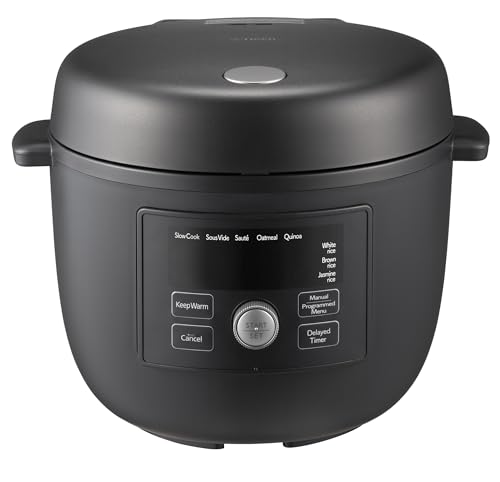
Adapting a family pot roast from a Crock-Pot to an enameled Dutch oven requires attention to temperature, liquid ratios, and material behavior. Eager to get dinner on the table, one may pour in the usual amount of broth, set the oven to a guesswork temperature, and walk away. What often greets a cook an hour later is a scorched, blackened mess — carrots fused to the bottom and meat that made shoe leather look tender. In everyday cooking, most kitchen mistakes come from rushing. The extra 30 seconds to check your setup saves hours of cleanup or regret. Now, when tackling a slow cooker to Dutch oven conversion, the same precision used when testing a new bakeware surface applies: temperature, liquid ratios, and material behavior must all align. This guide walks you through the method that turns early failures into reliably gorgeous, deeply flavored meals.
Key Takeaways
- Temperature replacement: Low roughly equals 165–175°F (74–79°C), high translates to 200–210°F (93–99°C). In a standard oven, 200°F (95°C) for low and 300–325°F (150–165°C) for high are safe starting points with lid on, but always monitor.
- Liquid reduction is essential: Dutch ovens trap much less moisture than a slow cooker; start by cutting liquid by one‑third to one‑half and adjust as you go.
- Searing is non‑negotiable: Building fond on the stovetop before braising replicates the caramelization a slow cooker struggles to deliver, resulting in richer sauce and deeper color.
How a Slow Cooker Differs from a Dutch Oven — and Why It Matters
To convert successfully, you need to understand what’s actually happening inside the two vessels. A slow cooker is essentially a sealed electric pot that cooks at a gentle, steady temperature, with very little evaporation. A Dutch oven — whether bare cast iron or enameled — becomes a tight‑fitting oven braiser that uses ambient radiant heat and some evaporation to concentrate flavors. The material’s heat capacity and the cooking environment shift the outcome dramatically.
Heat Source and Distribution
A slow cooker’s heating element wraps around the crock, so food warms from the sides and bottom simultaneously. The temperature climbs slowly and rarely exceeds boiling. In a Dutch oven set inside a conventional oven, the pot receives all‑around heat, with the bottom absorbing direct radiation. This means the cooking liquid can simmer more vigorously, causing faster liquid loss and quicker breakdown of collagen in meats. I’ve often noticed that a 3‑pound chuck roast that falls apart after 8 hours on low needs only about 2½ to 3 hours at 300°F (150°C) in a Dutch oven to reach the same tenderness — a testament to the more aggressive heat delivery.
Moisture Retention and Evaporation
Slow cookers are famous for barely releasing steam; condensation drips back from the lid, keeping everything in a wet, gentle environment. A Dutch oven lid fits tightly, but some water vapor escapes around the rim. That’s actually a positive: evaporation concentrates flavor and allows the surface of your stew or roast to develop a bit of crust. However, it also means the pot can dry out if you use the same volume of liquid. In my early days of converting slow cooker recipes, I once added 4 cups of broth to a 5‑quart Dutch oven for a short rib braise, assuming the lid would trap it. The result was a watery, insipid sauce. Now I know to start with half as much liquid and check after 45 minutes.
The Essential Guide to Slow Cooker to Dutch Oven Conversion
This is my go‑to sequence, built from years of tweaking recipes and chasing even browning. Each step accounts for the different physics at play.
Step 1: Evaluate the Recipe’s Liquid Ratio
Read through your slow cooker recipe and note the total amount of liquid: broth, wine, canned tomatoes, or any water released by vegetables. As a rule of thumb, cut that volume by 40–50% when moving to a Dutch oven. If the original calls for 4 cups of liquid for a 6‑quart slow cooker, try using only 2 to 2½ cups. Exceptions: recipes where the liquid is the dish itself, like soups or brothy beans, may need only a 25% reduction. You can always add a splash of stock later, but removing liquid is messy. I keep a measuring cup of warm stock on the side just in case.
Step 2: Adjust Cooking Temperature and Time
Converting slow cooker settings to oven temperatures requires understanding target internal food temperatures. Most slow cookers cook between 170°F (77°C) on low and 200°F (93°C) on high. An oven cannot hold such a tight window, so we use slightly higher temperatures with shorter cooking durations. My starting chart:
- “Low” slow cooker setting → 200–225°F (95–110°C) oven for 2.5 to 4 hours
- “High” slow cooker setting → 300–325°F (150–165°C) oven for 1.5 to 3 hours
- 4 hours on high equivalents in a slow cooker → 1.5 to 2 hours at 300°F (150°C)
- 8 hours on low → 3.5 to 4 hours at 225°F (110°C)
These are starting points. The thickness and bone content of your meat matter. A whole bone‑in pork shoulder might need the full 4 hours at 225°F, while a boneless chicken thigh stew could be done in 1.5 hours at 300°F. I always probe for tenderness, not just time. For most braised meats, 185–195°F (85–91°C) internal temperature signals collagen has converted to gelatin — that’s your doneness target.
Step 3: Incorporate Searing and Browning
One of the biggest flavor differences between slow cookers and Dutch ovens lies in the Maillard reaction. A Dutch oven can go straight from stovetop to oven, allowing you to brown meat, sauté aromatics, and deglaze in the same pot before braising. Never skip this step when converting a slow cooker recipe that originally lacked a searing instruction. Heat a thin film of oil until shimmering, then sear beef, lamb, or poultry until a deep brown crust forms on all sides — about 3–4 minutes per side. Remove the meat, toss in onions, garlic, and tomato paste, and cook until fragrant. Deglaze with a little wine or broth, scraping up every browned bit. That fond is the foundation of a restaurant‑quality sauce. If you’re converting a recipe like pot roast onion soup mix oven, the searing step amplifies the umami notes from the dried onion and bouillon.
Step 4: Check and Adjust During Cooking
Unlike a slow cooker you can set and forget, a Dutch oven braise benefits from occasional peeks. After the first 45 minutes, lift the lid and look for gentle bubbling — not a rolling boil. If the liquid has reduced too quickly, add a few tablespoons of water or stock. Rotate the pot halfway through if your oven has hot spots. I use an instant‑read thermometer to check liquid temperature: it should hold between 190°F and 205°F (88–96°C) for optimal collagen breakdown without toughening muscle fibers. Stirring a stew once or twice helps even out the heat, but be gentle so you don’t shred delicate vegetables.
Step 5: Finish with Care
When the meat is fork‑tender, you have options to polish the dish. Transfer the solids to a platter and tent with foil. If the sauce is thin, simmer it on the stovetop over medium‑high heat for 5–10 minutes to reduce. Skim off excess fat with a spoon. For an extra silky texture, finish with a pat of cold butter — a trick I borrow from pastry kitchens where gloss and richness matter. If you’re converting a bread‑based slow cooker recipe (like some monkey breads), the Dutch oven’s oven‑spring potential is unmatched. For artisan loaves, I always preheat the pot thoroughly, a topic I explore in detail when discussing preheating an enamel Dutch oven for bread.
Science‑Backed Adjustments for Different Recipe Types
Not every slow cooker recipe behaves the same inside a cast‑iron vessel. I classify dishes by their primary ingredient to fine‑tune the conversion.
Braised Meats and Stews
Beef, lamb, and pork that rely on collagen breakdown thrive in the Dutch oven’s higher heat. Cut liquid by half, and sear the meat thoroughly beforehand. A 3‑pound chuck roast that simmers for 8 hours on low can be ready in 3 hours at 275°F (135°C), with far more developed crust. Bone‑in cuts like short ribs release gelatin, so you can reduce the initial liquid even further. I often add a tablespoon of tomato paste during the searing of aromatics to boost body and color.
Vegetable‑Forward Dishes
Root vegetables, greens, and tomato‑based ragùs require a lighter touch. Supermarket carrots and potatoes cooked at 300°F for 2 hours turn to mush. Keep the oven at 225°F (110°C) and check for doneness with a skewer after 45 minutes. Because vegetables release their own water, reduce the added liquid by just one‑third. For leafy greens like collards, I’ll cook them first on the stovetop to wilt, then transfer to the oven with a tight‑fitting lid, using very little stock.
Grains, Beans, and Legumes
Rice, polenta, and dried beans behave very differently in a Dutch oven. The enclosed heat can cause starches to scorch if the layer is thin. Stir polenta every 10 minutes to prevent sticking. For dried beans, skip the slow cooker’s typical water‑logging; use exactly enough water to cover by 1 inch and bake at 250°F (120°C) for 1.5 to 2 hours. No need to presoak, but add salt only in the last 30 minutes, as salt can toughen skins under intense heat. If you’re attempting a no‑knead bread that starts as a wet dough, the Dutch oven’s steam‑trapping ability outperforms any slow cooker. The exact protocol for getting a crackling crust is set out in this guide to how to bake artisan sourdough in a Dutch oven.
Elevating Flavor Through Oven‑Specific Techniques
The Dutch oven rewards a few extra steps that aren’t possible in a slow cooker’s closed environment. Deglazing with wine, brandy, or even a splash of soy sauce after searing adds layers of complexity. Herbs behave differently, too: woody stems like rosemary and thyme can be added early and will slowly infuse, while delicate leaves like basil should be stirred in at the end to preserve their brightness. I also like to uncover the pot for the last 20 minutes of cooking to encourage a slight reduction and a more concentrated sauce — something I could never do with a slow cooker without losing heat.
Browning vegetables before they hit the liquid transforms their natural sugars. Caramelizing onions for a French onion braise or cooking tomato paste until it turns a shade darker intensifies the overall sweet‑savory balance. These are small moves that push a dish from serviceable to memorable.
Dutch Oven Tips Beyond Stews: Baking and Bread
While many folks associate Dutch ovens with soups and roasts, I’m convinced their greatest strength is bread baking. The heavy lid traps steam from the dough, delaying crust formation and allowing maximum oven spring—the same principle that makes a professional bread oven work. Converting a slow cooker bread recipe to a Dutch oven is straightforward: you’ll get a far superior loaf. Just preheat the pot at 450°F (230°C) for 30 minutes, carefully lower your shaped dough onto parchment, and bake covered for 25 minutes, then uncovered until deeply golden. The even heat of cast iron ensures a uniform crumb. This technique is all detailed in the full breakdown of preheating an enamel Dutch oven for bread and the step‑by‑step guide to dutch oven for sourdough.
Frequently Asked Questions
How do I convert a slow cooker recipe that calls for 8 hours on low to a Dutch oven?
Set your oven to 225°F (110°C) and plan for 3.5 to 4 hours of covered cooking. Begin by searing any meat on the stovetop using the same Dutch oven, reduce the liquid by about 40%, and check for tenderness after 3 hours. Because ovens can vary, poke the meat with a fork; it should meet no resistance. For bone‑in cuts, you might need the full 4 hours. This conversion preserves the gentle breakdown while cutting cooking time in half compared to the slow cooker.
Why does my Dutch oven food taste different from the same slow cooker recipe?
The flavor difference comes from several factors. Dutch ovens allow more evaporation, which concentrates flavor, and the ability to sear directly in the pot creates a rich fond that a slow cooker can’t produce. Additionally, the higher cooking temperature enhances the Maillard reaction during the braise, giving meats a deeper, more complex taste. If the dish seems too robust, try lowering the oven temperature to 200°F (95°C) and using a little more liquid to mimic the slow cooker’s gentler environment.
Can I convert a slow cooker dessert recipe to a Dutch oven?
Yes, but precision matters. Custards and puddings can curdle at the Dutch oven’s higher heat, so use a water bath and keep the oven temperature no higher than 300°F (150°C). For cobblers and fruit crisps, the Dutch oven’s ability to brown the top is a big advantage over slow cookers; just reduce the recipe’s liquid by one‑quarter to avoid a soggy outcome. Sticky toffee pudding and spoon breads also adapt beautifully when baked covered for the first half of cook time, then uncovered to set.