You have just finished braising short ribs for four hours. The kitchen smells incredible, the meat is fork‑tender, and now a 14‑pound enameled Dutch oven is sitting on your stovetop, still radiating heat. The last thing you want to do is mess up a third container just to transfer leftovers. It is a familiar spot to stand in, and the temptation to take the shortcut is strongest right there. Most kitchen mistakes come from rushing. The extra 30 seconds to check your setup saves hours of cleanup or regret. So the question that hits you right then is: can you stick a Dutch oven directly in the refrigerator? The short answer is usually no—at least not without a careful cooldown and a few critical steps—but the long answer is where we separate the home cook from the gear‑wrecking mistakes.
Key Takeaways
- Placing a hot Dutch oven directly into a cold refrigerator risks thermal shock, which can crack enamel, warp bare cast iron, and stress the metal permanently.
- Enameled cast iron is especially vulnerable to crazing and chipping from rapid temperature swings—cool your pot gradually to room temperature first.
- Condensation inside a chilled pot degrades seasoning on raw cast iron, encourages rust, and can thin out sauces or stews as moisture pools on the food surface.
- For food safety, transfer leftovers to shallow, BPA‑free containers when possible, but if you must store in the pot, follow a two‑stage cooling protocol that respects both the cookware and the ingredients.
In this guide
- Understanding Thermal Shock: The Silent Cookware Killer
- Material Matters: How Each Dutch Oven Composition Behaves in the Cold
- Step‑by‑Step: How to Safely Put a Dutch Oven in the Refrigerator
- Condensation, Rust, and the Battle Against Moisture
- Food Safety: Why Cooling Speed Matters More Than the Pot
- When You Might Skip the Fridge and Use Alternative Storage
- Maintaining Your Dutch Oven After Refrigerated Storage
- The Verdict: Can You Put a Dutch Oven in the Fridge Safely?
- Frequently Asked Questions
Understanding Thermal Shock: The Silent Cookware Killer
Thermal shock is not some esoteric concept reserved for materials scientists—it is the very real, rapid expansion or contraction of metal when exposed to a sudden temperature change. Cast iron, whether bare or enameled, has a relatively high thermal mass and a modest coefficient of expansion. That sounds dry, but here is what it means in your kitchen: the iron expands as it heats, then contracts as it cools. Do that gradually, and the metal holds up beautifully for decades. Slam a 350°F pot into a 37°F refrigerator, and the outer surface contracts violently while the inner core is still warm. The differential stress can exceed the material’s tensile strength, especially in the brittle enamel layer.
Hairline fractures can spider‑web across the bottom of a once‑perfect Le Creuset because someone wanted to save a few minutes after a long braise. The repair was impossible, and the pot became a slow‑leaking liability. In bare cast iron, sudden cooling rarely causes outright shattering, but it can warp a skillet base just enough that a flat glass‑top stove turns it into a spinner. Even aluminum pans, which handle moderate temperature shifts better, have limits—just as we explain in our guide on oven safety for aluminum. The principle holds across all cookware: slow and steady wins the longevity race.
How Cold Is Too Cold? The Danger Zone for Cast Iron
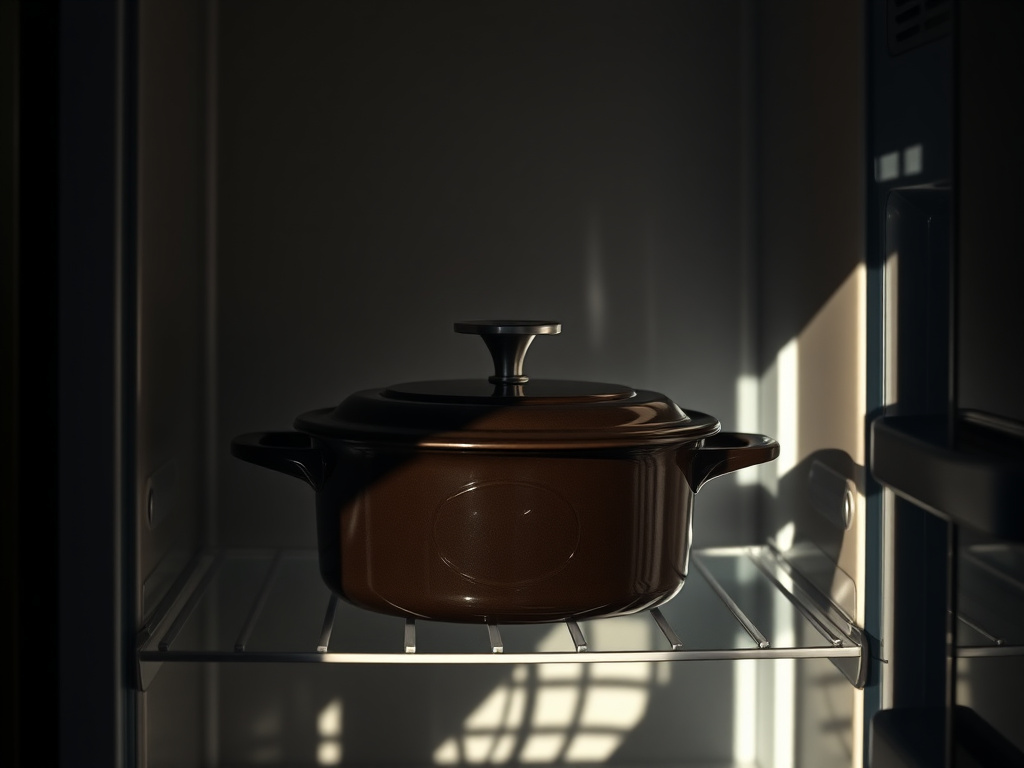
The average home refrigerator runs between 34°F and 39°F (1°C–4°C). Contrast that with a Dutch oven that has just come off a 325°F oven. The temperature delta can be close to 300°F. A general rule I follow in my own kitchen: never subject seasoned cast iron or enameled surfaces to a temperature gradient wider than 200°F in under five minutes. If your pot is still too hot to comfortably press your palm against for five seconds—above roughly 140°F—do not even think about cracking open the fridge door.
Material Matters: How Each Dutch Oven Composition Behaves in the Cold
Not all Dutch ovens are created equal, and the way your pot responds to refrigeration depends entirely on its material. Knowing what you have in your hands is step one.
Enameled Cast Iron: Beautiful but Brittle
The enamel coatings on modern Dutch ovens are essentially glass fused to iron at high temperatures. Glass and iron expand and contract at different rates. When a blistering‑hot enameled pot hits the cold shelving of a refrigerator, the glass layer wants to shrink faster than the iron core. The result is a network of microscopic cracks called crazing. You might see it as a faint, web‑like pattern on the interior surface after a few aggressive chill sessions. Crazing by itself does not mean the pot is ruined immediately, but it traps food particles, weakens the enamel, and becomes a nucleation point for chipping. Once enamel chips into your food, the pot is finished.
The other enemy is moisture. Even when you wait until the pot is cool to the touch, the refrigerator’s dry circulating air condenses on the cold enamel surface. That thin film of water seems harmless, but if you stack anything on top of the lid, or if the rim remains damp for days, you can get rust on the exposed cast iron edge—a common weak point where enamel coverage is thinnest.
Bare Cast Iron: Seasoning Under Siege
Bare cast iron Dutch ovens rely on polymerization—a layer of baked‑on oil that seals the porous iron from air and water. Refrigeration attacks that seasoning in two ways. First, cold air inside the pot causes condensation that beads up on the food surface, and as the pot itself cools further, the polymerized layer can stiffen and develop micro‑fractures if the pot was originally hot‑filled. Second, acidic foods like tomato‑based stews or wine‑braised dishes, if left in the fridge inside bare iron for more than a day, slowly eat into the seasoning. You will taste metallic notes and see patches of dull grey, stripped metal by the time you reheat.
If you absolutely must refrigerate in a bare cast iron vessel, transfer the food into the pot only after it has cooled externally, and never let acidic leftovers sit longer than 24 hours. I often remind cooks that nonstick cookware also has strict temperature limits—each material comes with its own rulebook, and ignoring it shortens the tool’s life.
Stainless‑Clad Dutch Ovens: The Exception
If you own a tri‑ply stainless steel Dutch oven (like some All‑Clad or Made In models), your fridge‑to‑oven‑to‑fridge flexibility is much higher. Stainless steel does not have a brittle enamel jacket and is far less susceptible to thermal shock cracking. The metal expands and contracts uniformly. However, condensation is still an issue for food quality, and a heavy stainless pot can still warp a fridge shelf if placed hot enough. Use the same gradual cooling approach, but rest easier knowing the metal itself will likely survive.
Step‑by‑Step: How to Safely Put a Dutch Oven in the Refrigerator
Sometimes transferring food into separate containers just is not practical—the pot is your serving vessel for the next day, or the braise is so large that it barely fits in the Dutch oven itself. When you need to refrigerate in the pot, follow this sequence I developed while running a tight prep kitchen where every square inch of cooler space mattered.
Step 1: Remove the Lid Immediately After Cooking
Once you turn off the heat, take the lid off and set it aside on a heat‑safe surface. Trapping steam inside the pot slows the cooling process dramatically and keeps the food in the bacterial danger zone (40°F–140°F) for too long. A covered pot of stew can take over four hours to drop below 70°F, while leaving the lid off can cut that time nearly in half. Place the lid diagonally, so some air circulation continues even after the initial heat dissipates.
Step 2: Portion Hot Food into Smaller Amounts (Optional but Critical for Safety)
If the pot holds more than two quarts of liquid, use a ladle to transfer some of the broth or solids into a wide, shallow pan to cool separately. The goal is to bring the core temperature of the remaining food down to 70°F within two hours, then below 41°F within an additional four hours—the standard USDA two‑stage cooling guideline. A full Dutch oven retains heat like a cinder block. Giving it less thermal mass to hold speeds the entire process.
Step 3: Cool the Exterior with a Gentle Water Bath
Plug your sink and fill it with room‑temperature water, not cold. Place the Dutch oven into this bath so the water comes no higher than two‑thirds up the outside wall. Stir the contents inside the pot every 10 minutes with a wooden spatula. The water absorbs ambient heat, and stirring prevents the outer edges from cooling while the center stays lava‑hot. This is the same technique restaurants use in blast chillers, just dialed back. Replace the water once if it becomes warm to the touch.
Step 4: Wait Until the Pot Reaches Room Temperature
You are looking for the pot’s exterior to feel neutral—neither warm nor cool—to the back of your hand. An infrared thermometer reading of around 75°F (24°C) on the outside means the thermal gradient is mild enough for refrigeration. If you lift the lid and there is no visible steam and the food surface does not ripple with heat, you are likely ready.
Step 5: Cover and Transfer with Protection
Place the lid back on, but leave it slightly ajar by the thickness of a wooden chopstick or a folded paper towel—this prevents a vacuum seal from forming as the pot cools further. Set the Dutch oven on a shelf that has no items directly above it, and place a thin cotton kitchen towel or a silicone trivet underneath the pot. The towel serves two functions: it insulates the pot from the cold glass shelf enough to soften the remaining thermal drop, and it catches any rogue condensation that might drip down the outside.
Step 6: Check After 4 Hours and Fully Seal
After four hours in the fridge, the pot and food should be uniformly chilled to 40°F or below. Now you can press the lid fully closed if you wish, as the risk of pressure differential is gone. Keep the towel beneath the pot for the entire storage duration to prevent rust rings on your shelf.
Condensation, Rust, and the Battle Against Moisture
Even if you avoid thermal shock, the enemy inside your refrigerator is water. Refrigerators are designed to circulate cold, dry air, but every time you open the door, humid room air rushes in. That humidity condenses on the coldest surfaces—and your metal Dutch oven is one of them.
In a bare cast iron pot, condensation that drips down onto the cooking surface and sits overnight will begin to dissolve the seasoned layer. You will see small rust spots by morning, especially around the rim and along the bottom where water pools. I have salvaged many cast iron pans from friends who left them wet in the fridge; the fix requires scrubbing down to bare metal and re‑seasoning from scratch.
For enameled pots, moisture is less a rust threat to the interior, but the exterior base may have exposed iron along the edge. Left wet, that rim rusts, and the rust can travel under the enamel and lift it over months. Dry the exterior thoroughly before refrigerating, and consider coating the rim with a whisper‑thin film of flavor‑neutral oil (like refined avocado oil) if you are storing the pot for more than a day.
Food Safety: Why Cooling Speed Matters More Than the Pot
While you have been worrying about your Dutch oven, there is a more hazardous variable at play: the food inside it. Pathogens like Clostridium perfringens and Bacillus cereus thrive in cooked meats and grains that linger in the 70°F–120°F range. A full Dutch oven placed directly in the fridge—even if the pot survives—will hold the interior of the food at dangerous temperatures for far too long. The outer layer chills quickly and creates an insulating shell around a warm core. That is a textbook condition for foodborne illness.
The USDA two‑stage cooling rule mandates that cooked food must drop from 135°F to 70°F within 2 hours, then from 70°F to 41°F or below within an additional 4 hours. Meeting that with a thick‑walled cast iron vessel is extremely difficult unless you actively cool the food. This is why I strongly recommend transferring leftovers to shallow containers—it is not a slight against your cookware, it is a food safety imperative. If you do choose to store directly in the pot, use the water bath method and stir frequently, and always check the center temperature with a probe before calling it safe.
When You Might Skip the Fridge and Use Alternative Storage
There are times when trying to refrigerate an entire Dutch oven is more trouble than it is worth. If the pot contains a dish with a heavy cream or dairy base, the prolonged cooling time can cause the sauce to split even after reheating. Similarly, if your fridge is already tightly packed, a large pot blocks airflow and stresses the compressor, which can shorten the appliance’s life.
Consider these alternatives:
- Shallow aluminum or glass containers with airtight lids: Cool food fast, stack neatly, and are microwave‑safe. The thermal properties of aluminum in microwaves are often misunderstood—it is safe for storage, just not reheating in that form.
- Silicone food storage bags: Great for soups and stews; they lay flat and defrost quickly.
- Immediate portioning: Serve dinner directly from the Dutch oven and pack the remaining leftovers for the fridge day‑of. This puts the food into a safer cooling trajectory without you needing to babysit the pot.
Maintaining Your Dutch Oven After Refrigerated Storage
Assuming you have followed the cooling protocol and now pull the pot out of the fridge the next day, there is still work to do before it goes back onto the stove. Never place a cold Dutch oven directly onto a high flame or into a preheated oven. That is thermal shock in reverse. Let the pot sit at room temperature for 20 to 30 minutes to take the chill off the metal. During that time, inspect the rim and interior for any rust spots or moisture droplets. Wipe dry with a paper towel, then proceed with gentle reheating on a low burner, gradually increasing the heat. This preserves both the cookware and the texture of your food.
For bare cast iron, I re‑oil the interior immediately after washing and drying post‑storage, even if the seasoning looks intact. A thin coat of high‑smoke‑point oil, buffed until the surface appears matte, is all it takes. For enameled interiors, a quick scrub with baking soda and a non‑abrasive sponge removes any fridge odors that may have clung to the surface. Do not use steel wool on enamel—ever.
The Verdict: Can You Put a Dutch Oven in the Fridge Safely?
You can, but it demands patience and a methodical approach. The risks of cracking enamel, warping the base, stripping seasoning, and creating food safety hazards are real. The safer, easier path—the one I have followed in professional kitchens for years—is to transfer food out of the pot, cool it rapidly, and store it in purpose‑built containers. Your Dutch oven is a precision tool for cooking, not a substitute for Tupperware. Treat it as such, and it will outlast you. Cut corners on cooldown, and you will be shopping for a new pot sooner than you think.
Frequently Asked Questions
Can you put a Dutch oven in the refrigerator if it is only slightly warm?
Even a warm‑to‑the‑touch pot—say around 100°F—still carries a thermal gradient that can cause micro‑crazing in enamel and condensation issues inside the fridge. Wait until the exterior feels neutral to the touch, below 80°F, before refrigerating. A few extra minutes on the counter will not spoil the food, but it will protect the cookware.
What happens if you put a hot enameled Dutch oven directly in the fridge?
Two things happen simultaneously. The enamel coating may fracture from rapid contraction, resulting in a spiderweb of cracks called crazing, and the fridge’s compressor struggles to pull heat out of the massive iron block. The pot’s outer edge cools while the core stays hot, leaving food in the pathogen growth zone for hours.
Is it better to refrigerate the lid separately from the Dutch oven?
Yes. Removing the lid accelerates cooling and prevents steam condensation from dripping back into the food. Once the pot and lid are both fully chilled, you can place the lid slightly ajar to avoid a vacuum seal. Storing the lid separately also prevents trapped moisture at the rim, which often leads to rust.
Does refrigerating a Dutch oven affect the seasoning on cast iron?
Absolutely. Condensation inside a chilled bare cast iron pot can soften or lift the polymerized oil layer, especially if the pot was originally filled while hot. Acidic leftovers amplify the damage. If you must store in bare cast iron, ensure the pot is completely cool, limit storage to 24 hours, and re‑oil the surface after washing.