

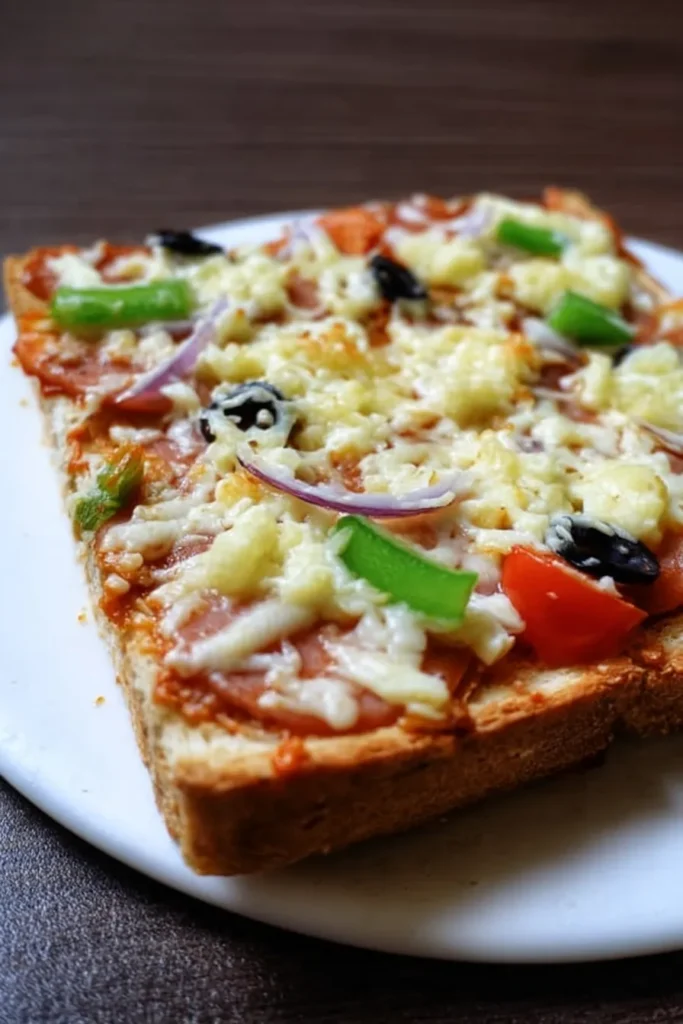
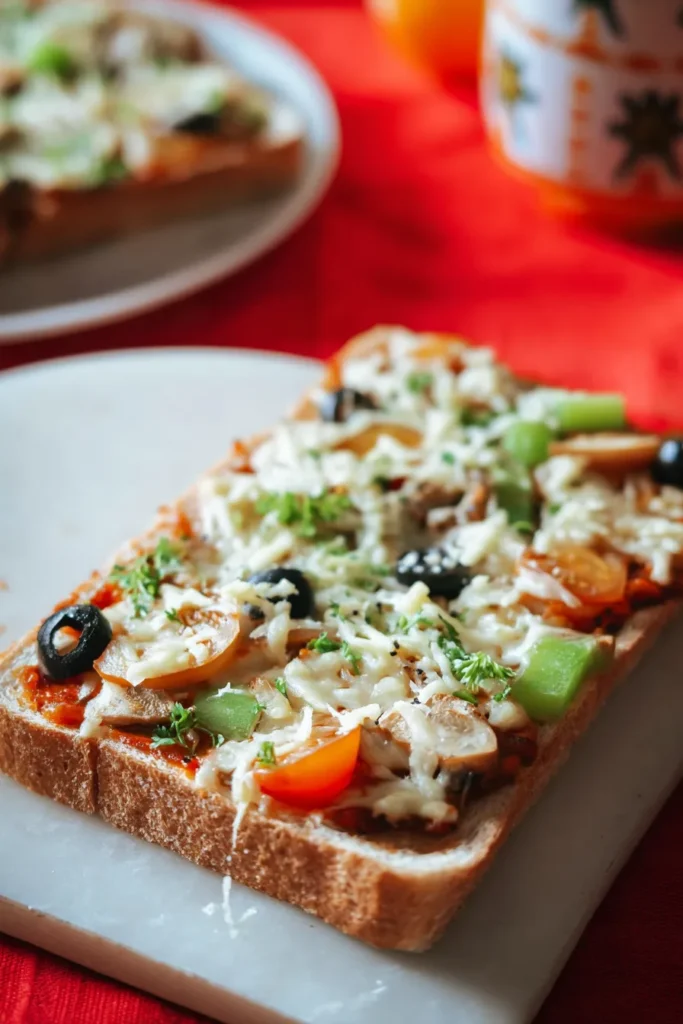
A crispy, cheesy delight straight from my kitchen to yours.
When Pizza Cravings Hit Hard
You know that feeling. It’s 6 PM. You’re hungry. The last thing you want to do is wait 45 minutes for delivery or spend an hour making dough from scratch.
That’s exactly when this recipe saves the day.
This bread pizza recipe is one of those dishes I keep coming back to again and again. It’s quick, satisfying, and honestly? It tastes way better than you’d expect from something this simple. No yeast. No kneading. No waiting.
Just crispy bread, gooey melted cheese, and all your favorite toppings.
I first started making this on busy weeknights when I had almost nothing in the fridge. A few bread slices, some leftover vegetables, a jar of pizza sauce. I threw it all together out of desperation. It became one of my most-requested recipes. My family actually prefers it over regular pizza some nights.
The secret? Using bread as your crust is not a shortcut. It’s a strategy. When toasted right, it gives you that satisfying crunch in every bite. It mimics a thin crust beautifully. And the best part is that every single slice can be customized. One person wants olives? Done. Someone else wants plain cheese? Easy. No arguments at the dinner table.
Before we get into the steps, let’s look at our timing and what we’ll need. Getting organized before you cook makes the whole experience much more enjoyable.
| Detail | Info |
|---|---|
| Prep Time | 10 minutes |
| Cook Time | 15 minutes |
| Total Time | 25 minutes |
| Servings | 4 |
| Difficulty | Easy |
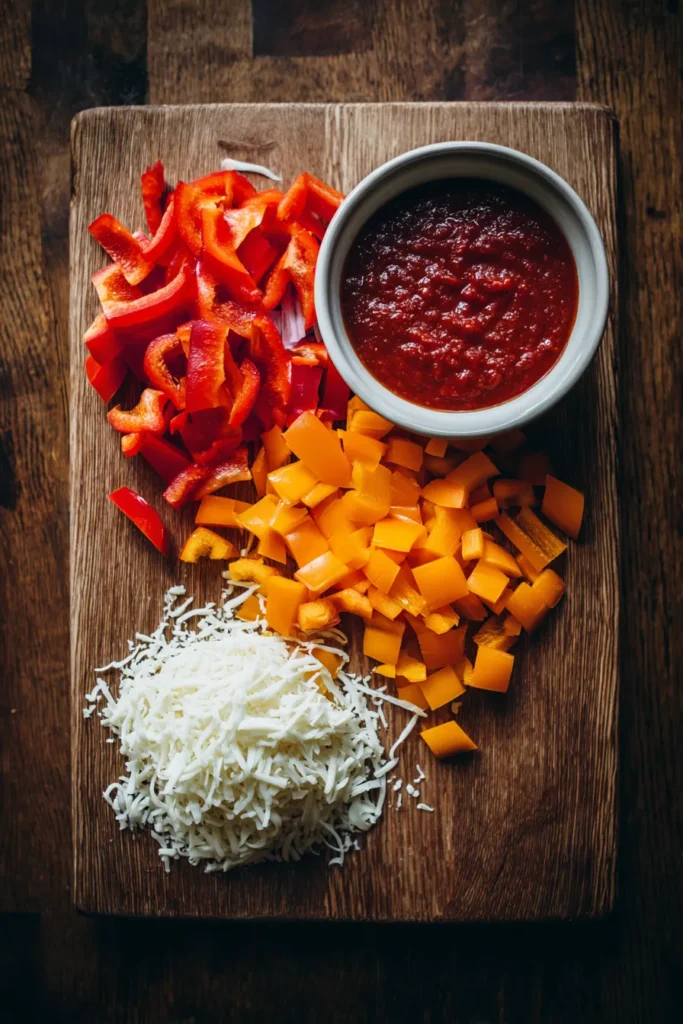
Your Ingredient Checklist
Gather everything before you start. It makes the process incredibly smooth. Nothing is worse than realizing mid-cook that you forgot something.
Here’s exactly what you’ll need:
| Ingredient | Quantity | Notes |
|---|---|---|
| Bread Slices | 6 large slices | Whole wheat, white, multi-grain, or brown bread all work beautifully |
| Olive Oil or Butter | As required | Used for toasting the base to golden perfection |
| Pizza Sauce | As needed | Store-bought or homemade both yield excellent results |
| Onion | 1 medium-sized | Cut into small, even cubes for quick cooking |
| Capsicum | 1 medium-sized | Cut into small cubes. Green, red, or yellow are all fine |
| Tomato (Optional) | 1 medium-sized | Cut into small cubes. Deseed them if possible |
| Olives (Optional) | 5 to 6 pieces | Sliced thinly. Black or green olives both taste great |
| Dried Oregano | As required | Adds that classic, authentic pizzeria aroma |
| Dried Basil | As required | Brings a sweet, earthy herbal note to the sauce |
| Crushed Black Pepper | As required (Optional) | Provides a subtle, warming background heat |
| Mozzarella or Pizza Cheese | 1 to 1.25 cups | Grated freshly for the best melting texture |
| Red Chilli Flakes | As required (Optional) | Perfect for those who enjoy a little spicy kick |
You probably have most of this already sitting in your fridge or pantry. A quick check is all it takes.
Let’s Make It: Step-by-Step
Now here’s where it gets fun.
Making bread pizza is simple, but there are a few small techniques that make a huge difference. Think of it like building a house. You need a solid foundation first. Rush the base, and everything falls apart.
The two biggest mistakes people make? Too much heat and too much sauce. High heat burns the bread before the cheese melts. Too much sauce makes the bottom soggy and sad. Follow these steps and you’ll avoid both problems completely.
Step 1: Prep Your Vegetables
Take your medium onion and dice it into small, even cubes. Do the same with your capsicum. Small pieces matter here. They cook slightly from the residual heat of the pan without turning mushy. Large chunks stay too raw and don’t blend well with the cheese.
Step 2: Handle the Optional Toppings
If you’re using fresh tomato, don’t skip the deseeding step. Those wet seeds carry a surprising amount of liquid. That moisture will soak right through your bread and ruin that crispy base you’re working hard to build. Scoop out the seeds, then cube the firm outer flesh into small pieces. Slice your olives thinly if you’re including them.
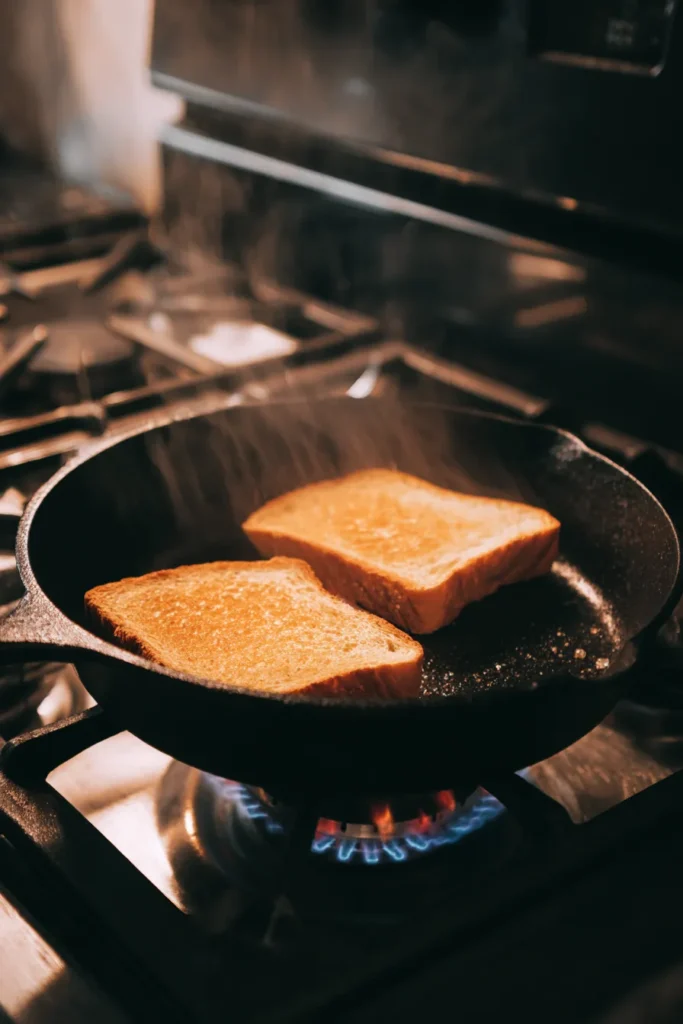
Step 3: Heat Your Pan the Right Way
Place a heavy frying pan or skillet on your stove. Turn the burner to the lowest possible heat setting. I cannot stress this enough. Low and slow is the rule here. A heavy pan distributes heat evenly across the surface. This prevents those annoying dark hot spots that burn one corner while the rest stays pale.
Step 4: Toast the First Side
Lightly coat the warm pan with olive oil or butter. You only need a very thin, even layer. Place one or two bread slices into the pan. Let them toast gently for about two minutes. You want the bottom to become firm and slightly golden. This initial toast is important because it acts as a moisture barrier. Once that bottom crust forms, sauce won’t seep through and make things soggy.
Step 5: Flip and Pause
Once the bottom feels crispy and golden, flip the bread over. The freshly toasted side should now be facing upward. Here’s a little trick I love: you can turn off the stove flame right at this point. It removes all the pressure of rushing through the assembly. You can take your time adding toppings without worrying about burning anything.
Step 6: Spread Your Sauce
Spoon your pizza sauce onto the crispy, upward-facing side. Use the back of your spoon to spread it gently. Don’t press down hard on the bread. Keep the sauce layer relatively thin. A thick layer of sauce is the enemy of crispiness.
Step 7: Add Your Vegetables
Scatter the small onion cubes across the saucy base. Follow with the chopped capsicum pieces. Try to distribute the vegetables evenly, all the way to the edges. Then add your optional tomato cubes and sliced olives.
Pro Tip: Don’t pile everything in the center. The center of the bread is the weakest structural point. Spread the weight evenly to prevent the slice from collapsing when you pick it up.
Step 8: Season Generously
Sprinkle a generous pinch of dried oregano over the vegetables. Add your dried basil right on top. If you enjoy a little warmth, crack some black pepper over everything. These herbs are what give bread pizza that authentic pizzeria smell. Your kitchen will start to smell incredible right about now.
Step 9: Cover with Cheese
Grab your grated mozzarella or pizza cheese blend. Drape it generously over the seasoned vegetable layer. Make sure the cheese covers the toppings well. Good cheese coverage means even melting and no dry, exposed patches of vegetables.
Step 10: The Covered Cook
If you turned off the stove earlier, turn it back on now. Keep the heat on the lowest setting. Place a tight-fitting lid over your heavy pan. This is the most important step of the whole process. The lid traps the rising heat inside. It creates a tiny oven environment right there on your stovetop. That trapped heat is what melts the cheese beautifully without burning the bread below.
Step 11: Watch and Wait
Let the bread pizza cook covered for a few minutes. If you have a glass lid, keep an eye on it. You’re looking for glossy, melted, slightly bubbling cheese. While that’s happening up top, the bottom of the bread is quietly toasting to a perfect golden crunch.
Step 12: Lift and Rest
Once the cheese has fully melted, remove the lid. Use a flat spatula to carefully lift the bread pizza out of the pan. Place it briefly on a wire cooling rack. This one small step prevents steam from condensing under the bread and making that bottom soggy. Just 30 seconds on the rack makes a real difference.
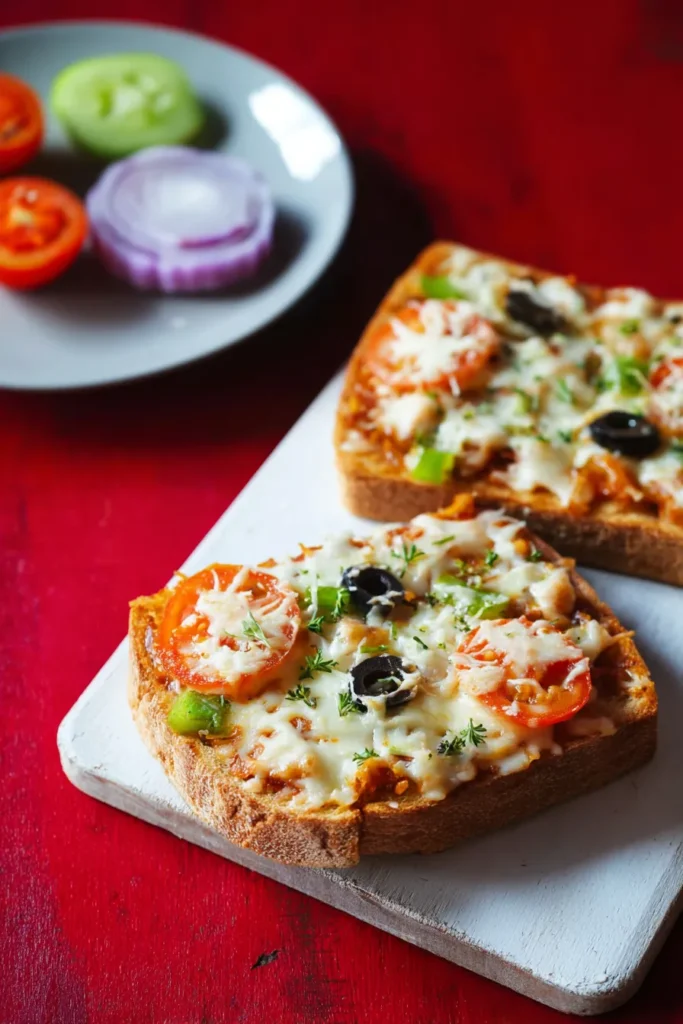
Step 13: Garnish and Serve
Transfer to a serving plate. Sprinkle red chilli flakes over the top if you like heat. Serve immediately while the cheese is still gloriously stretchy and hot. Repeat the entire process for the remaining bread slices.
Ways to Make It Your Own
I truly believe recipes are just starting points. Once you’ve made this a couple of times and feel comfortable, start playing around. This bread pizza practically begs for experimentation.
The bread you choose changes everything. Standard white bread gives you a nostalgic, soft-centered bite that feels almost like a childhood snack. Dense multi-grain bread adds a wonderful nutty flavor that pairs really well with sharp cheese. Sourdough slices bring a tangy contrast to the sweet tomato sauce that tastes genuinely gourmet. Whatever you choose, make sure the slices are reasonably thick. Thin sandwich bread struggles to hold up under the weight of cheese and toppings.
Your cooking fat matters too. Olive oil gives the crust a savory, Italian-style flavor. Butter creates a rich, diner-style crunch that’s deeply satisfying. I sometimes mix a small amount of minced garlic into softened butter before brushing it onto the bread. Garlic butter bread pizza is something else entirely. Try it once and you’ll never go back.
Frequently Asked Questions
Can I bake this bread pizza recipe in the oven?
Absolutely. Preheat your oven to 400°F (200°C). Assemble the bread pizzas on a parchment-lined baking tray. You do not need to pre-toast the bread for the oven method. Bake them for about 8 to 10 minutes. Watch closely until the cheese is golden and bubbling nicely.
How do I prevent my bread pizza from becoming soggy?
The pre-toasting step is your best defense. Toasting creates a firm crust that stops sauce from seeping deeply into the bread. Beyond that, use a thick, quality pizza sauce rather than watery tomato puree. And always remove the wet seeds from fresh tomatoes before adding them as a topping.
Can I substitute the mozzarella cheese with something else?
Yes, you can. Processed cheddar works well and offers a sharper, saltier flavor. A blend of cheddar and Monterey Jack is also fantastic. Just keep in mind that mozzarella gives you the best classic cheese pull. If that stretchy, melty texture is important to you, stick with mozzarella.
Why did the bottom of my bread burn before the cheese melted?
This almost always comes down to heat that’s too high. You must maintain the lowest possible flame throughout the entire cooking process. Using a thin, lightweight pan also causes rapid burning because the heat concentrates in small spots. Always use a heavy-bottomed skillet and make sure the pan is tightly covered so the trapped heat can do its job from above.
I hope this bread pizza recipe becomes a regular in your home the way it has in mine. It’s one of those rare recipes that’s fast enough for a Tuesday night but satisfying enough to serve to guests on a Saturday afternoon. Mix and match your herbs, try different breads, experiment with new toppings.
Most importantly, have fun with it. Happy cooking!

Crispy Bread Pizza
Ingredients
Method
- Dice onions and capsicum into small, even cubes. If using tomatoes, deseed and cube them. Slice olives thinly.
- Heat a heavy skillet on the lowest possible heat setting. Lightly coat with olive oil or butter.
- Place bread slices in the pan and toast for about 2 minutes until the bottom is golden and firm.
- Flip the bread. Optionally, turn off the flame to assemble.
- Spread a thin layer of pizza sauce on the toasted side. Do not press down.
- Evenly distribute onions, capsicum, tomatoes, and olives over the sauce.
- Sprinkle with oregano, basil, and black pepper. Cover generously with grated cheese.
- Turn the heat back to low, cover the pan with a lid, and cook until the cheese is melted and bubbling.
- Remove and place on a wire rack for 30 seconds to prevent sogginess. Garnish with chili flakes and serve.