

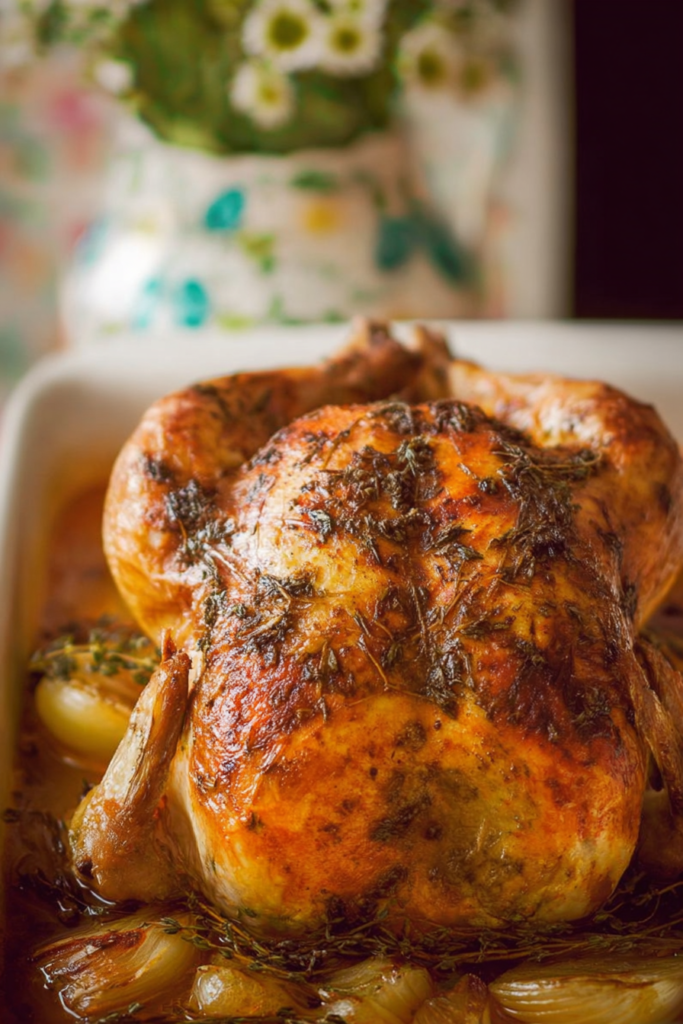
Welcome to my kitchen. Today, we are making something truly special. A whole roast chicken with crispy golden skin, juicy tender meat, and a garlic herb butter that will make your entire house smell incredible.
And the best part? It is so much easier than you think.
I know what you might be picturing. A fancy restaurant dish that takes all day and requires professional skills. But this recipe is the opposite of that. It is simple, straightforward, and absolutely packed with flavor. Once you try this method, you will want to make it every single week.
The Real Star of This Recipe
The secret is the garlic and fresh herb butter.
We rub it directly under the skin. We smear it all over the outside. We let the hot oven do the rest. That butter melts slowly into the breast meat, keeping it incredibly moist and tender throughout the cook. At the same time, the butter on top bubbles and crisps into the most beautiful golden crust you have ever seen.
Think of it like a warm blanket wrapped around the chicken. The butter protects the meat from drying out while slowly infusing every bite with rich, herby, garlicky flavor.
Under the bird, we place quartered onion and a halved garlic bulb. They lift the chicken off the pan so hot air can circulate underneath. They also release their flavor slowly into the pan drippings. Those drippings become the most incredible pan sauce you have ever tasted.
We also stuff the cavity with fresh lemon and rosemary. This perfumes the meat gently from the inside out. You get a subtle brightness in every bite that balances out all that rich butter beautifully.
Why This Method Works So Well
A lot of people feel nervous about roasting a whole chicken at home. They worry the breast meat will dry out. They worry the skin will turn out pale and rubbery. I was the same way the first time I tried it.
But this two-step roasting method completely takes care of both of those problems.
Here is how it works. We blast the chicken with very high heat at the start. That intense heat forces the fat in the skin to render fast. The exterior crisps up almost immediately. Then we lower the temperature for the rest of the cook. The inside finishes gently and evenly without burning the herbs or drying out the meat.
The result? Crispy outside. Juicy inside. Perfect every single time.
And while the chicken roasts away in the oven, you have plenty of time to throw together some side dishes. It is the kind of meal that looks incredibly impressive but requires very little hands-on effort from you.
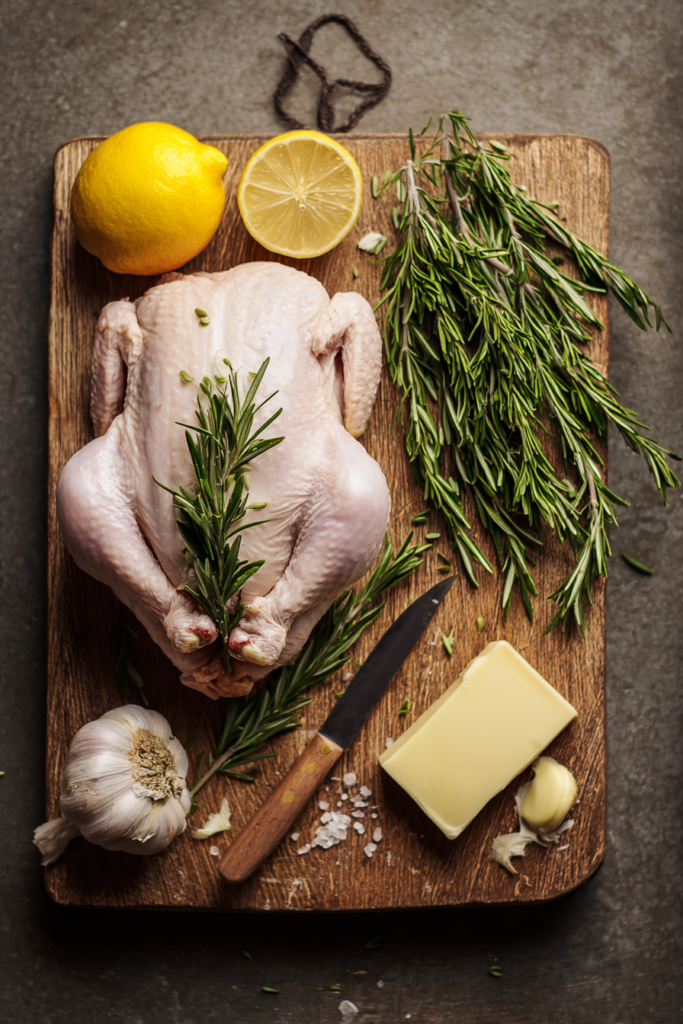
Ingredients
Recipe Timing:
| Detail | Info |
|---|---|
| Prep Time | 15 minutes |
| Cook Time | 1 hour 25 minutes |
| Total Time | 1 hour 40 minutes |
| Servings | 4 to 6 |
| Difficulty | Easy |
Full Ingredients List:
| Ingredient | Quantity | Notes |
|---|---|---|
| Whole chicken | 1.75 to 2 kg / 3.5 to 4 lb | Patted completely dry with paper towels |
| Salt and pepper | To taste | For general outside seasoning |
| Olive oil | 2 tsp | Helps the skin crisp up nicely |
| Lemon | 1 whole | Quartered into four equal wedges |
| Fresh rosemary | 3 sprigs | Left whole for stuffing the cavity |
| Unsalted butter | 100 g / 1 stick | Melted slightly or softened |
| Garlic | 3 cloves | Minced very finely |
| Fresh sage | 1 tbsp | Finely chopped |
| Fresh rosemary | 2 tsp | Finely chopped |
| Fresh parsley | 1 tbsp | Finely chopped |
| Salt | 1/2 tsp | Mixed into the herb butter |
| Black pepper | 1/2 tsp | Mixed into the herb butter |
| Low sodium chicken broth | 1 cup / 250 ml | Creates the delicious pan juice base |
| Onion | 1 whole | Quartered, outer skin left on |
| Garlic bulb | 1 whole | Halved horizontally, skin left on |
Step-by-Step Instructions
Step 1: The Crucial Preparation Phase
Take the chicken out of the fridge first. Let it sit on the counter for thirty full minutes before it goes anywhere near the oven. This brings the meat to room temperature so it cooks evenly all the way through. Cold meat going straight into a hot oven is one of the most common roast chicken mistakes out there.
While you wait, preheat your oven to 220°C / 450°F. Make sure your rack is positioned right in the middle.
Now pat the chicken completely dry with paper towels. Every single surface. This is not optional. Moisture on the skin creates steam in the oven, and steam gives you soft, flabby skin instead of that gorgeous crunch we are going for. Dry skin equals crispy skin. It is that simple.
Step 2: Crafting the Herb Butter
Grab a small mixing bowl. Add the softened butter, minced garlic, chopped sage, chopped rosemary, and chopped parsley. Add the salt and black pepper. Squeeze the juice from two lemon wedges directly into the bowl.
Stir it all together until you get a thick, fragrant, cohesive paste.
This herb butter is the real flavor engine of the entire dish. Every single savory, aromatic note you will taste in the final chicken comes from this little bowl right here. Take a second to smell it. It is incredible even before it hits the oven.
Step 3: The Under-the-Skin Technique
Place your dry chicken into a sturdy roasting pan. Take the back of a regular soup spoon and gently slide it under the breast skin. Work slowly and carefully so the skin does not tear. Just loosen it enough to create a pocket between the skin and the meat.
Now scoop most of your herb butter underneath. Use your fingers to push it evenly across both breasts.
Here is why this matters. The breast is the leanest, driest part of the chicken. By placing butter directly against it, you are giving it a rich, protective coating that keeps every bite moist and flavorful right through to the center.
Step 4: Flavoring the Outside and the Cavity
Smear the remaining herb butter all over the outside of the bird. Legs, wings, everywhere. Then squeeze the juice from the two remaining lemon wedges all over the top.
Take those squeezed lemon rinds and stuff them inside the cavity along with the whole rosemary sprigs. This little step gently perfumes the meat from the inside as it roasts. You will notice a subtle, bright freshness in every bite that you just cannot get any other way.
Tie the drumsticks together with kitchen twine and tuck the wing tips neatly under the body. Sprinkle a final layer of salt and pepper all over the top.
Step 5: Building the Roasting Foundation
Scatter the quartered onion and halved garlic bulb into the bottom of the roasting pan. Pour the chicken broth carefully around the vegetables. Important: do not pour it directly over the chicken. You do not want to wash away all that beautiful butter and seasoning you just applied.
Sit the prepared chicken on top of the vegetables. Drizzle the two teaspoons of olive oil right over the skin for an extra crispiness boost.

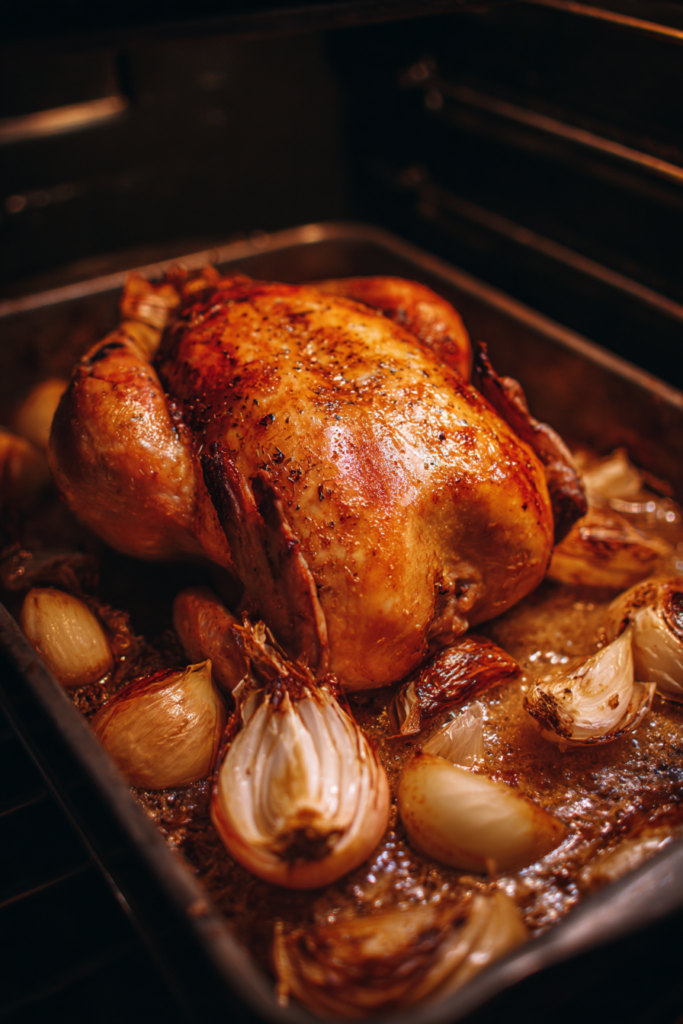
Step 6: The Two-Step Roasting Process
Slide the pan into your hot oven. Roast at 220°C / 450°F for exactly 10 minutes. That blast of heat is what gives you the deeply golden, crackling exterior.
Then, without opening the door more than necessary, turn the oven down to 180°C / 350°F. Continue roasting for another 1 hour and 15 minutes.
During this longer roasting period, baste the chicken twice. Just spoon the bubbling pan juices right over the skin. It takes about ten seconds and makes a big difference in color and flavor.
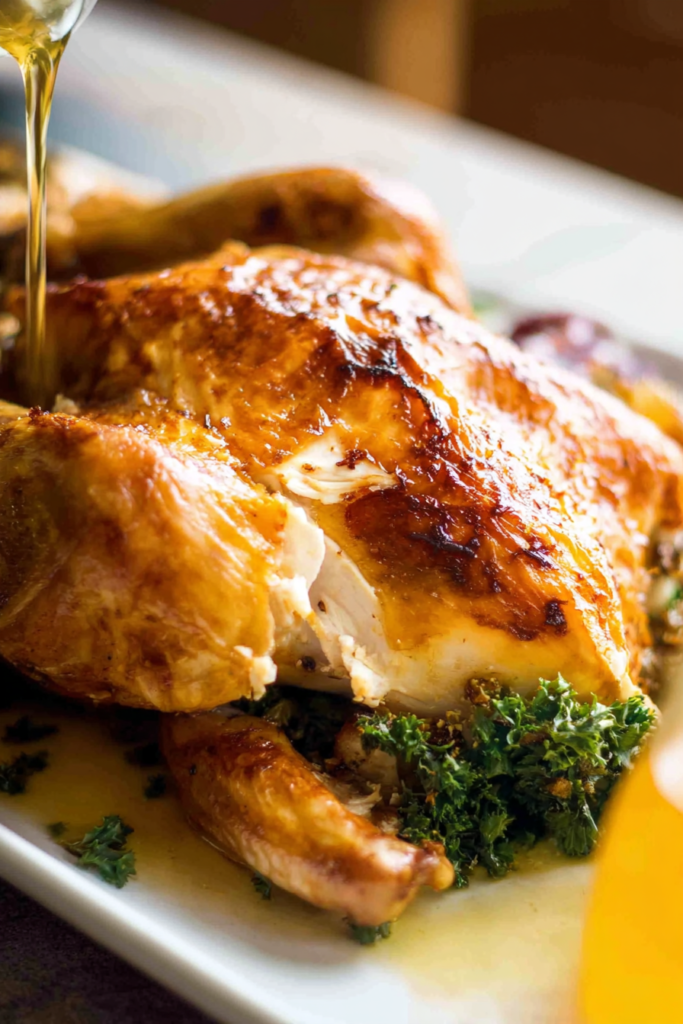
Step 7: The Essential Resting Period
The chicken is done when a meat thermometer inserted into the thickest part of the thigh reads 75°C / 165°F. The juices should run completely clear when you pierce the meat.
Remove the pan from the oven and leave the chicken completely uncovered for 15 minutes.
I know it is tempting to slice right into it. But please wait. Those fifteen minutes allow all the hot juices inside to redistribute back into the meat. Cut too early and those juices run straight out onto your cutting board. Wait patiently and every single slice stays beautifully juicy.
And whatever you do, do not cover it with foil. That steam will undo all the work you did getting that skin perfectly crispy.
Pro Tips for the Best Results
- Never skip the resting step. It is the single most important thing you can do after the oven.
- Do not peel the onion or garlic bulb. The skins protect them during the long cook so they do not dissolve into mush. Just discard them before serving.
- Use the pan drippings as your sauce. That combination of chicken broth, melted herb butter, and roasted juices is basically liquid gold. Spoon it generously over every slice. Want a thicker gravy? Whisk a little flour into the drippings before serving.
What to Serve Alongside
Keep the sides simple so the chicken stays the star. Here are a few that work beautifully:
- Creamy mashed potatoes to soak up every drop of that pan sauce
- Roasted potatoes tossed with olive oil and salt, cooked in the same oven
- Sauteed green beans with a little garlic and butter
- A simple garden salad with a bright vinaigrette to cut through the richness
- Crusty bread for swiping through the pan sauce at the end
Frequently Asked Questions
Can I use dried herbs instead of fresh ones?
Yes, absolutely. Just use one-third of the amount listed. Dried herbs are much more concentrated in flavor than fresh, so a little goes a long way.
How do I know the chicken is fully cooked?
Use an instant-read meat thermometer. Insert it into the thickest part of the thigh, avoiding the bone. It needs to read 75°C / 165°F. The juices should also run completely clear with no pink at all.
What do I do with the leftover bones?
Save the whole carcass and the roasted vegetable scraps from the pan. Toss them into a slow cooker with water and simmer for hours. You will get the most flavorful homemade chicken broth for soups and stews. Nothing goes to waste.
Can I make the herb butter ahead of time?
Yes, easily. Mix it up the day before and store it in a sealed container in the fridge. Just let it soften at room temperature before you start rubbing it on the chicken.
Why do we start with such high heat?
Starting at 220°C / 450°F forces the fat in the skin to render quickly. That is what creates the deep golden color and the crispy texture. Lowering the heat afterward lets the inside of the meat cook gently and evenly without drying out. You get the best of both worlds in a single roast.

Garlic Herb Roast Chicken
Ingredients
Method
- The Crucial Preparation Phase: Take the chicken out of the fridge for thirty minutes before roasting. Preheat your oven to 220°C / 450°F with the rack in the middle. Pat the chicken completely dry with paper towels on every single surface.
- Crafting the Herb Butter: In a small bowl, add the softened butter, minced garlic, chopped sage, chopped rosemary, chopped parsley, 1/2 tsp salt, and 1/2 tsp black pepper. Squeeze the juice from two lemon wedges directly into the bowl. Stir into a thick paste.
- The Under-the-Skin Technique: Place the dry chicken into a sturdy roasting pan. Use the back of a spoon to gently loosen the skin over the breasts. Scoop most of the herb butter underneath and push it evenly across both breasts.
- Flavoring the Outside and the Cavity: Smear the remaining herb butter over the outside of the chicken. Squeeze the remaining two lemon wedges over the top. Stuff the squeezed lemon rinds and whole rosemary sprigs inside the cavity. Tie the drumsticks together, tuck the wing tips, and sprinkle a final layer of salt and pepper over the top.
- Building the Roasting Foundation: Scatter the quartered onion and halved garlic bulb into the bottom of the pan. Pour the chicken broth carefully around the vegetables (not over the chicken). Sit the chicken on top of the vegetables and drizzle 2 tsp of olive oil over the skin.
- The Two-Step Roasting Process: Roast at 220°C / 450°F for exactly 10 minutes. Then, turn the oven down to 180°C / 350°F and continue roasting for 1 hour and 15 minutes. Baste the chicken twice during this period.
- The Essential Resting Period: The chicken is done when a meat thermometer inserted into the thickest part of the thigh reads 75°C / 165°F. Remove from the oven and leave completely uncovered for 15 minutes before carving.