

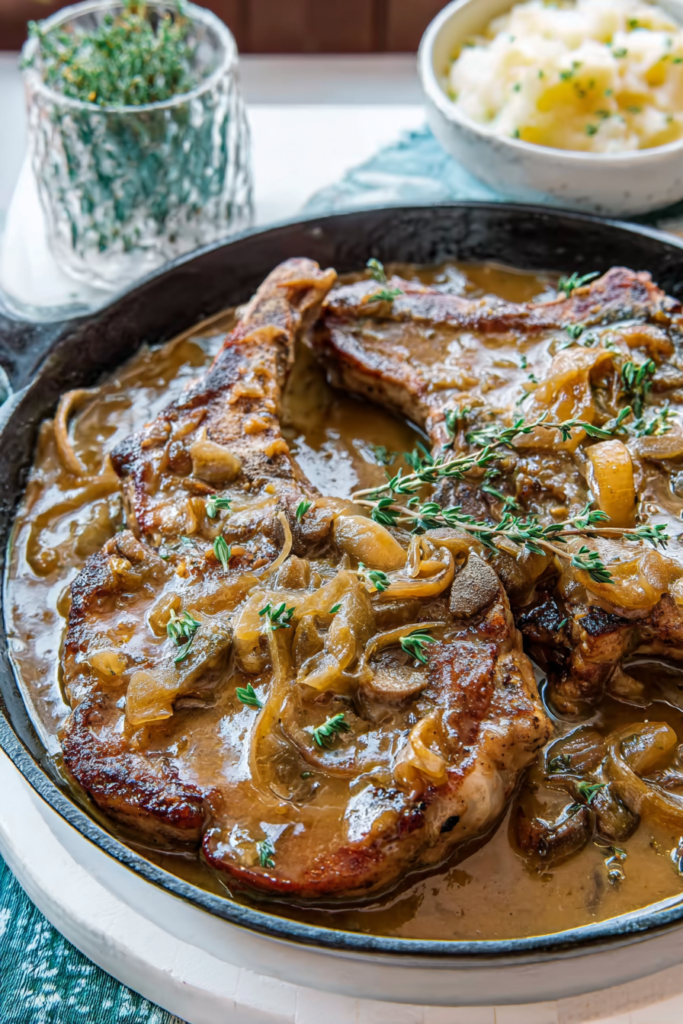
There are some meals that just feel like a hug.
This smothered pork chops recipe is exactly that. Rich, savory, deeply comforting, and shockingly simple to pull off on a weeknight. I first made this on a cold Friday evening when I had no energy for anything complicated. The smell of caramelized onions filling the house? Pure magic.
And the best part? Everything happens in one pan. Less mess. Less cleanup. More time at the table.
Prep Time: 10 minutes | Cook Time: 15 minutes | Total Time: 25 minutes | Servings: 4 | Difficulty: Easy
Why This Recipe Actually Works
Let’s be honest. Pork chops have a bad reputation for turning out dry and rubbery. We have all been there. You cut into what looked like a beautiful piece of meat and end up chewing for what feels like forever.
This recipe fixes that problem completely.
The secret is the gravy. A thick, glossy, caramelized onion gravy that the meat gently simmers in. It locks in moisture. It builds flavor from the inside out. It is, honestly, the best thing you can do for a pork chop.
Two more tricks that make a huge difference:
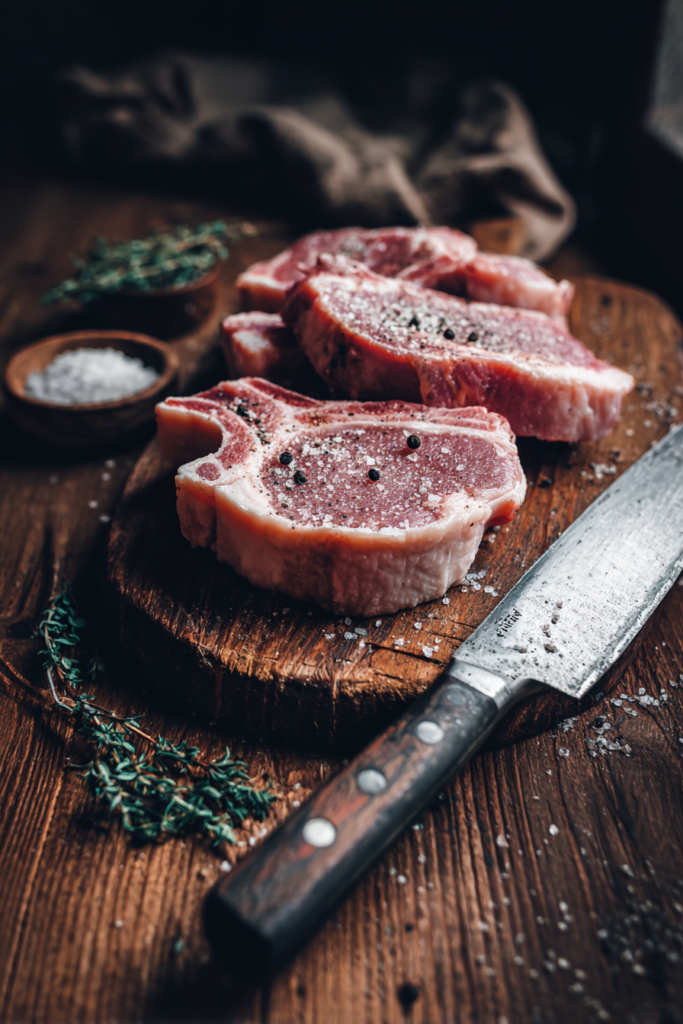
- Always use thick bone-in cuts. The bone acts like a heat shield. It distributes warmth evenly and keeps the center from drying out.
- Do not overcook during searing. We only want a golden crust at this stage. The gravy does the rest.
Think of it like this: searing is just the opening act. The gravy is where the real show happens.
What You Will Need
The ingredient list is beautifully short. You probably have most of this sitting in your kitchen right now.
| Ingredient | Quantity | Notes |
|---|---|---|
| Bone-in pork chops | 4 pieces | Thick-cut is highly recommended for juiciness. |
| Oil | 1½ tablespoons | A neutral cooking oil works best here. |
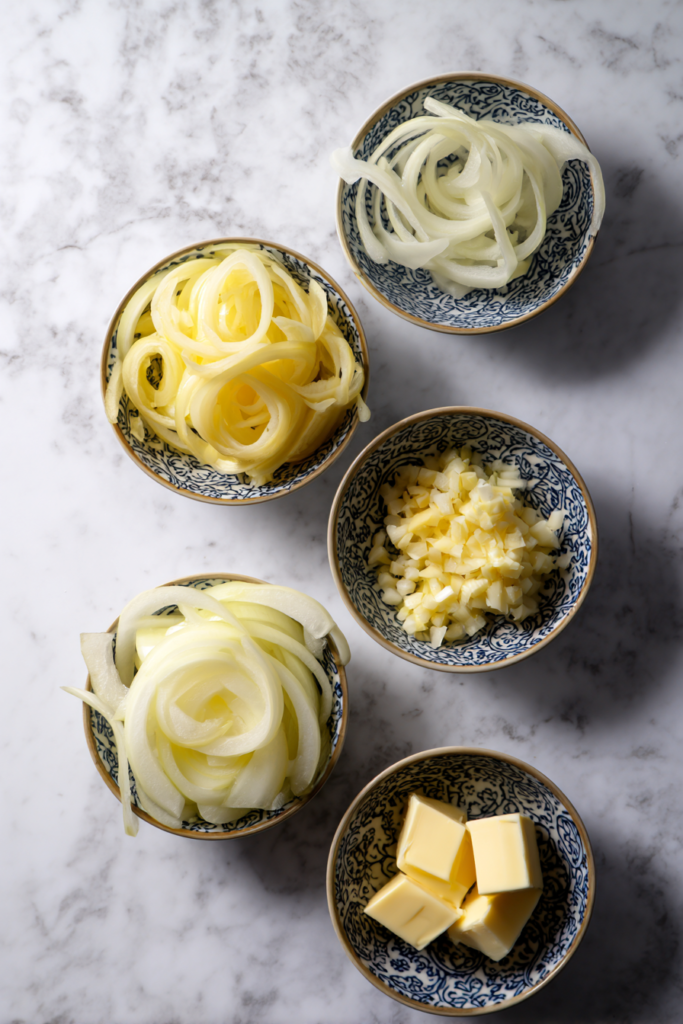
| Unsalted butter | 1 tablespoon | Cut into small chunks for easy melting. |
| Yellow onions | 3 medium-size | Peeled and thickly sliced for texture. |
| Garlic cloves | 3 cloves | Finely minced for maximum aromatic flavor. |
| All-purpose flour | 3 tablespoons | Used to thicken our delicious pan gravy. |
| Stock | 32 ounces | Chicken stock, beef stock, or a combination. |
| Heavy whipping cream | ¼ cup | Adds a velvety, luxurious finish to the sauce. |
| Sea salt and pepper | To taste | Freshly cracked black pepper is always best. |
I want to say one thing about the onions. Use high-quality yellow onions if you can. They caramelize beautifully and release a natural sweetness that balances the savory stock perfectly. Do not skip or rush this step.
Before You Turn on the Stove
Here is a habit that will completely change how relaxed you feel in the kitchen.
Before touching the burner, get everything chopped and measured. Garlic minced. Onions sliced. Butter cut into chunks. Stock measured and ready to pour.
In cooking, this is called mise en place. It is a French term that simply means “putting in place.” Professional kitchens swear by it. And once you try it, you will too.
You will not be scrambling to mince garlic while your meat burns. Trust me. Ten minutes of prep saves you from ten minutes of panic.
How to Make Smothered Pork Chops
Step 1: Season and Sear the Meat
Grab your largest heavy skillet or cast-iron pan. Cast-iron is genuinely ideal here because it holds heat so evenly. That means a consistent, beautiful sear on every inch of the meat.
Season your chops generously on both sides with coarse sea salt and freshly cracked black pepper. Pat the seasoning in with your fingers so it sticks.
Place the skillet over medium-high heat. Add your oil and let it get hot until it starts to shimmer. That shimmer is your signal.
Carefully lay the chops in the pan.
You should hear an immediate, loud sizzle. If you do not hear it? The pan is not hot enough. Pull the chops back out and give it another minute.
Let the meat cook completely undisturbed for 3 to 4 minutes. No peeking. No pressing down. Let the crust form on its own.
Flip the chops over and add your butter chunks to the pan. As the butter melts and starts to foam, tilt the pan slightly and use a spoon to baste. Scoop the hot butter and pour it right over the top of the meat repeatedly. This builds color and flavor at the same time.
Cook this side for another 3 to 4 minutes.
The chops will not be fully cooked through at this point. That is completely fine and fully intentional. Remove them from the pan and set them on a clean plate to rest.
Step 2: Build the Gravy
Do not wipe out that pan. I mean it.
Those dark, sticky bits clinging to the bottom? That is called fond. It is concentrated flavor, and it is about to become the foundation of your gravy.
Turn the heat down to medium. Add your thickly sliced onions directly into the pan drippings. Let them cook slowly for 5 to 7 minutes, stirring occasionally. Watch them soften and turn a warm, light golden brown. The kitchen will smell unbelievable right about now.
Add the minced garlic. Stir constantly and cook for just 1 to 2 minutes. Garlic burns fast, so stay close.
Now sprinkle the flour evenly over the onion and garlic mixture. Stir vigorously until every bit of flour is absorbed into the drippings. Let this cook for about 1 minute. This step is important because it cooks out the raw flour taste before we add the liquid.
Slowly pour in your stock while whisking continuously. Use chicken stock, beef stock, or a mix of both. As you pour, scrape the bottom of the pan to lift up all that fond we were protecting.
Raise the heat slightly to medium-high. Bring the liquid to a gentle boil and watch it thicken into a glossy, beautiful gravy. This takes about 3 to 4 minutes.
Quick tip: Too thick? Splash in a little more stock. Too thin? Let it simmer uncovered for another minute or two.
Step 3: Simmer and Finish
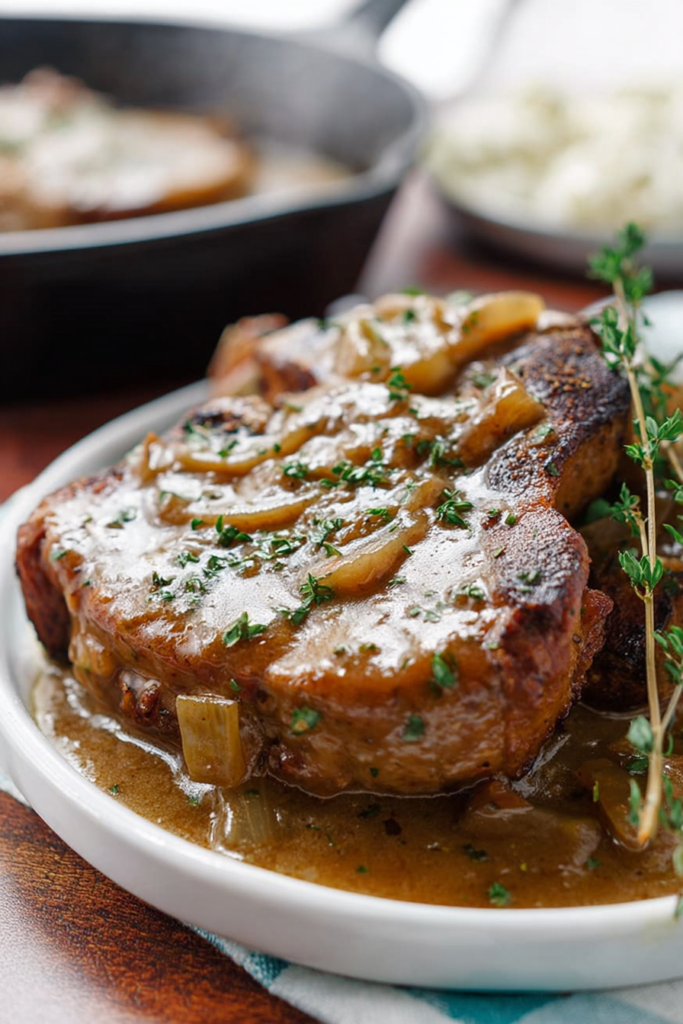
Nestle the seared chops back into the bubbling gravy. Pour any resting juices from the plate in too. Do not waste a single drop.
Turn the heat down to low. Cover the pan and let everything gently simmer together until the meat is cooked through and incredibly tender.
Right before serving, stir in the heavy whipping cream. It transforms the whole sauce instantly. What was already a rich, savory gravy becomes something velvety and deeply satisfying.
Your thermometer should read 145°F when inserted into the thickest part of the meat, away from the bone. At that temperature, the meat stays juicy and may show just a hint of pink inside. That is perfectly safe and exactly what you want.
How to Serve This Dish
This is where things get really good.
Spoon the chops over a generous pile of creamy mashed potatoes. The potatoes act like a sponge for that caramelized onion gravy. Every bite is just better than the last.
You can also serve alongside:
- Roasted green beans
- Steamed asparagus
- Buttered egg noodles
- Simple white rice
Storing and Reheating Leftovers
Here is something I genuinely love about this recipe. It tastes even better the next day. The flavors keep developing in the fridge overnight. Leftovers feel like a reward.
To store: Let everything cool to room temperature first. Place the chops and gravy together in an airtight container, keeping the meat submerged in the gravy. The liquid acts like a protective blanket and keeps the meat from drying out. Refrigerate for up to 4 days.
To freeze: Transfer cooled chops and gravy into a freezer-safe bag or container. It keeps well for up to 3 months. When ready to eat, thaw in the refrigerator for a full 24 hours before reheating.
To reheat: Forget the microwave for this one. Transfer the thawed meat and gravy into a saucepan over medium-low heat. Cover with a tight lid to trap the steam. Let it heat slowly for about 10 minutes until piping hot. This gentle method keeps the cream sauce from splitting.
Frequently Asked Questions
Can I use boneless cuts instead of bone-in?
Yes, absolutely. Just adjust your searing time. Boneless chops cook faster and dry out more quickly. Sear them for only about 2 minutes per side, then let the gravy finish the cooking gently.
What type of stock works best?
It depends on the flavor you are after. Chicken stock gives you a lighter, slightly sweeter result. Beef stock makes a darker, more robust gravy. My personal favorite? Half chicken, half beef. It hits a beautifully balanced middle ground.
Can I make this dairy-free?
Easily. Replace the butter with a little extra oil and simply leave out the heavy cream at the end. The flour and stock still create a thick, flavorful gravy on their own. You could also stir in an unsweetened plain oat creamer as a substitute.
How do I know when the meat is done?
Use a digital meat thermometer. Insert the probe into the thickest part of the chop, avoiding the bone. You are looking for an internal temperature of 145°F. At that point, the meat is safe, juicy, and still slightly pink. That is the sweet spot.
Can I use gluten-free flour?
Yes. A 1-to-1 gluten-free baking flour works perfectly here. Use it exactly as you would regular flour. Alternatively, make a quick cornstarch slurry: mix 1 tablespoon of cornstarch with 2 tablespoons of cold water, then whisk it into the hot stock and watch the gravy thicken right before your eyes.

Smothered Pork Chops with Caramelized Onion Gravy
Ingredients
Method
- Season chops generously with salt and pepper. Heat oil in a large heavy skillet (preferably cast-iron) over medium-high heat until shimmering.
- Sear chops undisturbed for 3-4 minutes. Flip, add butter chunks, and baste the meat with foaming butter for another 3-4 minutes. Remove chops from pan and set aside on a plate.
- Lower heat to medium. Add sliced onions to the pan drippings and cook for 5-7 minutes until light golden brown. Add garlic and cook for 1-2 minutes.
- Sprinkle flour over the onions and stir for 1 minute to cook out the raw flour taste.
- Slowly whisk in stock, scraping the bottom of the pan to release the fond. Raise heat to medium-high and simmer for 3-4 minutes until thickened.
- Nestle the chops back into the gravy. Lower heat, cover, and simmer until the internal temperature reaches 145°F.
- Stir in the heavy whipping cream right before serving to finish the sauce.