

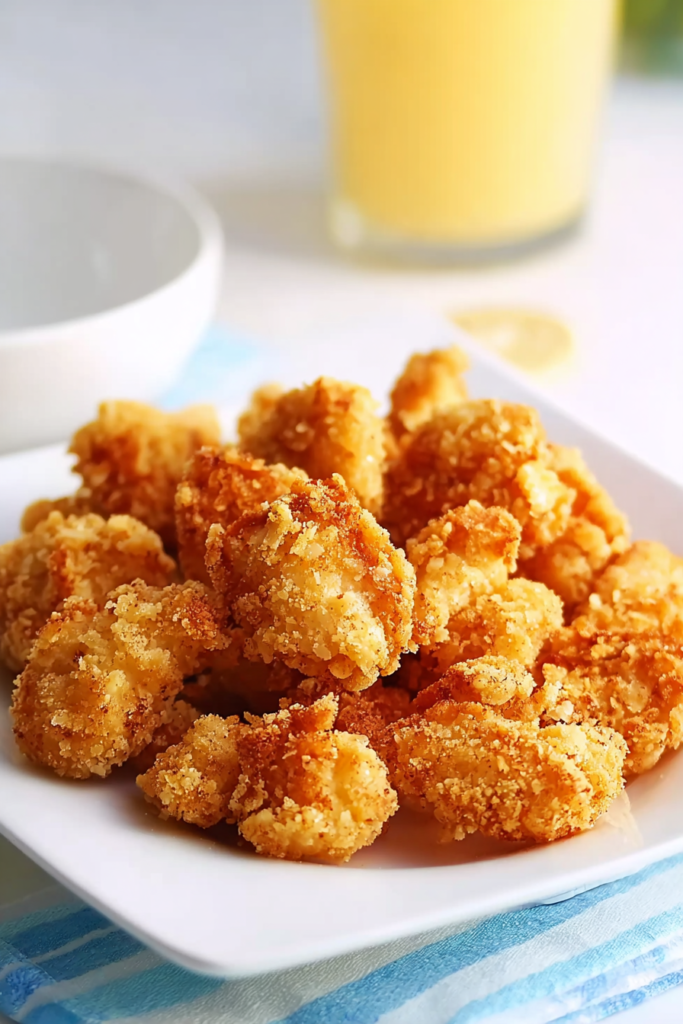
Let’s be honest. There’s something about popcorn chicken that just hits differently.
Maybe it’s the size. Maybe it’s the crunch. Or maybe it’s the fact that you can pop three or four pieces into your mouth at once and feel zero guilt about it.
Whatever the reason, this recipe is one you’ll come back to again and again. The outside is shatteringly crisp. The inside stays tender and juicy. And the whole thing comes together in just 30 minutes.
No fancy equipment. No hard-to-find ingredients. Just really, really good fried chicken in bite-sized form.
I’ve made this for weekend get-togethers, lazy Friday nights, and even as a quick afternoon snack when the craving hits. Every single time, the bowl is empty before I even sit down.
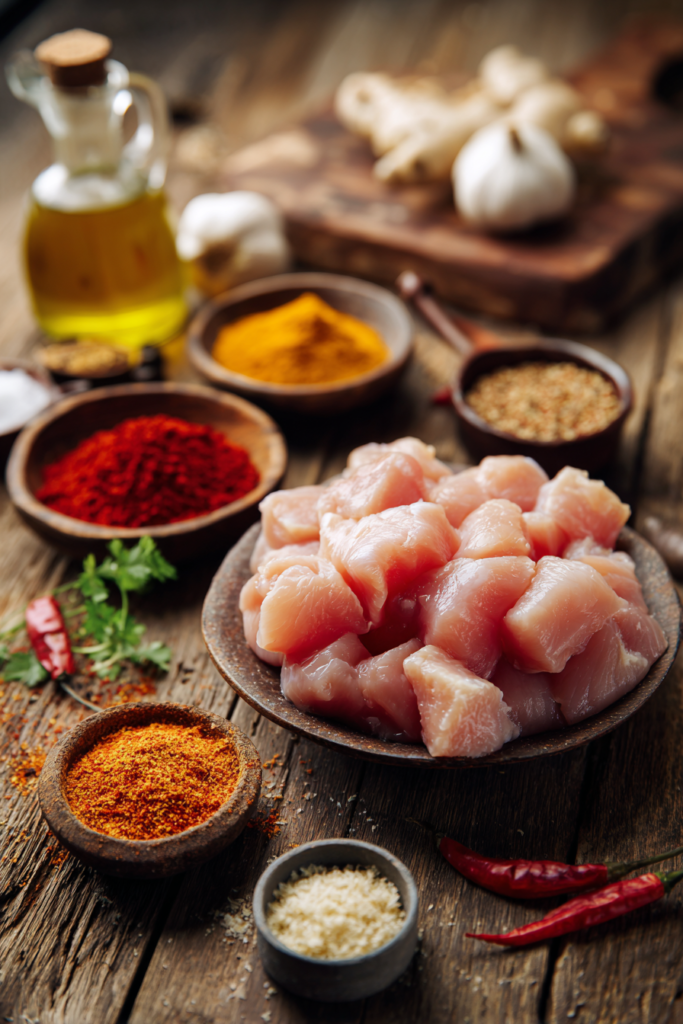
What You’ll Need
Before we get into the cooking, let’s talk ingredients. Everything here is a pantry staple. Nothing weird, nothing expensive.
The real secret? Panko crumbs. Not regular breadcrumbs. Panko. They’re lighter, airier, and they create that signature crackly crust that makes each bite so satisfying. Think of it like the difference between a soft cardboard box and a thin sheet of crispy crackers. Same idea, completely different result.
Here’s the full breakdown:
| Ingredient | Quantity | Notes |
|---|---|---|
| Chicken breast (boneless) | 1 lb (450 to 500g) | Cut into uniform, bite-sized cubes |
| Cornstarch or all-purpose flour | ¼ cup | Cornstarch yields a crispier outer shell |
| Buttermilk or yogurt | 2 tablespoons | Optional; skip to make it dairy-free |
| Egg whites | 2 | Or substitute with ½ cup buttermilk or yogurt |
| Panko crumbs (or bread crumbs) | 2 cups | Panko provides the ultimate light, airy crunch |
| Oil for deep frying | As needed | Use a neutral oil with a high smoke point |
| Salt | ¾ to 1 teaspoon | Adjust to your personal preference |
| Onion powder | 1 teaspoon | Optional, but adds great savory depth |
| Garlic powder | 1½ teaspoons | Or substitute with 1 tbsp ginger garlic paste |
| Ground black pepper | ½ teaspoon | Freshly ground gives the best aroma |
| Paprika | ½ to 1½ teaspoon | Or use cayenne or red chilli powder |
| Allspice | ¼ teaspoon | Or substitute with 2 tsp garam masala |
| Wasabi or sriracha powder | 2 teaspoon | Optional, for a spicy finishing touch |
Prep Time: 15 minutes | Cook Time: 15 minutes | Total Time: 30 minutes | Servings: 4 | Difficulty: Easy
Let’s Make It: Step by Step
This recipe has three phases. Each one is simple. None of them will stress you out.
Phase One: Prep and Marinate the Chicken
Start with a clean cutting board and your chicken breast. Cut the meat into small, even cubes. You’re aiming for pieces that are roughly one inch each.
Why does size matter? Because uniform pieces cook at the same rate. Cut them too big and the outside burns before the inside is done. Cut them too small and they dry out fast. One inch is the sweet spot.
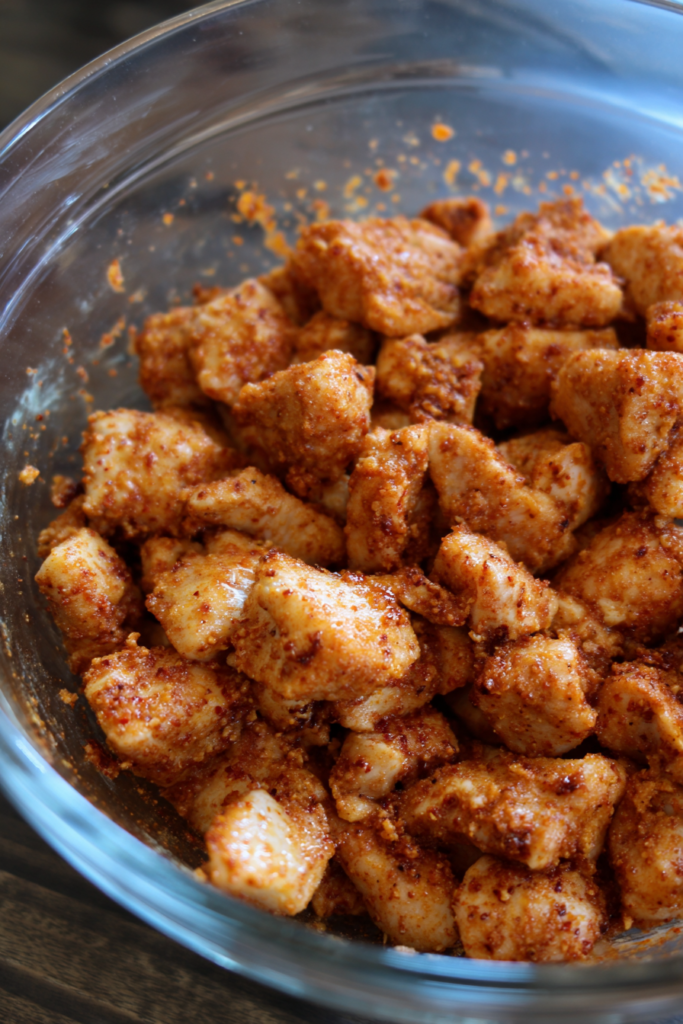
Once everything is cut, toss the pieces into a large mixing bowl.
Now comes the flavor. Add your salt, onion powder, garlic powder, black pepper, paprika, and allspice directly to the bowl. Mix everything well. You want every single piece coated in that spice blend, not just the ones on top.
If you’re using yogurt, add the two tablespoons now. Yogurt has gentle acids that break down the proteins in the meat just enough to keep things tender and juicy inside even after the heat of frying. It’s a small step that makes a big difference.
Cover the bowl and refrigerate for at least 30 minutes. If you have more time, go longer. The flavor only gets better.
Phase Two: Build That Crust
This is where the magic happens.
After marinating, pour the two egg whites over your seasoned chicken. If you’re going the buttermilk route, use half a cup instead. Stir everything together until the liquid coats the pieces evenly.
Next, sprinkle your cornstarch or flour over the wet chicken. Here’s the important part: do it in two separate batches. Add half, stir well. Add the rest, stir again. Doing it all at once causes clumping, and clumps mean uneven frying.
What you want at the end of this step is a thick, sticky coating hugging every piece. Not dry. Not floury. Sticky.
Now grab a wide plate and pour your two cups of panko crumbs onto it.
Pick up one piece of battered chicken. Drop it into the panko. Roll it around. Then use your fingers to press the crumbs into the surface firmly. This pressing motion is what creates that thick, craggy crust you see in restaurant-style popcorn chicken.
Think of it like packing sand into a bucket. The more you press, the more it holds together. And when it hits the hot oil, all those little craggy bits turn into tiny, crispy peaks.
Place the coated piece on a dry tray and repeat until every piece is done.
Once all the chicken is breaded, let it rest for 10 to 15 minutes before frying. This step is easy to skip. Don’t skip it. The resting time lets the crumbs bond with the coating so they don’t fall off in the oil.
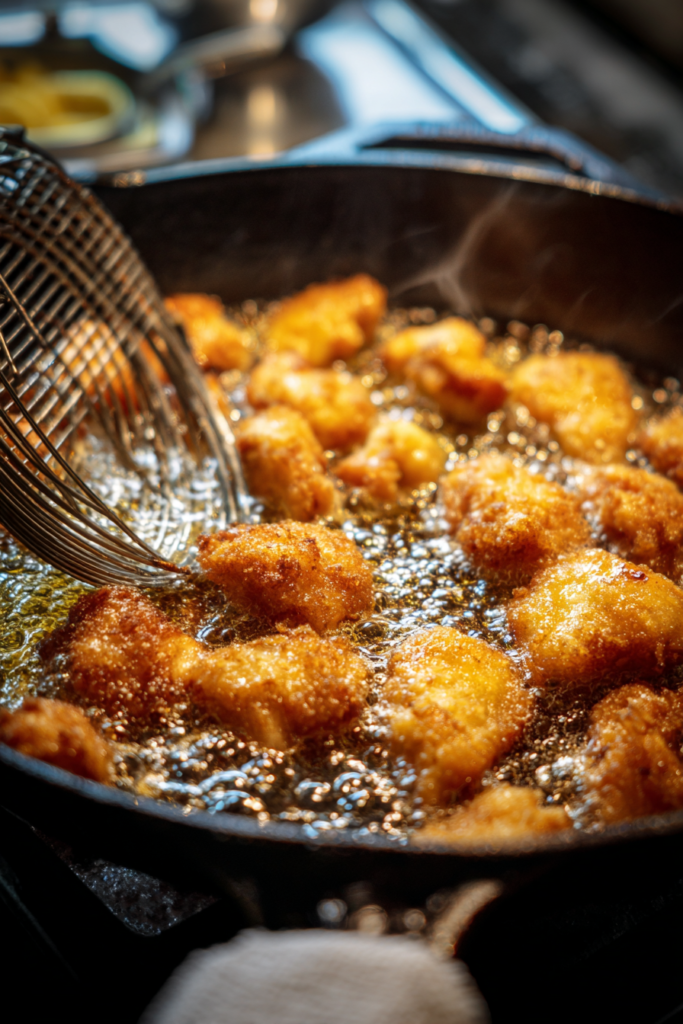
Phase Three: Fry to Golden Perfection
Set a deep, heavy-bottomed pan on your stove. Pour in enough neutral oil for deep frying. Turn the heat to medium and let it warm up gradually.
You want the oil medium-hot. Not smoking. Not barely warm. Right in the middle.
Here’s the easiest way to test it: drop a single panko crumb into the oil. It should sizzle immediately and float to the surface. If it sinks and just sits there, the oil is too cold. If it turns dark brown in seconds, the oil is too hot. You’re looking for a lively, steady sizzle with no burning.
Once the oil is ready, start adding your chicken pieces. Drop them in one at a time. Do not dump them all in at once. Overcrowding drops the oil temperature fast, and when the temperature drops, you get greasy, heavy chicken instead of light and crispy.
Fry in smaller batches. It takes a few extra minutes but the difference in texture is worth every second.
After you drop a batch in, leave them alone for a full two minutes. No stirring, no poking. Let the crust set. After two minutes, give them a gentle stir with a slotted spoon and continue frying for another two to three minutes until they’re deep golden brown.
Pro tip: The safe internal temperature for chicken is 165°F (74°C). If you’re ever unsure, use a small meat thermometer to check.
When a batch is done, lift the pieces out with a slotted spoon and place them on a wire cooling rack. Put a paper towel underneath to catch drips, but don’t rest the chicken directly on paper towels. The steam gets trapped underneath and turns the bottom crust soft and soggy.
Before frying your next batch, skim out any loose crumbs floating in the oil. Those tiny bits burn quickly and leave a bitter taste on everything that comes after them. A quick skim with your mesh spoon takes ten seconds and keeps the oil clean.
Finishing Touches
Your chicken is golden. It’s crispy. The kitchen smells incredible.
But here’s one last step that takes it from really good to genuinely great.
Remember that optional wasabi or sriracha powder from the ingredient list? While the chicken is still warm, sprinkle it over the top. The slight surface oil from frying helps the dry spice cling to each piece. A light dusting of sriracha powder gives a warm, building heat. Wasabi powder hits sharper and faster, almost like a little jolt of spice that clears right up.
Toss the chicken gently in a bowl to distribute the powder evenly.
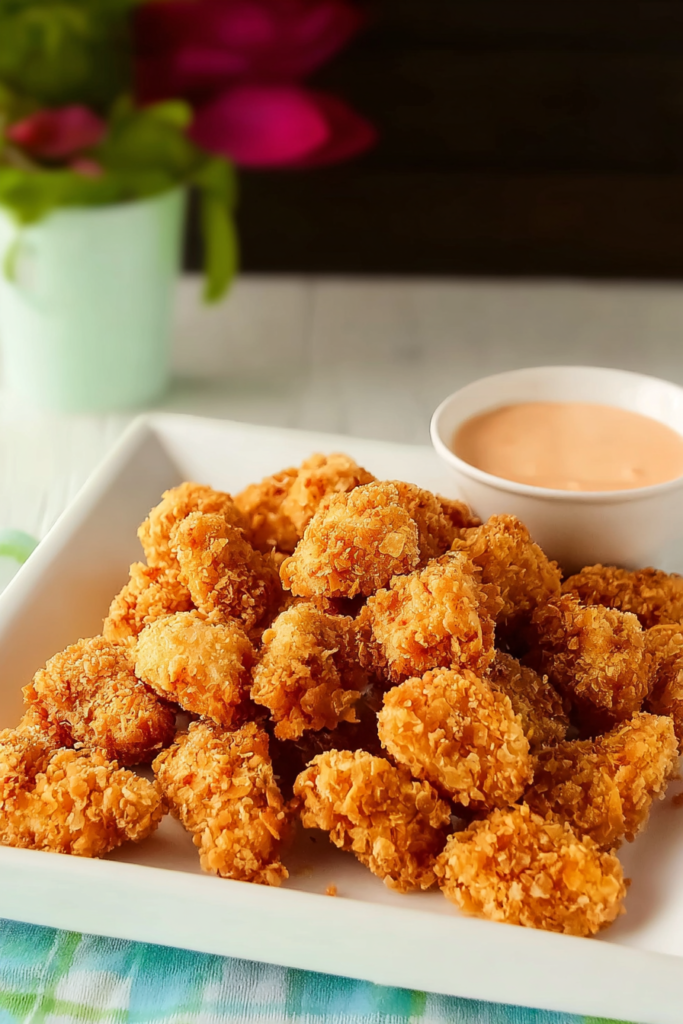
Then serve immediately with your dipping sauces of choice:
- Garlic mayo is rich and cooling against the heat
- Sweet chili sauce adds a lovely sweet and savory contrast
- Classic ketchup is always a safe bet, especially if kids are eating too
Frequently Asked Questions
Can I bake this instead of frying?
Yes, absolutely. Preheat your oven to 400°F (200°C). Place the breaded pieces on a wire baking rack set over a sheet pan. Spray generously with neutral cooking oil spray. Bake for 15 to 20 minutes, flipping halfway through for even browning.
What about the air fryer?
The air fryer is a great option. Preheat to 400°F. Arrange pieces in a single layer in the basket with no overlapping. Lightly spray with cooking oil. Air fry for 10 to 12 minutes, shaking the basket halfway through.
How do I store and reheat leftovers?
Let the chicken cool completely before storing. Keep pieces in an airtight container in the fridge for up to three days. Reheat in an oven or air fryer at 350°F until hot and crispy again. Skip the microwave. It turns the breading soft and sad.
Can I use regular breadcrumbs instead of panko?
You can. The result will be a slightly denser, less airy crust. It still tastes good, just not quite as light. If you want to get creative, crushed unsweetened cornflakes make a surprisingly crunchy alternative that works really well too.

Shatteringly Crispy Popcorn Chicken
Ingredients
Method
- Cut chicken breast into uniform 1-inch cubes. Place in a bowl and toss with salt, onion powder, garlic powder, black pepper, paprika, allspice, and yogurt (if using). Refrigerate for at least 30 minutes.
- Pour egg whites over the marinated chicken and stir. Gradually add cornstarch in two batches, stirring until a thick, sticky coating forms.
- Roll each piece of chicken in panko crumbs, pressing firmly to ensure a thick crust. Let the breaded chicken rest for 10-15 minutes.
- Heat oil in a heavy-bottomed pan to medium-hot. Test with a crumb; it should sizzle immediately.
- Fry chicken in small batches to avoid overcrowding. Cook undisturbed for 2 minutes, then stir and fry for another 2-3 minutes until deep golden brown.
- Remove with a slotted spoon and place on a wire rack. Dust with wasabi or sriracha powder while still warm.