Most home cooks chase the perfect roasted vegetables by tweaking oven temperatures or buying exotic seasonings. Rarely do they look down at the pan. That thin, darkened sheet they’ve been using for a decade is the silent saboteur. The products that last are never the flashiest — they’re the simplest, heaviest, and most boring-looking tools in the drawer. When it comes to a roasted vegetables recipe that delivers deep, even browning every time, the right baking sheet isn’t a luxury; it’s the foundation.
Key Takeaways
- A heavy-gauge aluminum or stainless steel baking sheet prevents hot spots and warping, ensuring every piece of vegetable caramelizes instead of steaming.
- Properly dried vegetables, a 425°F oven, and a single-layer arrangement are non-negotiable steps for a roasted vegetables recipe with crisp, browned edges.
- Maintaining your pan through gentle cleaning and occasional restoration keeps it performing like new for decades, eliminating the need for disposable non-stick sheets.
In this guide
The Pan Philosophy: Heavy Metal Wins Every Time
Walk into any commercial kitchen and glance at their sheet pans. They won’t be shiny, double-coated, or stamped with a celebrity chef’s name. They’ll be dull, dark, and made of thick aluminum. This isn’t about aesthetics. It’s about heat capacity and even distribution. A roasted vegetables recipe lives or dies by how uniformly the pan transfers oven heat to the food sitting on it. Thin pans flex under high temperature, creating gaps where moisture pools. That moisture becomes steam, and steam is the enemy of browning.
Why Thin Pans Fail
A flimsy baking sheet warps the moment it hits a 425°F oven. You might hear it pop and buckle. That distortion causes vegetables to roll toward the low spots, crowding together. Crowded vegetables release more moisture and never get dry enough to brown. If you’ve ever pulled a tray from the oven to find pale, soggy carrots instead of deeply caramelized ones, the pan thickness — or lack thereof — was likely the culprit.
The Materials That Hold Heat
For a roasted vegetables recipe, you want a sheet made from heavy-gauge aluminum (at least 12-gauge) or tri-ply stainless steel with an aluminum core. Both materials retain significant heat. When you scatter cold vegetables across them, the pan’s temperature drops less, so searing starts immediately rather than after a five-minute recovery lag. Uncoated aluminum has the added benefit of developing a natural patina over time that improves browning, much like a seasoned cast iron skillet. I restore old bakeware as a hobby, and a thirty-year-old aluminum pan with a deep, even patina will outperform any brand-new coated sheet right out of the box.
Those dark non-stick coatings that come on department store pans? They wear down within a year. Once the surface begins to flake, the pan becomes landfill. A heavy-gauge bare metal sheet, properly cared for, will outlive its owner. It’s the same approach I bring to every roasted vegetables recipe: build the process around tools that get better with age, not worse.
A Step-by-Step Roasted Vegetables Recipe
The technique below works for virtually any hardy vegetable — root vegetables, cruciferous cuts, winter squash — and scales from a single sheet to a full holiday spread. Master this, and you’ll never need to search for ingredient-specific instructions again.
Preparation: Cutting for Consistency
Uniform pieces roast at the same rate. Aim for 1- to 1½-inch chunks for dense vegetables like potatoes or beets, and slightly larger florets for broccoli or cauliflower. Any thinner and they burn before softening; thicker, and the outside chars while the inside stays raw. Dry the cut pieces thoroughly with a clean kitchen towel. Excess surface water instantly turns to steam in the oven, which is why towel-drying is the single most overlooked step in any roasted vegetables recipe.
Oil and Seasoning: Less Is More
Pour enough high-heat oil — avocado, refined peanut, or a quality olive oil with a high smoke point — to lightly coat each piece. Don’t drown them. Toss in a large bowl until a thin, even film clings to every surface. Season with kosher salt and freshly ground black pepper at this stage. Salt draws out moisture during roasting, so if you add it right before the oven, you’re helping the browning process rather than creating a pool of liquid.
For a classic roasted vegetables recipe, stick to salt and pepper only. Add dried herbs like rosemary or thyme halfway through cooking — their volatile oils burn if exposed to high heat for the full duration. Fresh herbs go on after the tray comes out.
The Oven Setup: Temperature and Rack Position
Set the oven to 425°F (220°C) with a rack in the middle position. If you’re roasting two sheets at once, use the upper-middle and lower-middle racks, and rotate them top to bottom and front to back halfway through. Too low, and the bottom scorches while the top steams. Too high, and the tips char before the middles soften.
Never line a heavy-gauge pan with parchment for high-heat roasting unless you’re working with delicate ingredients that stick. Parchment insulates the metal from the vegetables, preventing that initial sear. A properly seasoned bare pan releases food naturally once browning occurs. If you’re working with a newer pan or a sticky marinade, use unbleached parchment, but understand you’re sacrificing some caramelization.
Roasting and Checking for Doneness
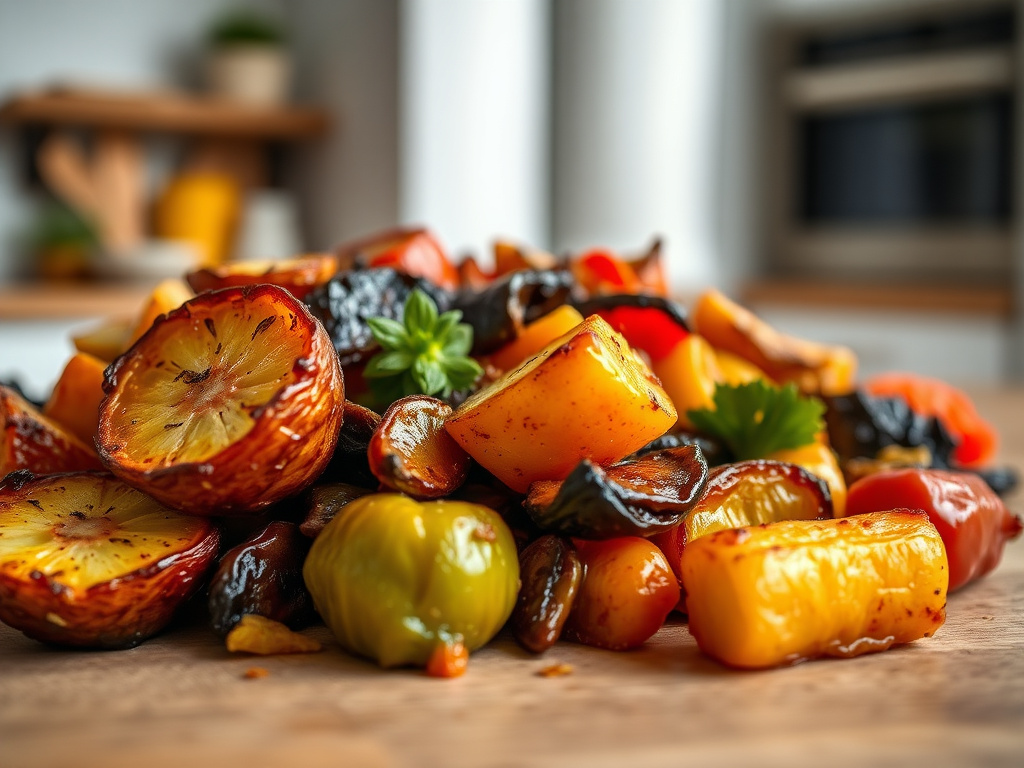
Spread the vegetables in a single layer with space between pieces. Overcrowding is the number one reason roasted vegetables turn mushy. If the sheet is packed, steam builds between the pieces, and you end up with a braise, not a roast. Use two sheets if necessary.
Roast for 20–25 minutes, then open the oven and use a thin metal spatula to flip the vegetables. They should release easily if they’ve browned adequately. If they stick, give them another 5 minutes and try again. The Maillard reaction — the chemical process that creates deep, savory browning — requires sustained heat above roughly 300°F, but it accelerates nicely at 425°F. Total roasting time usually falls between 35 and 45 minutes, depending on the density of the vegetable.
Test doneness with the tines of a fork, not a paring knife. You’re looking for tender resistance with deeply browned, craggy edges. If you’ve followed a roasted vegetables recipe that chases after the perfect balance of soft and crisp, that contrast is exactly what you’re after.
The Science of Caramelization and Why It Matters
Understanding what’s happening inside the oven transforms a roasted vegetables recipe from guesswork into repeatable craft. When carbohydrates and naturally occurring sugars in vegetables reach temperatures above 300°F, they begin to break down and recombine into hundreds of new flavor compounds. That’s caramelization — not browning proteins, which is the Maillard reaction, but the slow development of nutty, bittersweet depth that defines a truly great roast.
Dry Veggies, Hot Pan, Perfect Browning
Water is the enemy of caramelization because it maxes out at 212°F. As long as moisture sits on the surface of a carrot or beet, it’s creating a steam bath that prevents the temperature from climbing past boiling. That’s why drying the vegetables thoroughly before oiling is non-negotiable. The oil itself doesn’t create browning — it simply conducts heat efficiently and prevents sticking. The actual browning is pure vegetable chemistry.
The Steam Trap and How to Avoid It
Even with a dry surface, vegetables release internal moisture as their cell walls break down. A heavy pan manages this by retaining enough heat to quickly evaporate that liquid. Thin pans lose heat the moment moisture hits them, and before they recover, that liquid spreads and starts steaming neighboring pieces. If you’ve roasted vegetables that came out with a few beautifully browned spots and large pale areas, look at your pan. Hot spots on thin metal over-brown; cool spots steam. A thick, continuous slab of aluminum eliminates this problem entirely.
Caring for the Pan: The Restoration Mindset
A heavy-gauge baking sheet isn’t disposable. With basic maintenance, it becomes a family heirloom — the same pan that roasted your first solo dinner can roast your grandchildren’s holiday vegetables. I restore vintage bakeware in my workshop, and the most neglected pans almost always come back to life with a little effort.
Cleaning Without Destruction
After roasting, let the pan cool completely. Scrape off any stuck bits with a bench scraper or stiff nylon brush. For heavy buildup, fill the pan with hot water and a few drops of mild dish soap, then let it soak for 10 minutes — never overnight, which can pit uncoated aluminum. Scrub gently with a non-abrasive pad. Do not use steel wool on polished surfaces; it leaves deep scratches that food grabs onto. A well-seasoned pan with a patina will look stained and mottled — that’s perfect. The dark spots are polymerized oil, which naturally reduces sticking.
Dealing with Rust and Crust
Uncoated steel pans can rust if left wet. If a pan develops orange spots, mix a paste of baking soda and water and scrub with a cork or nylon brush until the rust lifts. Dry it immediately and rub the entire surface with a thin layer of high-heat oil. Place it in a 350°F oven for an hour to set the seasoning. For aluminum pans, a paste of cream of tartar and water removes dark, carbonized buildup without harming the metal. Avoid harsh oven cleaners, which can etch and weaken aluminum over time.
This level of care seems fussy until you realize that a single well-maintained pan replaces five cheap ones that warp and scratch. When you’re balancing a roasted vegetables recipe alongside other dishes, knowing your equipment won’t buckle under heat gives you one less variable to fight.
And if you’re looking at a pan already bowed in the center, don’t toss it yet. Flip it over, place it on a flat concrete surface, and tap the center gently with a rubber mallet. Heavy aluminum can often be coaxed back into shape. It’s the kind of repair work that, to me, feels more satisfying than clicking “buy” on a replacement. Tools that respond to effort earn their place in a kitchen. That same principle applies when I’m working through a recipe like Oven Roasted Potatoes and Vegetables: A Complete Guide — the method works because the foundation is sound, not because the tools are new.
Flavor Variations and Advanced Techniques
Once the core technique is dialed in, a roasted vegetables recipe becomes a canvas. The heavy pan does the heavy lifting; your additions just play to its strengths.
Infusing Oil with Aromatics
Instead of tossing raw garlic cloves in with the vegetables and watching them burn to acrid little pebbles, infuse the oil first. Gently warm your oil with whole smashed garlic cloves, rosemary sprigs, and a strip of lemon zest over low heat for 10 minutes, then strain and use that oil for coating. The flavor hangs on beautifully through high-heat roasting without the bitter burnt notes.
Layering Vegetables by Density
Not everything can go on the pan at the same time. Hard carrots, parsnips, and sweet potatoes need a head start. Give them 10–15 minutes alone, then add quicker-cooking items like bell peppers, zucchini, or cherry tomatoes. Shelling beans and stone fruit can join in the final 10 minutes for a burst of juicy contrast. This staggered approach turns a single tray into a complete, complex dish.
Finishing Touches That Stick
Right out of the oven, toss the hot vegetables with a splash of acid — sherry vinegar, fresh lemon juice, or pomegranate molasses — and a handful of chopped fresh herbs. The residual heat blooms the herbs and the acid cuts through the richness. For a creamy finish, crumble a bit of feta or dab of ricotta onto the pan while it’s still hot; it melts into the crevices and sets as the tray cools. These small moves make the same roasted vegetables recipe feel entirely new every time, and they’re the sort of thing that turns a weeknight side into a dish people ask for. And if you’re ever looking for an unexpected way to use them, pureeing roasted tomatoes and garlic from this method into a Roasted Garlic Caprese Dip is a perfect application — the deep, slow-roasted flavor carries into a quick appetizer.
Frequently Asked Questions
Why do my roasted vegetables always come out soggy even at high heat?
Almost certainly, the pan is overcrowded or the vegetables weren’t dried thoroughly. When pieces touch, they steam. And any surface moisture instantly becomes vapor that cools the pan and prevents browning. Spread them out in a single layer with gaps between, and towel-dry everything after cutting. A heavy-gauge pan also retains heat better, so it recovers faster when cold vegetables hit it. The combination of dry ingredients, space, and a hot, thick sheet turns a soggy roasted vegetables recipe into a crisp, caramelized success.
Is it worth restoring an old, discolored baking sheet, or should I just buy a new one?
Absolutely worth it — if the sheet is heavy-gauge metal without deep pitting. Discoloration is a natural patina formed from polymerized oils, and it actually improves release. Scrub off any carbonized crust with baking soda paste or cream of tartar, avoid harsh chemicals, and reseason lightly if bare metal shows. You’ll end up with a piece of bakeware that performs better than most factory-fresh pans. Restoration takes an afternoon, but the pan will then last decades longer.
Can I use a cast iron skillet for a roasted vegetables recipe instead of a baking sheet?
You can, but with trade-offs. Cast iron holds immense heat and delivers excellent browning, especially on dense root vegetables. However, its high sides trap moisture, so you’ll need to stir more frequently and leave extra space between pieces to prevent steaming. Preheat the skillet in the oven for a great initial sear, and use it when you want a rustic, almost fried edge. For sheer evaporation and crispness, a heavy rimmed baking sheet remains the better tool for most roasted vegetables recipes.