

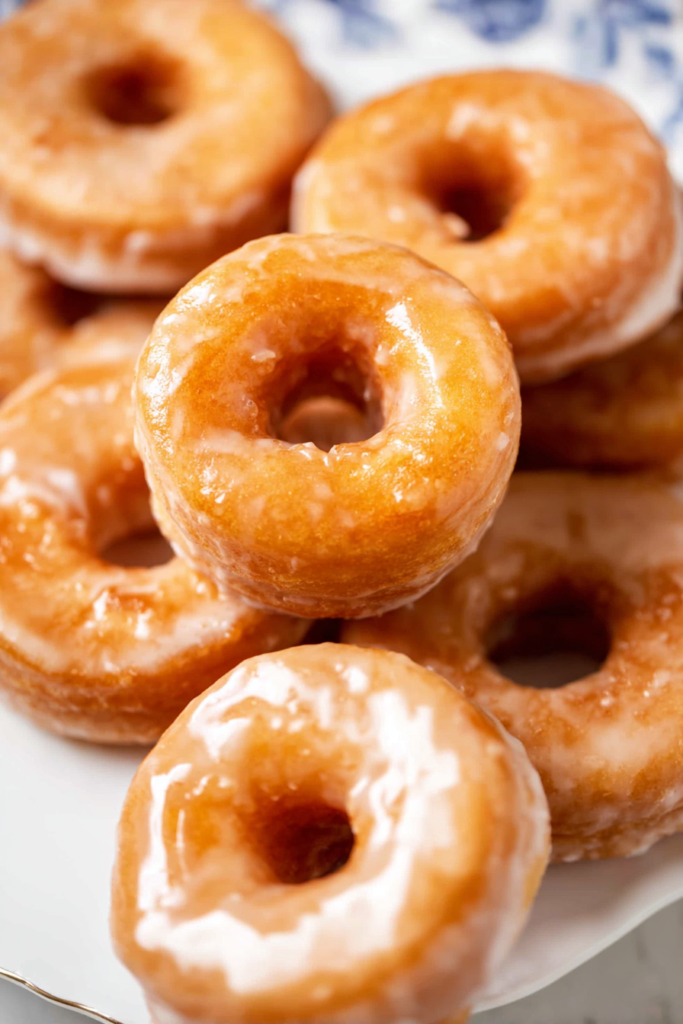
You know that feeling when you bite into a warm glazed donut with your morning coffee?
The sweet glaze sticking to your lips. That soft, tender crumb just melting in your mouth.
Pure. Comfort. Food.
I’ve been making these Old Fashioned Glazed Donuts for years now. And honestly? I’m so excited to finally share all my secrets with you today.
Here’s the thing.
When I first tried baking donuts at home, I was scared. I thought it would be super complicated. Maybe even impossible without some fancy bakery equipment.
Boy, was I wrong!
These beauties come together in under 30 minutes. And they taste exactly like the ones from your favorite bakery. Actually… I think they’re even better. Because you control what goes in them. The ingredients. The sweetness level. Everything.
What makes these donuts special?
Their cake-like texture.
Unlike yeast donuts that need all that rising time, these use baking powder and baking soda for lift.
The result?
Warm donuts on your table faster than you can drive to the donut shop. Plus they’re baked, not fried. Which means way easier cleanup. (Your kitchen will thank you.)
Why This Recipe Actually Works
The buttermilk is the secret weapon.
This tangy ingredient reacts with the baking soda. It creates the softest, most tender crumb you’ve ever tasted. The acidity also balances out all that sweetness from the glaze perfectly.
I’ve tried making these with regular milk before. Trust me on this one – buttermilk makes all the difference.
Butter and oil team up for the best texture.
The butter brings that rich, amazing flavor. The oil keeps everything moist for days. This combo means your donuts won’t turn into hockey pucks after a few hours like some cake donuts do.
A tiny hint of nutmeg adds magic.
Just the smallest amount transforms these from “plain donuts” to “wow, what makes these taste so good?”
That subtle spice reminds me of Christmas mornings. Cozy weekend breakfasts. It’s honestly the secret ingredient everyone asks about.
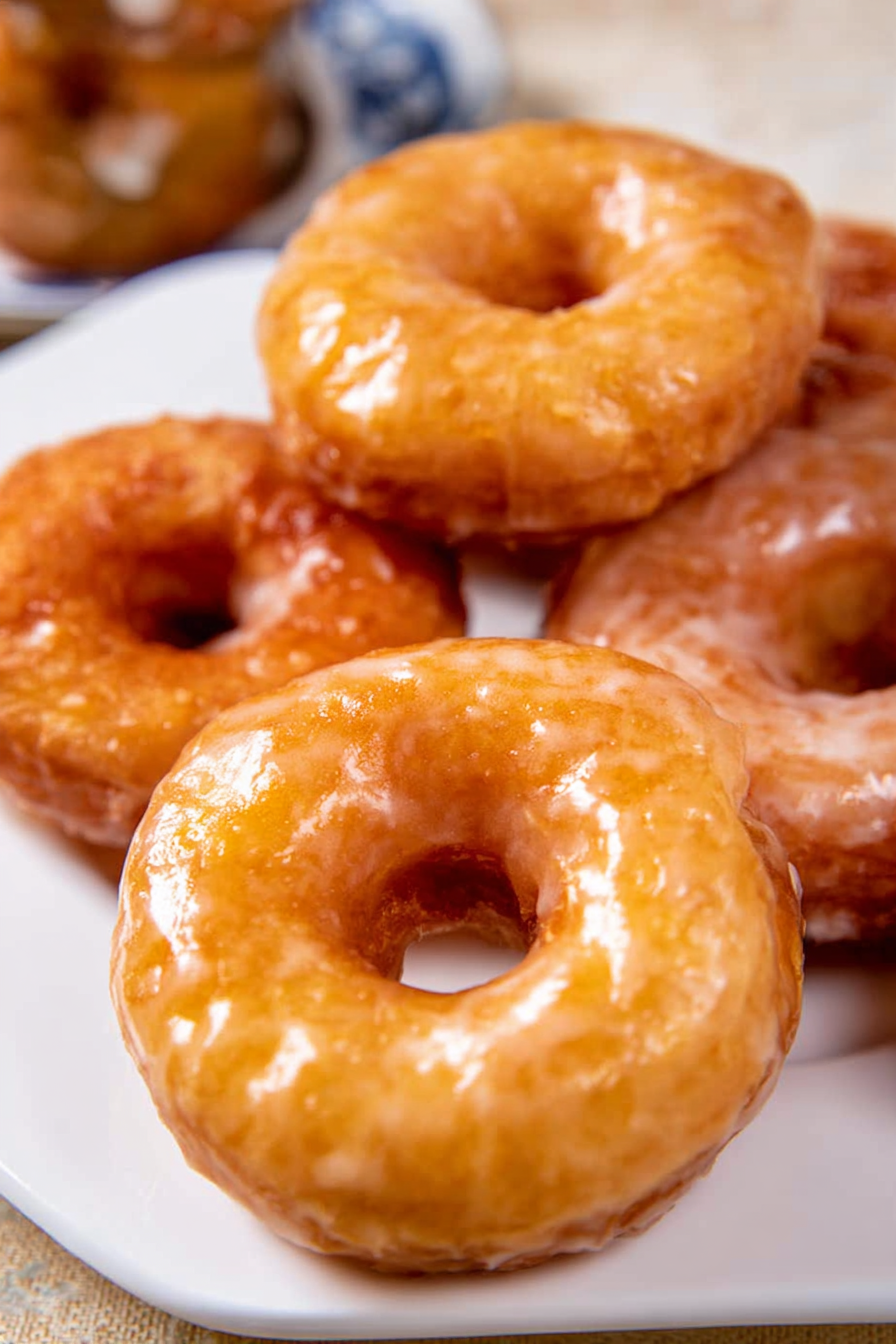
The glaze? Simple perfection.
Just powdered sugar, milk, and vanilla. That’s it.
It sets up beautifully – not too thick, not too thin. After about 20 minutes, you get that classic glazed donut finish. Slightly firm on the outside. Still sweet and glossy.
I love making these on Sunday mornings.
The house is quiet. The aroma of vanilla and nutmeg starts filling the kitchen. And soon everyone’s wandering in asking, “Is breakfast ready yet?”
These donuts bring people together, you know?
Perfect for:
- Birthday brunches
- Holiday gatherings
- Tuesday mornings when you just need something special
The best part?
You don’t need fancy equipment. Just a donut pan. Don’t have one? They’re super affordable – like $10-15 at any kitchen store. And they’ll open up a whole new world of breakfast possibilities for you.
Fair warning though.
Once you taste these homemade donuts, store-bought ones will never hit the same again.
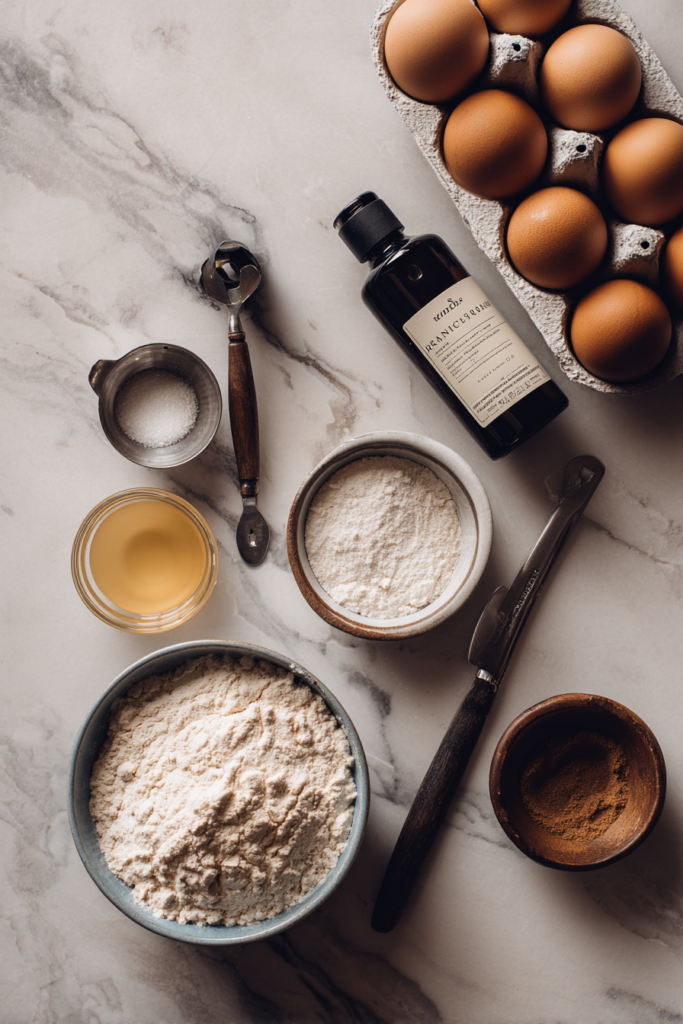
What You’ll Need
| Ingredient | Quantity | Notes |
|---|---|---|
| Baking spray | As needed | For greasing donut pan |
| Butter | 6 tablespoons | Melted and cooled, unsalted preferred |
| Canola oil | 2 tablespoons | Vegetable oil works too |
| Eggs | 2 large | Room temperature is essential |
| Vanilla extract | 2 teaspoons | Pure extract recommended |
| Buttermilk | 1¼ cups + extra | Room temperature, full-fat or low-fat |
| All-purpose flour | 2¼ cups | Spoon and level for accuracy |
| Granulated sugar | ¾ cup | White sugar only |
| Baking powder | 2 teaspoons | Check expiration date |
| Baking soda | ½ teaspoon | Fresh for best rise |
| Ground nutmeg | ⅛ teaspoon | Freshly ground if possible |
| Salt | ¾ teaspoon | For donut batter |
| For the Glaze: | ||
| Powdered sugar | 4 cups | Must be sifted |
| Milk or cream | 10-12 tablespoons | Whole milk works best |
| Vanilla extract | 2 teaspoons | For glaze |
| Salt | ⅛ teaspoon | Balances sweetness |
Prep Time: 10 minutes | Cook Time: 15 minutes | Total Time: 25 minutes
Servings: 12-14 donuts | Difficulty: Easy
Quick Notes on Ingredients
Flour: I always grab unbleached all-purpose flour. It has the cleanest flavor. But bleached? That works totally fine if it’s what you’ve got.
Here’s the key – measure it right.
Spoon the flour into your measuring cup. Then level it off with a knife. This prevents you from packing in too much flour and ending up with dense, heavy donuts.
Buttermilk: This is non-negotiable for tender donuts.
Full-fat gives the richest taste. Low-fat works in a pinch though.
Don’t have buttermilk? No problem. Add 1 tablespoon lemon juice to regular milk. Let it sit for 5 minutes. Boom – homemade buttermilk.
Oil: Canola, vegetable, or any neutral oil works great.
Just avoid olive oil or anything with a strong flavor. The oil is what keeps these donuts moist even the next day.
Nutmeg: This tiny amount makes a huge impact.
Want more spice? Bump it up to ¼ teaspoon. Prefer it milder? Just use a pinch. And if you can get freshly grated nutmeg – do it. The flavor is incredible.
How to Make These Donuts (Step by Step)
Step 1: Get Everything Ready
Preheat your oven to 350°F (176°C).
Grab your donut pan and spray it generously with baking spray. And I mean generously. Get into every little crevice. This recipe makes 12-15 donuts, so have extra pans ready if you’ve got them.
Step 2: Melt That Butter
Pop the butter in the microwave or melt it on the stovetop.
Then let it cool for about 5 minutes.
Why?
You want it liquid but not so hot that it scrambles your eggs. Room temperature is perfect.
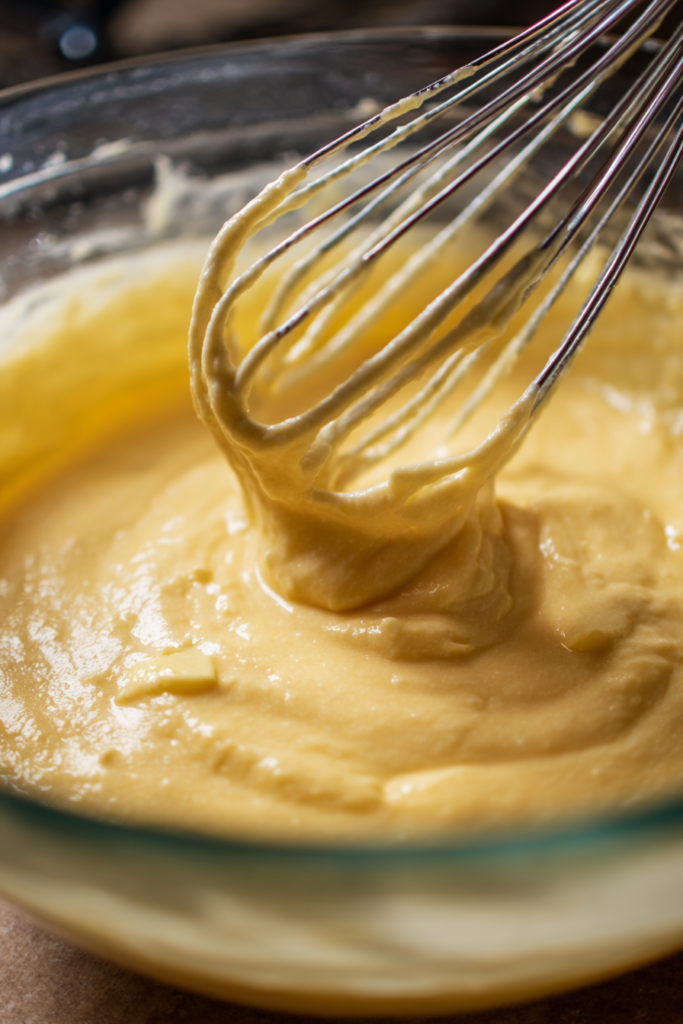
Step 3: Mix Your Wet Stuff
Grab a large mixing bowl. Whisk together the cooled butter, canola oil, eggs, vanilla extract, and buttermilk.
Whisk hard until everything’s completely combined and a little frothy. The mixture should look smooth and creamy.
Step 4: Combine Your Dry Stuff
In a separate large bowl, whisk together the flour, sugar, baking powder, baking soda, nutmeg, and salt.
Make sure there are no lumps hiding in there. The mixture should be one uniform color.
Step 5: Bring It All Together
Pour the wet ingredients into the dry ingredients.
Stir gently with a spatula or wooden spoon. Mix until just combined.
The batter will be thick. A little lumpy. That’s perfect.
Too stiff to pipe? Add an extra tablespoon or two of buttermilk.
But here’s the thing – don’t overmix. Seriously. Your donuts will end up tough and chewy instead of tender.
Step 6: Fill Those Pans
Transfer your batter to a piping bag. Don’t have one? Use a large ziplock bag with one corner snipped off.
Pipe the batter into each donut cavity. Fill them about ¾ full.
If the batter doesn’t connect to form a complete ring, just wet your fingertip and smooth it together. Easy fix.

Step 7: Bake Until Golden
Pop them in the oven for 12-14 minutes. You want them golden brown.
How do you know they’re done?
Stick a toothpick into a donut. It should come out clean.
Watch carefully during those last few minutes. Overbaked donuts = dry donuts. Nobody wants that.
Step 8: Let Them Cool
Here’s where patience comes in.
Let the donuts cool in the pan for 10 minutes. They’re too fragile to move right away. Trust me – I’ve tried. It doesn’t end well.
After 10 minutes, gently flip the pan over. Tap them out onto a wire cooling rack.
Then cool for another 15-20 minutes before glazing.
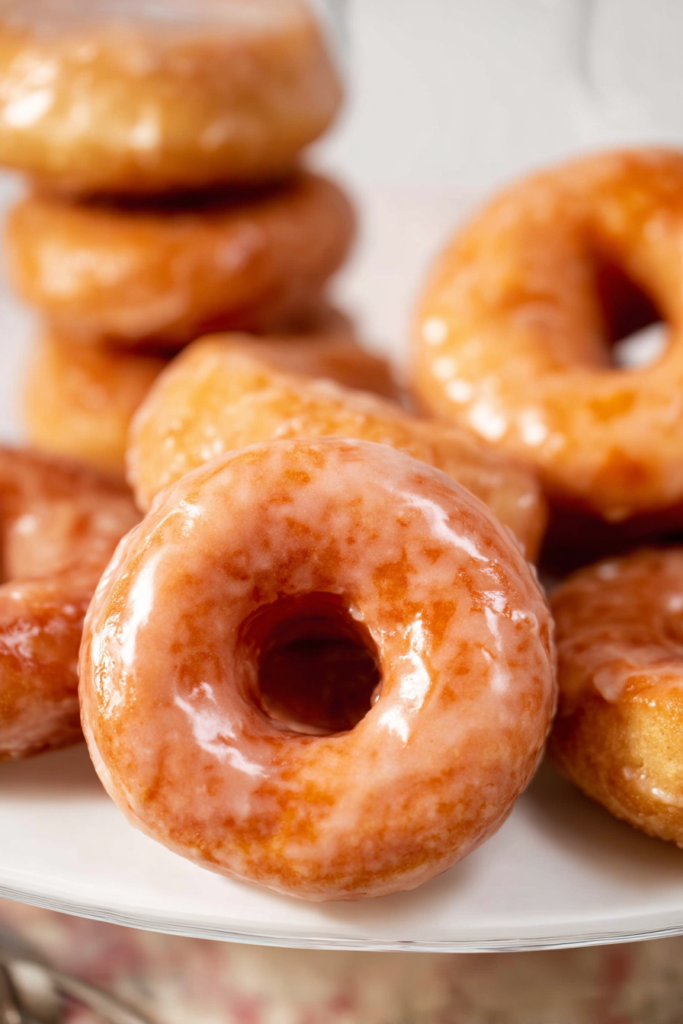
Step 9: Make That Beautiful Glaze
While your donuts are cooling, sift the powdered sugar into a medium bowl.
Add milk (start with 10 tablespoons), vanilla extract, and salt. Whisk until it’s smooth and pourable.
Too thick? Add more milk. Too thin? Add more powdered sugar.
Easy adjustments.
Step 10: Glaze Time
Place parchment paper under your cooling rack. (This catches all the drips and makes cleanup way easier.)
Dip each cooled donut into the glaze. You can coat one side or both – your choice.
Let them sit on the rack for 20 minutes.
The glaze will set into that classic shiny finish. Slightly firm but still sweet and delicious.
My Best Tips for Perfect Donuts
Get your ingredients to room temperature.
Cold eggs and buttermilk won’t mix well with melted butter. They just don’t play nice together.
Set everything out 30 minutes before you start baking. This small step makes a big difference.
Stop mixing as soon as the flour disappears.
Once you combine wet and dry ingredients, mix only until you can’t see flour anymore.
Overmixing develops gluten. And gluten = tough, dense donuts instead of tender, fluffy ones.
Check your baking powder and baking soda.
These lose power over time.
If yours are older than 6 months, grab fresh ones. Old leaveners mean flat, sad donuts.
A kitchen scale is your friend.
Measuring flour by weight gives you consistent results every single time.
2¼ cups should equal about 280 grams.
Test one donut first.
Not sure about baking time? Test a donut with a toothpick at the 12-minute mark.
Every oven is different. Mine runs hot. Yours might run cool. Better to check early than overbake the whole batch.
Cake Donuts vs Yeast Donuts – What’s The Deal?
These are cake donuts.
That means they use chemical leaveners (baking powder and baking soda) instead of yeast.
Cake donuts have a denser, more tender crumb. Think muffin texture. They’re super quick to make since there’s no rising time.
Yeast donuts?
Those are lighter and airier. But they need kneading. Multiple rises. Way more time. Yeast donuts are usually fried, while cake donuts can be baked or fried.
Both styles are delicious.
But cake donuts win for convenience. And for that nostalgic, old-fashioned texture we all crave.
How to Store These
Eat them fresh.
Glazed donuts taste incredible the day they’re made. The glaze is at peak perfection. The texture is spot-on.
Room temperature storage works fine.
Keep leftover donuts in an airtight container at room temperature for up to 3 days. They’ll stay pretty fresh, though the glaze might soften a bit.
You can freeze them.
Freeze the donuts unglazed for up to 3 months.
Place cooled donuts in a freezer-safe container. Separate the layers with parchment paper so they don’t stick together.
When you’re ready to eat them? Thaw at room temperature for about an hour. Then make fresh glaze and dip them. They’ll taste like you just made them.
Questions You Might Have
Can I make these without a donut pan?
Unfortunately… you really need a donut pan for this recipe.
The batter is designed for baking, not frying. And donut pans are pretty cheap – around $10-15 at most kitchen stores. If you love donuts, it’s a solid investment.
Why did my donuts turn out dense?
This usually happens from:
- Overmixing the batter
- Using too much flour
Make sure you’re measuring flour correctly. Spoon it into the cup – don’t scoop. And mix only until the ingredients just come together.
Can I use regular milk instead of buttermilk?
Buttermilk is really important here. It makes the donuts tender and adds that special flavor.
But if you absolutely must substitute?
Add 1 tablespoon of lemon juice or vinegar to regular milk. Let it sit for 5 minutes. This creates a buttermilk substitute that works pretty well.
How do I know when the glaze is the right consistency?
The glaze should slowly drip off a spoon. Not watery, but not super thick either.
When you dip a donut, it should coat nicely without immediately running off.
Add milk or powdered sugar in small amounts until you get it just right.
Can I add different flavors to the glaze?
Absolutely!
Try these:
- Cocoa powder for chocolate glaze
- Maple extract for maple flavor
- Lemon zest for citrus notes
- A little espresso powder for coffee glaze
Get creative. Make it your own.
Why are my donuts sticking to the pan?
You probably didn’t use enough baking spray.
Coat every single part of each cavity. Non-stick spray with flour works best.
Also – let the donuts cool for the full 10 minutes before trying to remove them. If you rush this step, they’ll stick or break.
Enjoy your homemade Old Fashioned Glazed Donuts! They’re perfect for breakfast, brunch, or honestly anytime you need something sweet and wonderful.
Old Fashioned Glazed Donuts
Ingredients
Method
- Preheat your oven to 350°F (176°C). Spray donut pan generously with baking spray, getting into every crevice.
- Melt the butter in the microwave or on the stovetop. Let it cool for about 5 minutes until it’s liquid but not hot.
- In a large mixing bowl, whisk together the cooled butter, canola oil, eggs, vanilla extract, and buttermilk until completely combined and slightly frothy.
- In a separate large bowl, whisk together the flour, sugar, baking powder, baking soda, nutmeg, and salt until uniform with no lumps.
- Pour the wet ingredients into the dry ingredients. Stir gently with a spatula until just combined. The batter will be thick and slightly lumpy. Don’t overmix. If too stiff to pipe, add 1-2 tablespoons of buttermilk.
- Transfer batter to a piping bag or large ziplock bag with one corner snipped off. Pipe the batter into each donut cavity, filling about ¾ full. If batter doesn’t form a complete ring, wet your fingertip and smooth it together.
- Bake for 12-14 minutes until golden brown. Test with a toothpick – it should come out clean. Watch carefully to avoid overbaking.
- Let donuts cool in the pan for 10 minutes. Then gently flip the pan over and tap them out onto a wire cooling rack. Cool for another 15-20 minutes before glazing.
- While donuts cool, make the glaze: Sift powdered sugar into a medium bowl. Add 10 tablespoons milk, vanilla extract, and salt. Whisk until smooth and pourable. Adjust thickness with more milk or powdered sugar as needed.
- Place parchment paper under the cooling rack. Dip each cooled donut into the glaze, coating one or both sides. Let sit on rack for 20 minutes until glaze sets into a shiny finish.