Picture this.
You’re pulling a golden loaf of pumpkin bread from the oven on a crisp autumn morning. The smell of warm cinnamon and nutmeg hits you instantly. It fills every corner of your kitchen.
And just like that… your home feels cozy and inviting.
I’ve spent countless weekends perfecting this recipe. Honestly? I’m beyond excited to share my foolproof version with you today.
Here’s what makes this pumpkin bread so special.
It’s ridiculously simple.
No fancy equipment. No hard-to-find ingredients. Everything comes together in one bowl. You’ll have the batter ready in about ten minutes flat.
The result?
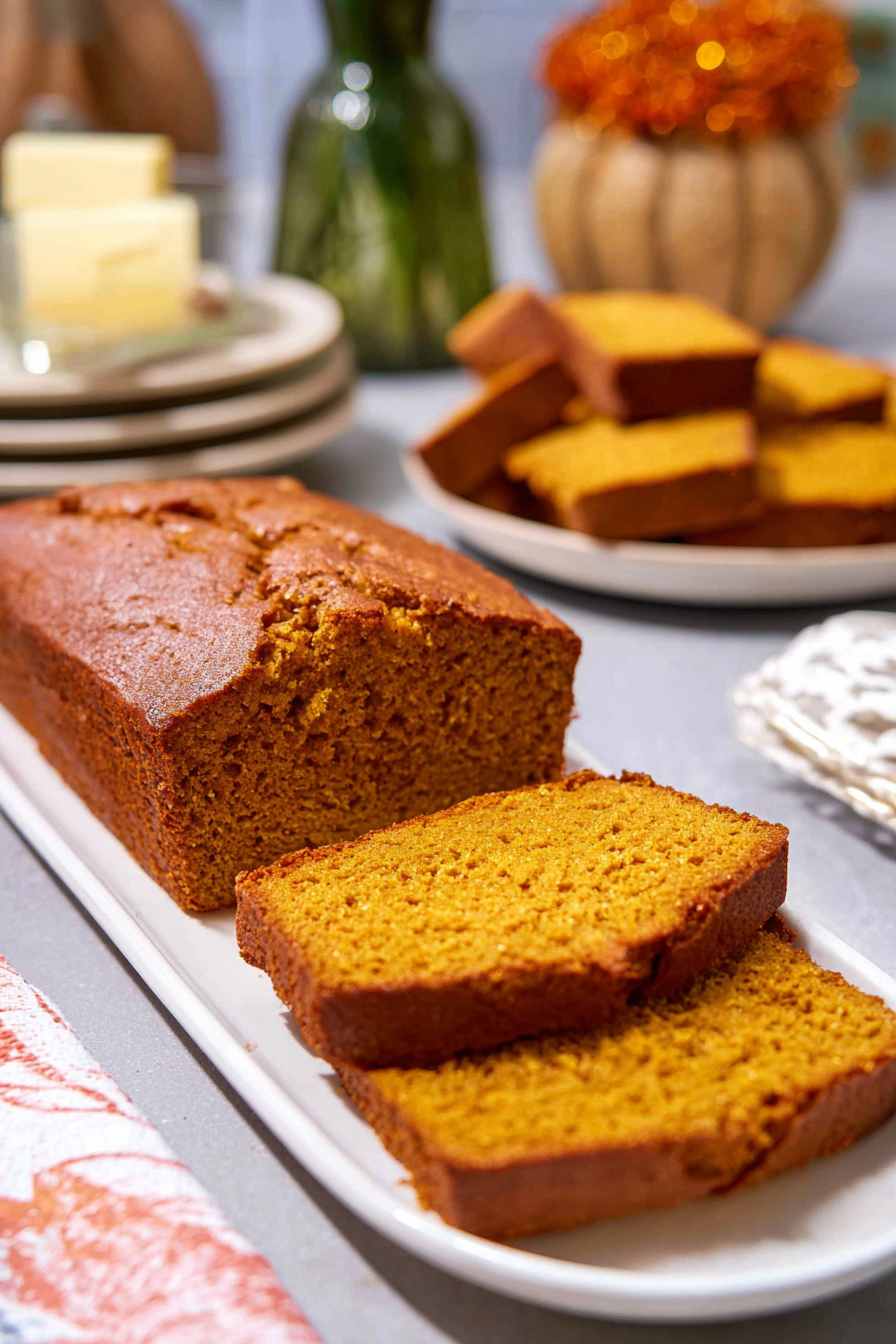
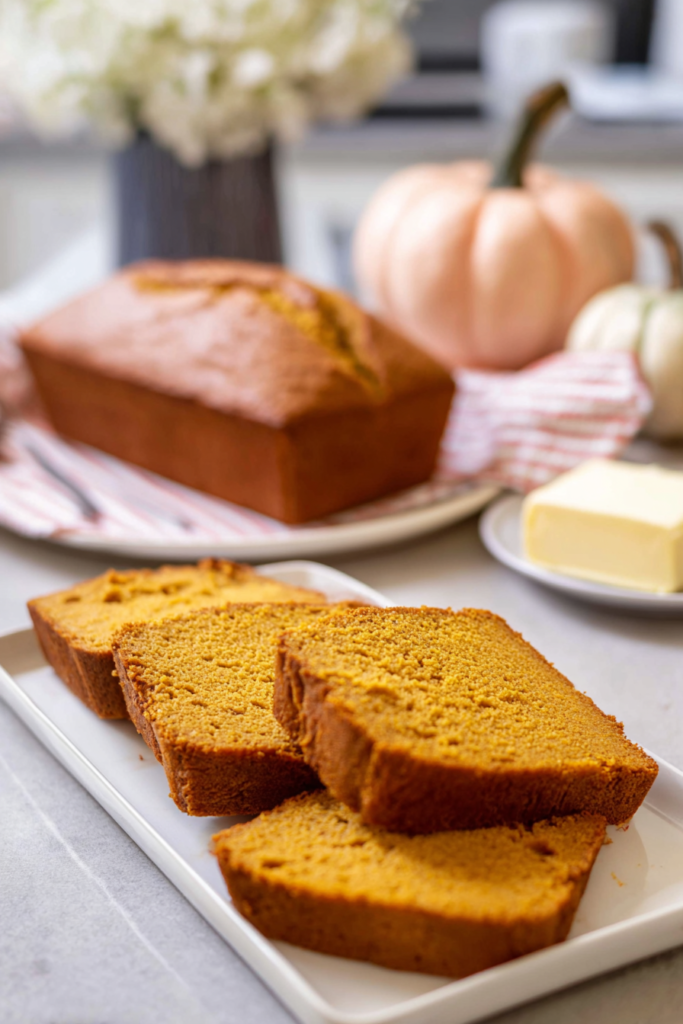
A perfectly moist, tender loaf with just the right amount of sweetness and spice.
I’ve baked this recipe more times than I can count. Each time, I’d tweak something. Adjust something else. Until finally… I achieved that ideal crumb structure.
The texture? Wonderfully soft without being dense.
And it stays fresh for days.
My friends and family constantly request this recipe. Especially during fall when pumpkins are everywhere. One friend actually asked me to make three loaves for her daughter’s bake sale. That’s how good it is.
Prep Time: 10 minutes | Cook Time: 60 minutes | Total Time: 1 hour 10 minutes
Servings: 12 slices | Difficulty: Easy
The beauty of this bread?
Its versatility.
- Enjoy a thick slice for breakfast with your morning coffee
- Pack it in lunchboxes for an afternoon treat
- Serve it as a simple dessert after dinner
I often make two loaves at once. One to enjoy immediately. Another to freeze for later.

Understanding Your Ingredients
Let me walk you through what you’ll need.
Each ingredient plays a specific role in creating the perfect loaf.
Pumpkin Puree is the heart of this recipe.
I always reach for canned pumpkin puree. Why? Because it delivers consistent results every single time.
Here’s the catch though.
Look for pure pumpkin on the label. Not pumpkin pie filling. That stuff contains added sugars and spices that’ll throw off the balance.
The puree adds moisture and that distinct earthy-sweet pumpkin flavor we all love.
All-Purpose Flour creates the structure.
I’ve tested this recipe with various flour types. Regular all-purpose works beautifully. The protein content is just right for a tender crumb that isn’t too delicate or too sturdy.
Vegetable Oil might seem unusual.
But here’s the secret.
It’s actually what makes this bread incredibly moist. Unlike butter (which solidifies when cooled), oil stays liquid at room temperature.
This keeps your bread soft and tender. Even after sitting on the counter for a couple of days.
Granulated Sugar does two things.
It sweetens the loaf. And it helps create that lovely golden crust.
I prefer white sugar here because it lets the pumpkin flavor shine through. Brown sugar would add competing caramel notes.
Warm Spices transform everything.
Ground cinnamon provides warmth. Freshly grated nutmeg adds a subtle complexity that makes people ask, “What’s your secret ingredient?”
And honestly? That’s my favorite part.
Leavening Agents work together here.
Both baking soda and baking powder give your bread a beautiful rise. The combination creates a loaf that’s light and airy. Not heavy and compact.
Complete Ingredients List
| Ingredient | Quantity | Notes |
|---|---|---|
| All-purpose flour | 1¾ cups (210g) | Spooned and leveled |
| Baking soda | 1 teaspoon | Fresh for best rise |
| Baking powder | ½ teaspoon | Helps with lift |
| Salt | ½ teaspoon | Enhances flavors |
| Ground cinnamon | 2 teaspoons | For warmth |
| Grated nutmeg | ¼ teaspoon | Freshly grated preferred |
| Pumpkin puree | 1⅓ cups (300g) | Pure pumpkin only |
| Granulated sugar | 1¼ cups (250g) | White sugar works best |
| Vegetable oil | ⅔ cup (160ml) | Canola also works |
| Large eggs | 2 | Room temperature |
| Vanilla extract | 1 teaspoon | Pure extract preferred |
Smart Ingredient Substitutions
I love experimenting with variations.
And this recipe? It’s wonderfully forgiving.
Here are some swaps that work beautifully.
For the oil:
Melted coconut oil adds a subtle tropical note. Light olive oil works perfectly without overwhelming the pumpkin flavor. Avocado oil is another excellent neutral option.
For the sugar:
Swap up to half the white sugar with light brown sugar. You’ll get deeper, molasses-like undertones. Plus, the extra moisture from brown sugar makes the bread even more tender.
For dietary needs:
Your favorite gluten-free flour blend works wonderfully here. Just use a one-to-one substitute. Don’t adjust any other ingredients.
For the spices:
Got pumpkin pie spice in your pantry? Use two teaspoons instead of measuring individual spices. It simplifies things without sacrificing flavor.
Step-by-Step Baking Instructions
Getting perfect pumpkin bread is all about technique and timing.
Let me guide you through the process. These are tips I’ve learned through trial and error.
Step 1: Prepare Your Workspace
Start by preheating your oven to 350°F.
This gives it plenty of time to reach the right temperature while you mix your batter.
Grab a 9×5-inch loaf pan. Coat it thoroughly with baking spray.
Don’t skip this step.
Proper greasing ensures your beautiful loaf slides out effortlessly after baking.
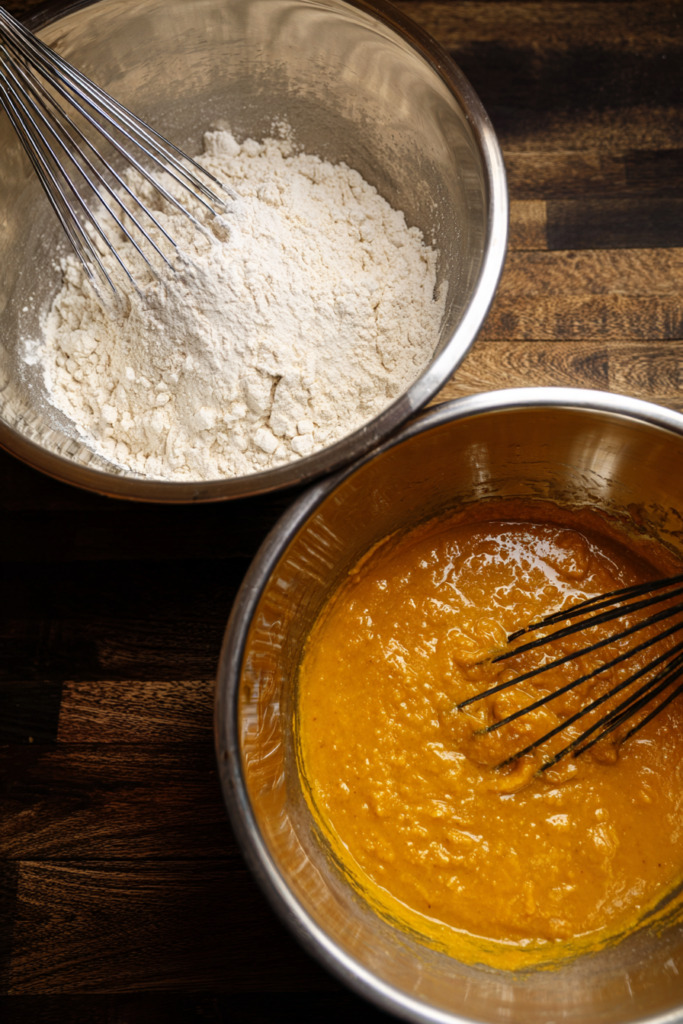
Step 2: Combine the Dry Ingredients
Take a large mixing bowl. Add your flour, baking soda, baking powder, salt, cinnamon, and nutmeg.
Use a whisk to blend everything together for about 30 seconds.
This distributes the leavening agents and spices evenly throughout the flour.
You’ll notice something cool here.
The mixture takes on a warm, speckled appearance from the cinnamon.
Step 3: Mix the Wet Ingredients
In a separate medium bowl, combine the pumpkin puree, sugar, vegetable oil, eggs, and vanilla extract.
Here’s a crucial tip I learned the hard way.
Start whisking gently at first.
If you whisk too vigorously right away, the oil can splash out of the bowl. (Trust me on this. I’ve cleaned up that mess more than once.)
Once everything starts coming together, whisk more energetically. Keep going until the mixture becomes smooth and uniform.
The batter should look glossy and well-emulsified.
You’ll see the sugar beginning to dissolve. And the mixture will have a beautiful orange hue from the pumpkin.
Step 4: Bring It All Together
Create a well in the center of your dry ingredients.
Pour the wet mixture directly into this well.
Using a silicone spatula or wooden spoon, gently fold the ingredients together. Start from the center. Work your way outward in smooth, deliberate strokes.
Now here’s the important part.
Stop mixing as soon as you no longer see streaks of flour.
A few small lumps? Perfectly fine. They’ll disappear during baking.
Overmixing develops gluten strands. Which leads to tough, chewy bread instead of the tender texture we’re after.
Step 5: Transfer and Bake
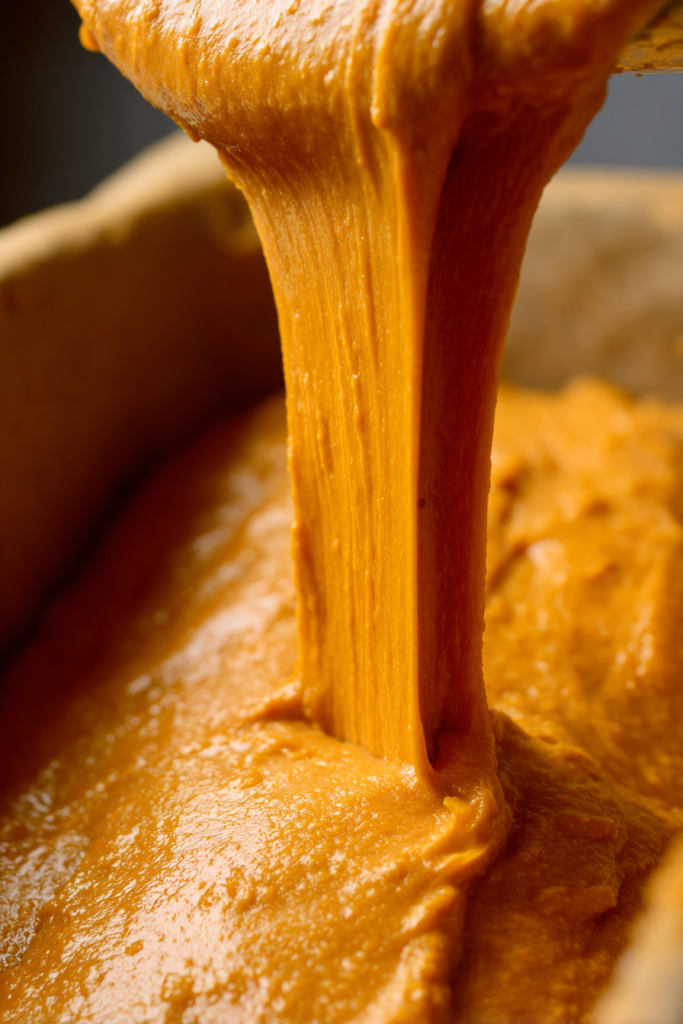
Pour your batter into the prepared loaf pan.
Use your spatula to smooth the top surface gently.
The batter will be quite thick. Almost like a very dense cake batter. This thickness is exactly what we want.
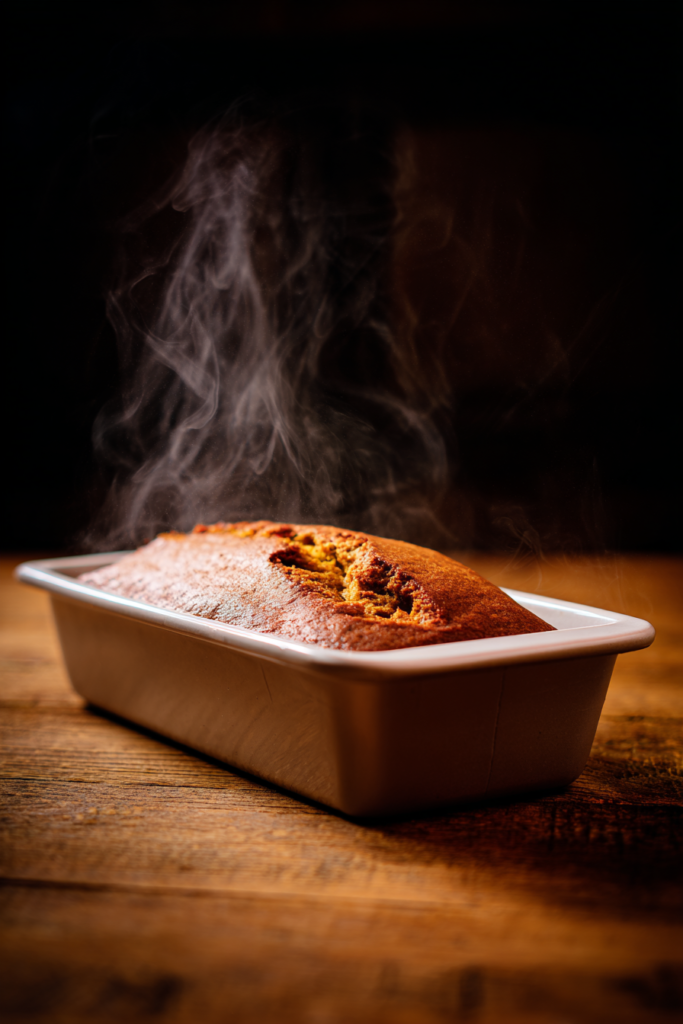
Place the pan in your preheated oven. Set a timer for 60 minutes.
After about 30 minutes of baking, check on your loaf.
If the top is already deeply golden? Loosely tent it with aluminum foil. This prevents the surface from burning while the inside continues cooking.
Step 6: Test for Doneness
At the one-hour mark, perform the toothpick test.
Insert a wooden toothpick or thin knife into the center of the loaf. It should emerge with just a few moist crumbs clinging to it.
If you see wet batter? Give it another five minutes. Test again.
Another method is the touch test.
Gently press the top of the bread with your fingertip. The surface should spring back immediately. Not leave an indent.
This springiness indicates the bread has set properly.
Step 7: Cool Properly
Remove the pan from the oven. Place it on a wire cooling rack.
Let the bread rest in the pan for exactly 15 minutes.
This resting period allows the structure to firm up. Makes it easier to remove from the pan without breaking.
After 15 minutes, run a butter knife around the edges of the pan. Loosen any stuck bits.
Carefully invert the pan to release the loaf onto the cooling rack.
Turn it right-side up. Let it cool completely before slicing.
Essential Baking Tips I’ve Learned
Measure Flour Correctly
Scooping flour directly from the bag packs it down. You end up with too much flour.
Instead?
Fluff the flour with a spoon. Then gently spoon it into your measuring cup. Level it off with a straight edge.
This one tip made a huge difference in my baking.
Room Temperature Matters
Cold eggs straight from the refrigerator don’t incorporate as smoothly into the batter.
Let them sit on the counter for 30 minutes before baking. Or place them in warm water for five minutes.
Fresh Nutmeg Makes a Difference
Pre-ground nutmeg loses its potency quickly.
If you have whole nutmeg? Grate it fresh using a microplane grater.
The flavor difference is remarkable. Like night and day.
Don’t Rush the Cooling
I know it’s tempting to slice into warm bread.
But patience pays off here.
Warm bread crumbles easily. It doesn’t showcase that perfect texture. Wait until it reaches room temperature for clean, beautiful slices.
Creative Variations to Try
Once you’ve mastered the basic recipe, these variations add exciting new dimensions.
For added crunch:
Fold in half a cup of chopped toasted pecans or walnuts. Do this just before pouring the batter into the pan. The nuts add wonderful texture contrast.
For chocolate lovers:
Stir in chocolate chips.
Dark chocolate provides a sophisticated bitterness that balances the sweetness. Milk chocolate creates a more dessert-like treat.
For extra moisture:
Dried cranberries or chopped dates scattered throughout the batter. They add chewy pockets of concentrated sweetness.
For a finishing touch:
Mix powdered sugar with a splash of milk and cinnamon. Creates a simple glaze. Drizzle it over the cooled loaf for an elegant presentation.
How to Serve This Delicious Bread
Pumpkin bread shines in so many different serving situations.
For breakfast?
I love toasting thick slices until the edges get slightly crispy. The warmth intensifies the spices. Creates an irresistible aroma.
Spread a generous pat of butter on top. Watch it melt into all those little air pockets.
For an indulgent afternoon snack, try spreading cream cheese on a slice.
The tangy richness complements the sweet pumpkin perfectly.
Want to take it up a notch?
Maple-flavored cream cheese. It takes this combination to another level entirely.
When serving guests, present thin slices arranged on a platter. Alongside hot tea or coffee.
The bread holds its shape beautifully when cut thin. Makes it perfect for elegant entertaining.
If you enjoy warm desserts, microwave individual slices for about 15 seconds.
This gentle reheating makes the bread taste freshly baked. Without drying it out.
Storage Guidelines
Proper storage keeps your pumpkin bread tasting fresh for days.
Once the loaf has cooled completely to room temperature, wrap it tightly. Use plastic wrap or aluminum foil.
It stays fresh on your kitchen counter for up to three days.
For longer storage?
Refrigeration extends the life to five days. Keep the bread wrapped to prevent it from absorbing other flavors. Or drying out from the cold air.
Freezing works wonderfully for this recipe.
Slice the entire loaf before freezing. Then wrap each slice individually in plastic wrap. Bundle the wrapped slices together in a freezer-safe zip-top bag.
This method lets you thaw individual portions as needed. Without defrosting the entire loaf.
Frozen pumpkin bread stays delicious for up to three months.
To thaw? Simply leave slices at room temperature for an hour. Or microwave them for 20-30 seconds straight from frozen.
Frequently Asked Questions
Can I make muffins instead of a loaf?
Absolutely.
This batter works perfectly for muffins.
Line a muffin tin with paper liners. Fill each cup about two-thirds full. Reduce the baking time to 20-22 minutes. Test with a toothpick to ensure they’re done.
You’ll get approximately 12 standard-size muffins from this recipe.
Why is my bread too dense?
Dense bread usually results from overmixing the batter.
When you stir too much, you develop gluten strands. These create a tough, heavy texture.
Mix only until the flour disappears into the wet ingredients.
Another common cause?
Using too much flour. Always measure carefully using the spoon-and-level method.
Can I use fresh pumpkin instead of canned?
Yes. But with an important adjustment.
Fresh pumpkin puree contains more water than canned versions.
After pureeing your cooked pumpkin, spread it on paper towels. Let it sit for ten minutes to absorb excess moisture.
Otherwise? Your bread may turn out soggy. Or take much longer to bake through.
How do I know when the bread is perfectly done?
Use two tests together for confidence.
First, insert a toothpick into the center. It should come out with a few moist crumbs. But no wet batter.
Second, gently press the top of the loaf with your finger. The surface should feel firm. Spring back immediately.
What if the top browns too quickly?
If your loaf’s surface is getting too dark before the inside finishes cooking, loosely cover it with aluminum foil.
This shields the top from direct heat. Allows the center to continue baking.
Usually, this happens around the 30-minute mark. Check your bread at that point.
I hope you enjoy making this pumpkin bread as much as I do.
The simple process and incredible results make it my go-to recipe whenever autumn arrives.
Happy baking!

Easy Pumpkin Bread
Ingredients
Method
- Preheat your oven to 350°F. Coat a 9×5-inch loaf pan thoroughly with baking spray.
- In a large mixing bowl, whisk together the flour, baking soda, baking powder, salt, cinnamon, and nutmeg for about 30 seconds until evenly distributed.
- In a separate medium bowl, combine the pumpkin puree, sugar, vegetable oil, eggs, and vanilla extract. Whisk gently at first, then more vigorously until the mixture becomes smooth, glossy, and well-emulsified.
- Create a well in the center of the dry ingredients. Pour the wet mixture into the well.
- Using a silicone spatula or wooden spoon, gently fold the ingredients together, starting from the center and working outward. Mix only until no streaks of flour remain. A few small lumps are fine—do not overmix.
- Pour the batter into the prepared loaf pan and smooth the top gently with your spatula.
- Bake for 60 minutes. After 30 minutes, check if the top is deeply golden and loosely tent with aluminum foil if needed to prevent burning.
- Test for doneness by inserting a toothpick into the center—it should come out with just a few moist crumbs. The top should spring back when gently pressed.
- Remove from oven and let the bread rest in the pan on a wire cooling rack for exactly 15 minutes.
- Run a butter knife around the edges, invert the pan to release the loaf, and turn right-side up. Let cool completely before slicing.
Leave a Reply