
You know that feeling when you bite into a warm donut fresh from the fryer?
Yeah, that’s what we’re talking about today.
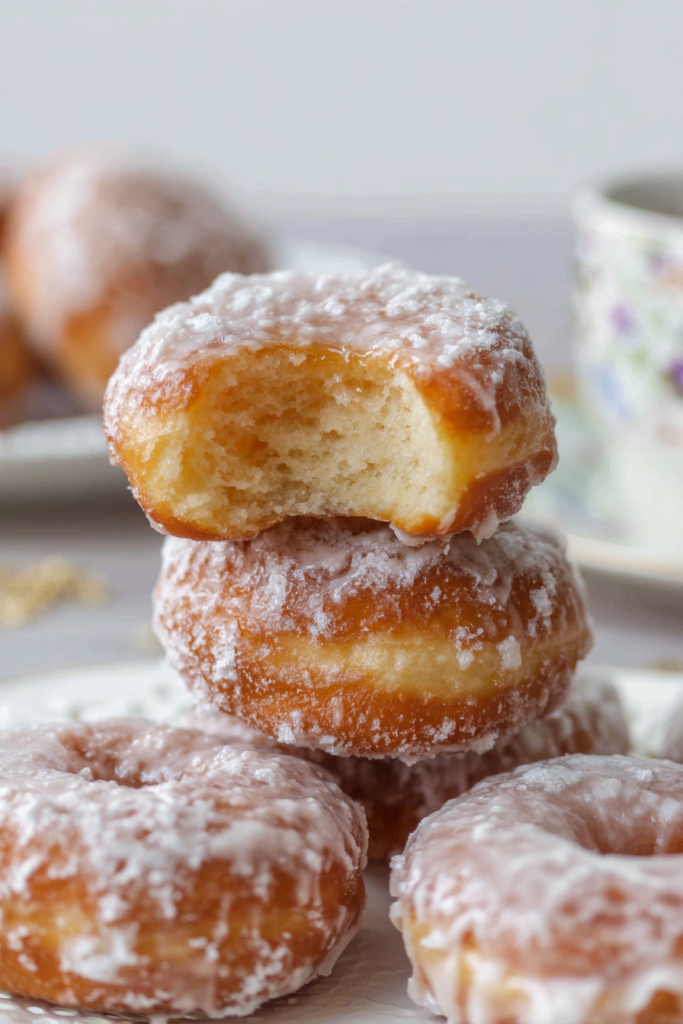
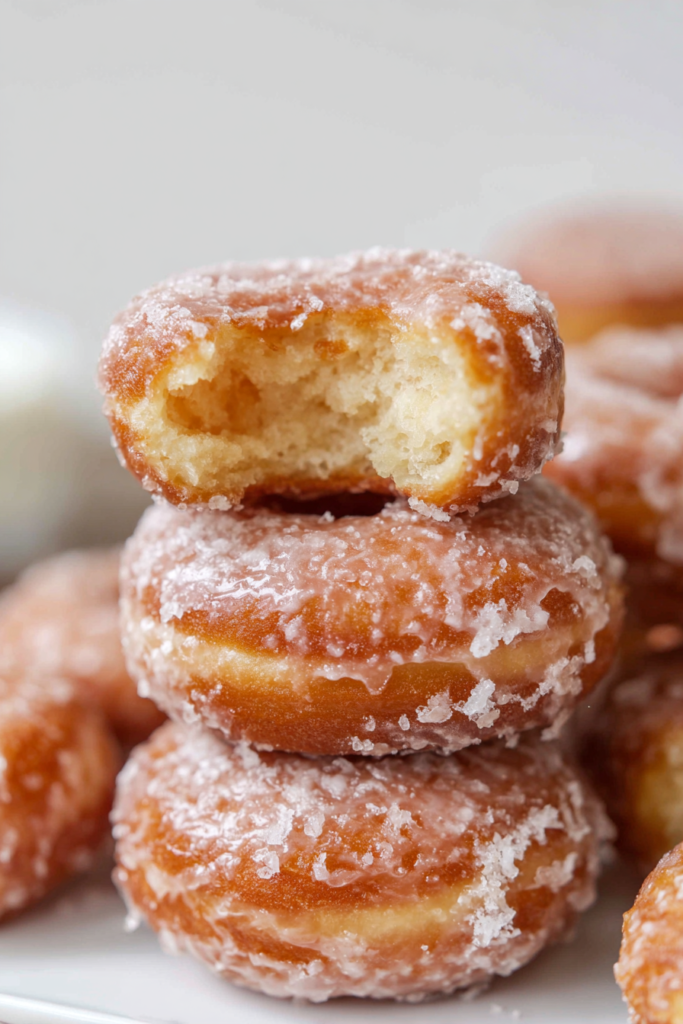
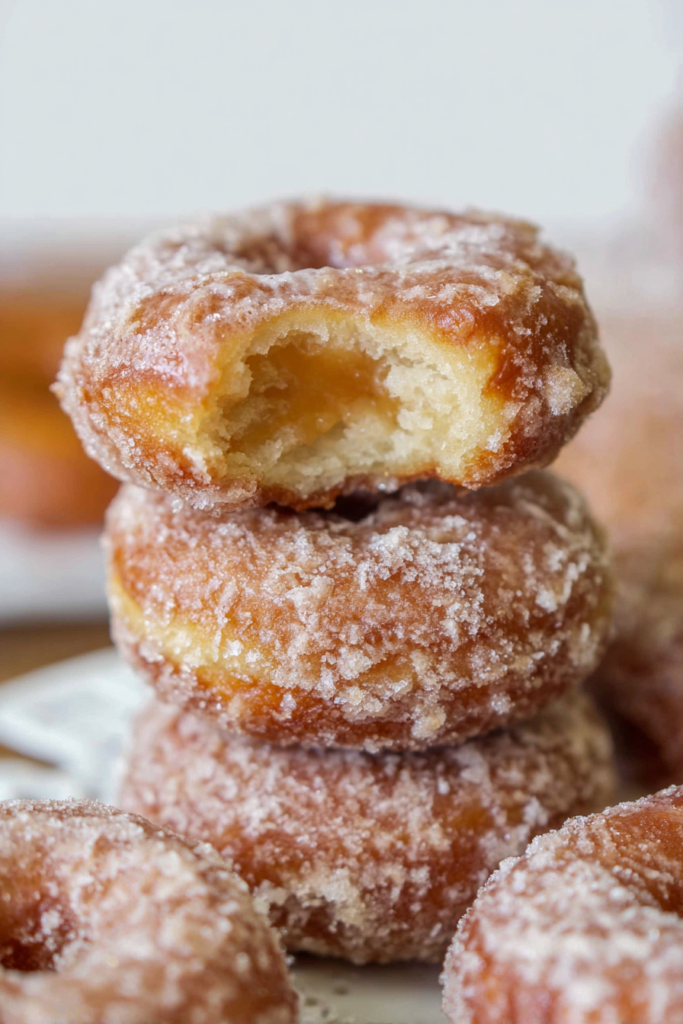
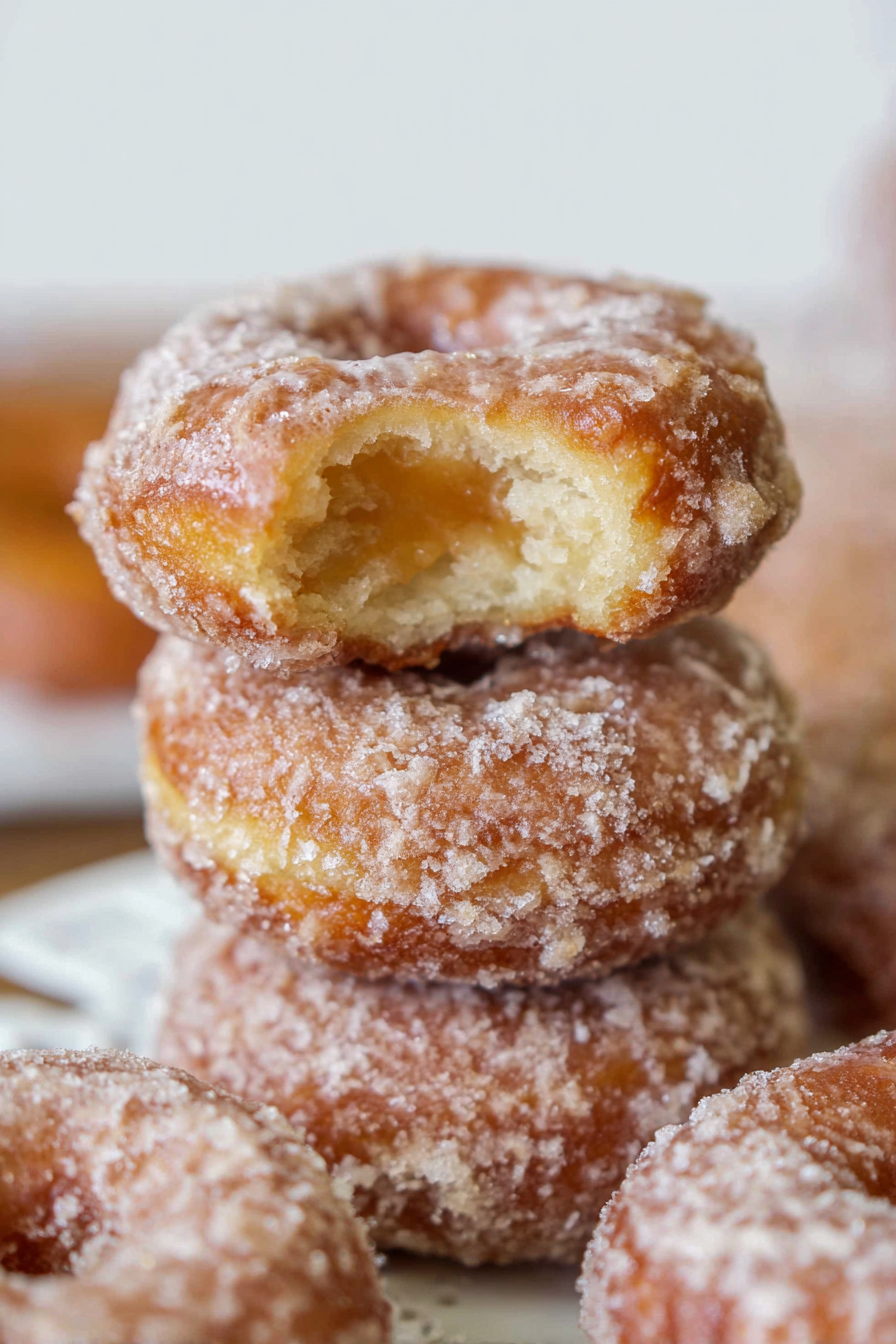
These old-fashioned sour cream donuts hit different. The outside? Crispy with this amazing crackle. The inside? So soft it practically melts in your mouth.
I’ll be honest with you. I’ve made these donuts more times than I can count. What started as a random Saturday morning craving turned into a full-blown donut obsession. But here’s the thing – after all that trial and error, I finally cracked the code.
And the best part? You don’t need to be a professional baker to pull this off.
No yeast. No waiting around for hours. Just mix, chill, cut, and fry. In about 2.5 hours, you’ll have bakery-quality donuts sitting on your counter. Promise.
Recipe Timing:
Prep Time: 30 minutes | Cook Time: 30 minutes | Chill Time: 90 minutes | Total Time: 2 hours 30 minutes
Servings: 13 donuts | Difficulty: Moderate
Why You Need These Donuts in Your Life
The Texture is Insane
Look, I’m picky about donuts. They need that perfect contrast – crispy outside, pillowy inside. These deliver every single time.
The sour cream? That’s the secret weapon. It keeps everything tender without making the donuts greasy.
Fits Your Crazy Schedule
Sunday evening rolls around. You mix up the dough. Stick it in the fridge.
Wednesday morning? Fry up fresh donuts for breakfast. The dough literally waits for you – up to three days.
You Won’t Mess This Up
I get it. Frying seems scary.
But I’ve broken this down into super simple steps. Will your first batch be perfect? Maybe not. Will your second batch blow your mind? Absolutely.
The Sour Cream Thing – Why It Actually Matters
Here’s what most people don’t realize about sour cream in donuts.
It’s not just about flavor. Sure, it adds a little tang. But that’s the least important part.
The fat keeps everything soft. Without it, you end up with tough, chewy donuts. Nobody wants that.
The thickness? That’s crucial. Too much liquid and your donuts turn gummy and soak up oil like a sponge. Sour cream gives you just the right amount of moisture.
And here’s the cool part – the acidity kicks the baking powder into gear immediately. First reaction happens when you mix. Second reaction happens when the donuts hit the hot oil. That’s how you get that perfect puff.
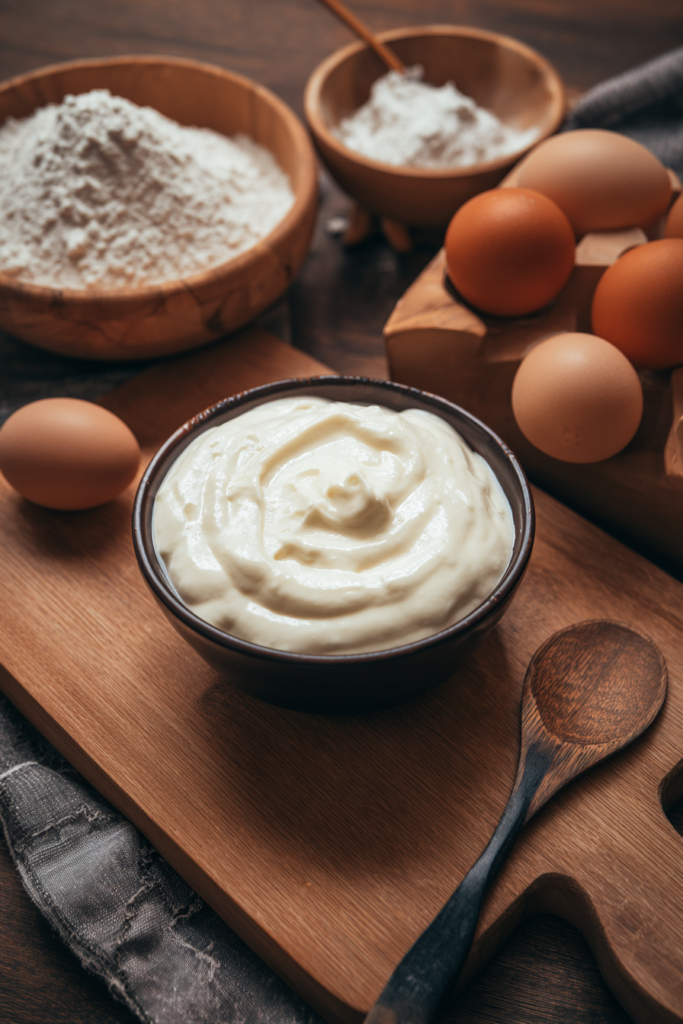
What You’ll Need (And Why Each Ingredient Matters)
| Ingredient | Quantity | Notes |
|---|---|---|
| Pastry flour | 4¾ cups | All-purpose flour works perfectly too |
| Baking powder | 1 tablespoon | Must be fresh for proper rise |
| Kosher salt | 1 tablespoon | Enhances all flavors in the dough |
| Granulated sugar | 1¼ cups | Adds sweetness and helps with texture |
| Unsalted butter | 2½ tablespoons | Controls saltiness in final product |
| Egg yolks | 5 large | Creates rich, tender crumb structure |
| Sour cream | 1½ cups | The star ingredient for moisture |
| Vegetable oil | 96 oz | For frying; needs high smoke point |
| Whole milk | ⅓ cup | For the glaze coating |
| Powdered sugar | 3¼ cups | Creates smooth, sweet glaze |
| Salt (for glaze) | 1 teaspoon | Balances sweetness in coating |
About That Flour
All-purpose works great. It’s got just enough gluten to hold things together without making your donuts tough.
Could you use cake flour? Sure. But I’ve been using all-purpose for years and haven’t looked back.
Sugar Does More Than You Think
Obviously it makes things sweet. But when you beat it with the eggs, it creates these tiny air pockets. Those expand when you fry. That’s how you get light, puffy donuts.
The Yolk-Only Thing
Why not use whole eggs? Good question.
Egg whites add water without fat. That makes tough donuts. The yolks bring richness and actually make the gluten strands shorter. Result? Tender, cakey texture.
Baking Powder is Non-Negotiable
Use double-acting. Not baking soda.
Here’s why: baking powder reacts twice. Once with the sour cream. Again with heat. Baking soda? Reacts once and you’re done. No second chance when it hits the oil.
Pick Your Oil Wisely
Vegetable or canola. Both work perfectly.
Skip the olive oil. You don’t want that flavor competing with your donuts.
Let’s Make Some Dough
Get Your Bowls Ready
Grab two large bowls.
First bowl: Whisk flour, baking powder, and salt together. This makes sure everything’s evenly mixed.
Second bowl: Line it with plastic wrap. Spray the wrap really well with cooking spray. You’ll thank me later.
Mix Sugar and Butter
Throw sugar and butter in your stand mixer with the paddle attachment. Beat on high.
It won’t look like normal creamed butter. Don’t worry. The ratio is weird here. Just beat until the butter completely disappears into the sugar.
Add Those Yolks
All five yolks go in. Keep beating on high for about two minutes.
Watch it change. Grainy to smooth. Pale yellow and fluffy.
Scrape down the bowl a few times. Everything needs to mix evenly.
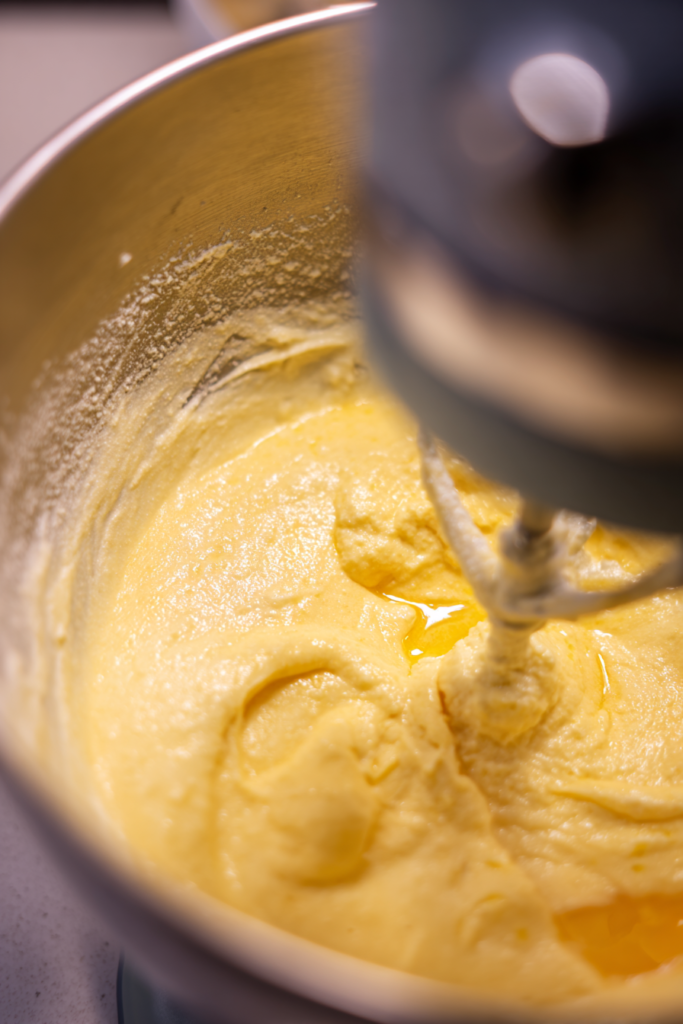
The Alternating Game
Switch to low speed.
Big spoonful of flour. Big spoonful of sour cream. Repeat until both are gone.
Speed matters here. Work fast. The second those last flour streaks disappear, stop mixing. Overmixing = tough donuts with weird tunnels through them.
Chill Time Number One
Move your dough to that plastic-lined bowl. Spray the top. Fold the plastic over.
Into the fridge for at least 60 minutes. Not optional. This is mandatory.
Cold dough rolls easier. Cuts cleaner. And the baking powder won’t start reacting too early.
Cutting Your Donuts
Prep Your Station
Baking sheet with parchment paper. Spray it.
Work surface covered in flour. And I mean covered. This dough is sticky. Flour is your best friend.
Dust the top of your chilled dough while it’s still in the bowl. Flip it onto your floured surface. Dust the top again.
Roll It Out
Work fast to keep everything cold.
Half inch thick. Exactly.
Too thin? Dense donuts. Too thick? Raw centers.
Use even pressure. Rotate occasionally to keep the thickness uniform.
Cut Those Shapes
Brush off excess flour first.
Dip your 3-inch cutter in flour. Press straight down. Don’t twist.
Use the 1¼-inch cutter for the holes. Put everything on your baking sheet.
Tap the cutters in flour before each cut. Trust me.
Chill Time Number Two
Cover loosely with plastic wrap. Don’t let it touch the tops.
Back in the fridge for at least 30 minutes.
This is huge for shape retention. Cold donuts hold together in hot oil. Room temp ones? They fall apart.
Making the Glaze is Easy
Milk, powdered sugar, salt. Whisk until smooth.
Should look like thick cream. No lumps.
Cover directly with plastic wrap. This stops a skin from forming while you’re frying.
If your donuts are hot enough when you dip them, the glaze doesn’t need rewarming.
Frying – This is Where the Magic Happens
Setting Up
Dutch oven. Pour oil at least 2 inches deep.
Clip-on candy thermometer on the side. Make sure the bulb sits in the oil but doesn’t touch the bottom.
Heat slowly over medium to 350°F. I actually go to 360°F because the cold dough drops the temp fast.
Temperature is Everything
340°F? Too cold. Greasy donuts.
380°F? Too hot. Burnt outside, raw inside.
The sweet spot? 350-360°F.
Watch that thermometer like a hawk. Adjust your heat constantly. Don’t be afraid to turn the burner completely off if things get too hot.
Fry in Small Batches
Pull 3-5 donuts from the fridge. Leave the rest cold.
Use a slotted spoon to lower them gently into the oil. Give them space.
They’ll sink. Then float within seconds.
Wait 30 seconds after they float. Flip with your spoon.
Timing Each Side
First side: about 80 seconds. Until deep golden brown.
Flip. Second side: another 80 seconds.
Donut holes cook faster:
- 30 seconds
- Flip
- 60 seconds
- Flip again
- 40-60 seconds more
Check for Doneness
Cake tester. Insert it. Pull it out. Look at it.
No raw dough. No wet crumbs. That’s what you’re looking for.
First donut not perfect? Adjust. Too dark outside but doughy inside? Lower the temp. Too pale and taking forever? Bump the heat up a bit.
Drain Properly
Wire rack over a baking sheet. Air circulates underneath. Keeps the bottoms crispy.
Paper towels work but can make bottoms soggy.
Glaze While They’re Hot
Work fast. Donuts should still be warm.
Dip each one completely. The heat makes the glaze flow smoothly and creates that crackled finish.
Back on the wire rack. Glaze sets in minutes. Creates this perfect thin, crispy shell.
The Tips That Actually Matter
Cold Everything
Not just the oil. The dough needs to stay cold too.
Cold dough = baking powder doesn’t activate early. Also stops gluten from developing. That’s how you get tender donuts instead of tough ones.
Don’t Skimp on Flour
Your work surface needs lots of flour. This dough is naturally sticky.
Too little flour? You’ll fight with the dough every step of the way.
Neutral Oil Only
Canola or vegetable. High smoke point. No flavor.
Let the donut taste shine through.
Wire Racks are Essential
They let air circulate underneath. No condensation. No soggy bottoms.
Hot Donuts, No Need to Heat Glaze
I time my glazing for when the donuts are still pretty hot. The residual heat does all the work.
Want warm glaze anyway? Heat it gently over simmering water.
Why Baking Doesn’t Work
I tried baking these. Multiple times.
Every single time? Disappointing. Dense. Weird texture. Not good.
The reason is simple. This dough is built for frying. The ratios, the consistency – everything’s designed for hot oil.
Want baked donuts? Start with a baked donut recipe. Not this one.
Swapping Ingredients – What Works and What Doesn’t
Sour Cream Options
Full-fat is best. Thick consistency. Great tang.
Low-fat works but the texture changes slightly. Fat-free? Skip it.
Baking Powder – No Substitutes
Double-acting or nothing.
Baking soda would be a disaster. Unless you’re in a true emergency, don’t even think about it.
About Those Eggs
Could you use whole eggs? Technically yes.
Should you? No. The whites add moisture without fat. That equals tougher donuts.
Separate the eggs. Save the whites for scrambled eggs or something.
Ways to Mix It Up
Try Different Glazes
The basic recipe is super versatile.
Citrus zest for brightness. Instant coffee powder for mocha. Extra vanilla for classic flavor.
Spice Things Up
Fold in 1½ tablespoons of your favorite spice blend.
Cinnamon and nutmeg? Fall vibes. Cardamom? Exotic warmth. Chai spice? Beautiful.
Add Fruit
Lemon zest in the dough. Fruit jam on top. The tartness cuts right through the richness.
Berry jams work especially well with the tangy sour cream.
Keeping These Fresh (Or Trying To)
Best advice? Eat them the day you make them.
Warm from the fryer if possible. That’s when texture and flavor peak.
Need to store them? Room temperature. Container with the lid cracked open slightly. The ventilation stops condensation.
They’ll last three days this way. They’ll gradually dry out but still taste good.
Don’t refrigerate. That makes them stale faster.
Don’t freeze finished donuts either. The glaze doesn’t survive freezing. Texture gets weird when you thaw them.
Questions People Always Ask
Do I Really Need to Chill Twice?
Yes. Both times matter.
First chill makes the dough workable. Second chill keeps the shape during frying.
Skip either step and your results suffer.
Can I Make the Dough Ahead?
Absolutely. Keeps in the fridge for three days.
You can even freeze cut, unfried donuts for a month. Thaw in the fridge for a few hours before frying.
Why Aren’t My Donuts Cracking?
The cracks happen naturally. They’re affected by:
- Dough temperature
- Oil temperature
- How much you worked the dough
Cold dough in 350-360°F oil should crack nicely. Overworked dough won’t crack as much.
Can I Double or Triple This?
Sure. Your mixer capacity is the only limit.
When scaling up, weigh your ingredients. Don’t use volume measurements. Donut dough is sensitive to flour and water ratios.
What Makes These Different from Yeast Donuts?
These are cake donuts. Leavened with baking powder.
Yeast donuts are airier. These are denser and more tender. Plus no rising time needed.
Here’s What I Want You to Remember
Start with this recipe exactly as written. Get the technique down.
Then experiment. Different glazes. New flavors. The possibilities really are endless.
Your first batch might not be perfect. That’s okay. Frying takes practice. Temperature. Timing. It all comes together after a few tries.
But even imperfect homemade donuts? Better than most store-bought ones.
The smell alone is worth it. Your kitchen will smell incredible. And watching people take that first bite of something you made from scratch? There’s nothing quite like it.
You don’t need fancy equipment. Just a thermometer and a Dutch oven. The ingredients are basic. Stuff you probably have on hand already.
Try making these this weekend. Seriously.
Your kitchen will smell amazing. And you’ll finally understand why nothing beats a donut pulled straight from hot oil.
This might just become your new Saturday morning tradition.
Old-Fashioned Sour Cream Donuts
Ingredients
Method
- In a large bowl, whisk together flour, baking powder, and salt. Set aside.
- Line a second large bowl with plastic wrap and spray generously with cooking spray.
- In a stand mixer with paddle attachment, beat sugar and butter on high speed until butter completely disappears into the sugar.
- Add egg yolks and continue beating on high for 2 minutes until mixture is pale yellow and fluffy. Scrape down bowl as needed.
- Switch to low speed. Alternate adding flour mixture and sour cream, working quickly until just combined. Stop mixing immediately when flour streaks disappear.
- Transfer dough to the prepared plastic-lined bowl. Spray top with cooking spray, fold plastic wrap over, and refrigerate for at least 60 minutes.
- Prepare a baking sheet with parchment paper and spray with cooking spray. Flour your work surface generously.
- Dust the chilled dough with flour while still in bowl. Turn onto floured surface and dust the top again.
- Roll dough to exactly 1/2 inch thickness, working quickly to keep it cold. Use even pressure and rotate occasionally.
- Brush off excess flour. Using a 3-inch cutter dipped in flour, cut donuts by pressing straight down without twisting. Use a 1.25-inch cutter for holes.
- Place cut donuts on prepared baking sheet. Cover loosely with plastic wrap and refrigerate for at least 30 minutes.
- Make the glaze: Whisk together milk, powdered sugar, and salt until smooth. Cover with plastic wrap directly touching surface.
- In a Dutch oven, heat oil to 350-360°F (at least 2 inches deep). Use a clip-on candy thermometer, ensuring bulb sits in oil but doesn’t touch bottom.
- Working in batches of 3-5, gently lower cold donuts into oil with a slotted spoon. They’ll sink then float within seconds.
- Fry for 30 seconds after floating, then flip. Cook first side for about 80 seconds until deep golden brown. Flip and cook second side for another 80 seconds.
- For donut holes: fry 30 seconds, flip, 60 seconds, flip again, 40-60 seconds more.
- Test doneness with a cake tester – it should come out clean with no raw dough or wet crumbs.
- Transfer to a wire rack over a baking sheet. Let cool slightly but keep warm.
- While donuts are still warm, dip each completely in glaze. Return to wire rack and let glaze set for a few minutes until it forms a thin, crispy shell.
Leave a Reply