
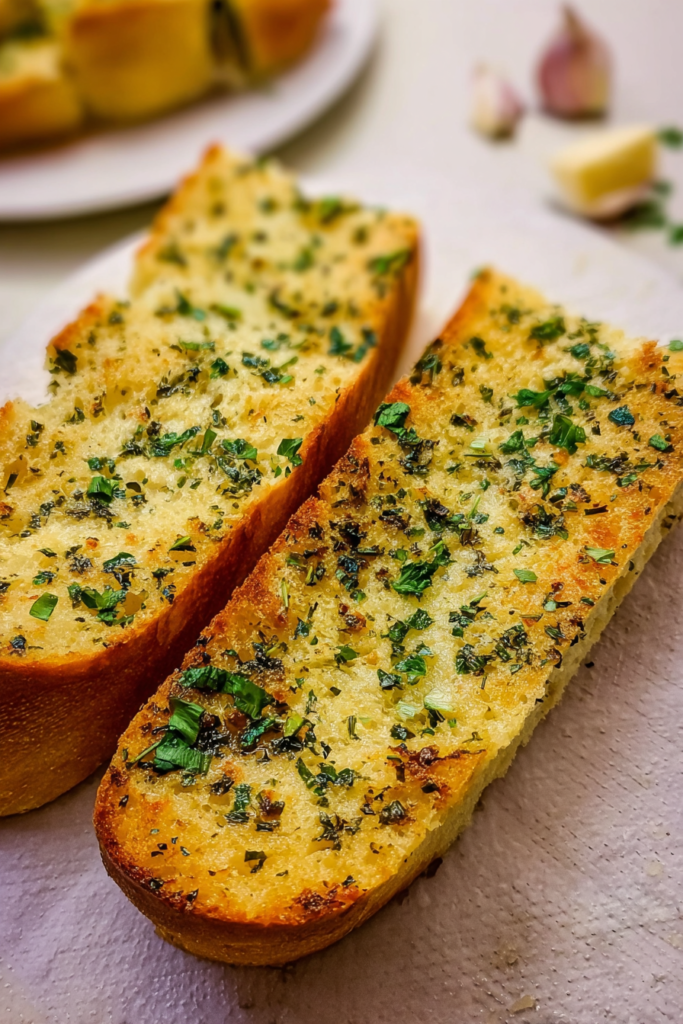
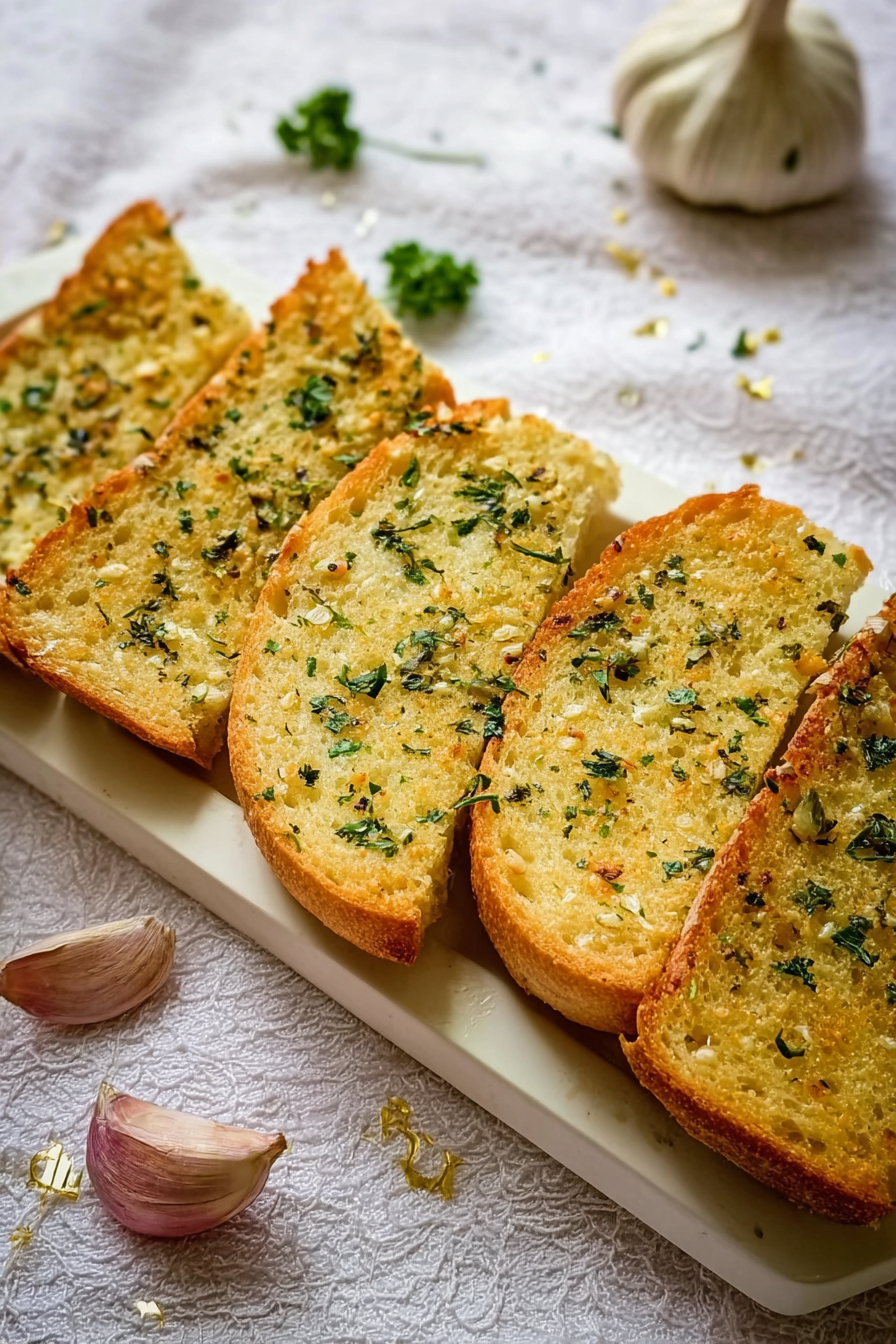
This homemade garlic bread is perfectly crispy on the edges and soft inside. With aromatic roasted garlic, fresh herbs, and melted butter, it’s the ideal side dish. Serve it with pasta, soups, or enjoy it on its own!
Prep Time: 10 minutes | Cook Time: 15 minutes | Total Time: 25 minutes
Servings: 8 slices | Difficulty: Easy
My Journey to Perfect Garlic Bread
Want to know something embarrassing?
The first time I tried making garlic bread from scratch, it was an absolute disaster. Burnt edges. Raw center. And the garlic flavor? Barely there.
My family tried to be polite. They pushed it around their plates while making small talk. But I could see the disappointment in their eyes.
Right then, I made myself a promise. I would figure this out.
And you know what? After about two dozen attempts (and way too many trips to the bakery), I finally cracked the code.
Here’s what I learned…
The secret isn’t just throwing butter on bread and crossing your fingers. It’s actually about three things: choosing the right bread, nailing that butter-to-garlic ratio, and getting your oven temperature just right.
These days? This garlic bread shows up at our dinner table at least twice a week. My kids beg for it every single pasta night. And honestly, I don’t blame them one bit.
It’s become our family’s thing.
Why This Recipe Actually Works
Let’s be real for a second.
Store-bought frozen garlic bread? It can’t hold a candle to homemade. Those packages are loaded with preservatives and artificial flavors. The texture is always disappointing.
But making it yourself? Takes maybe 10 minutes of actual work.
The difference comes down to ingredients. Real butter melts into every nook and cranny of the bread. Fresh garlic gives you that incredible punch of flavor without any bitter aftertaste. And the herbs? They add this brightness that frozen versions just don’t have.
Plus, this recipe is super forgiving.
Forgot to soften your butter? I’ve got a quick fix for that.
Want extra cheese? Go crazy.
Prefer less garlic? Totally fine—adjust it however you want.
Everything You Need (And Why Each Ingredient Matters)
Let me walk you through what you’ll need and why each thing is important.
The Bread Foundation
Your bread choice? It determines everything.
I always use a 1-pound Italian or French loaf. But here’s the key—not a baguette. Baguettes get way too hard and crusty when you bake them this way.
You want bread that’s sturdy enough to hold all that butter. But soft enough that you can actually bite through it without breaking a tooth.
The loaf should be about 12-14 inches long. Look for something with a moderately soft interior and a light crust. That’s what creates the perfect texture contrast after baking.
The Butter Base
I use 1/2 cup of softened unsalted butter.
Why unsalted? It gives you complete control over the salt level. But listen—salted butter works fine too. Just cut back on the extra salt a bit.
Now, when I say “softened,” I mean room temperature. Not melted.
The butter should be spreadable but still hold its shape. This consistency lets it cream properly with the garlic and herbs.
Forgot to soften your butter?
Here’s my trick: Cut it into small cubes. Let it sit for 10 minutes. It’ll soften way faster than leaving out a whole stick.
The Garlic Star
Fresh garlic is non-negotiable.
I use 4 cloves, finely minced. And I’m not talking about the jarred stuff or garlic powder. Those just can’t replicate the complexity and aroma of fresh garlic.
Mince your garlic as finely as you possibly can. Large chunks burn really easily and create these unpleasant bitter spots that ruin everything.
I usually grab my garlic press for consistency. But a sharp knife works great too.
Four cloves might sound like a lot. But here’s the thing—baking really mellows out garlic’s intensity. What you end up with is this rich, sweet, roasted garlic flavor. No overwhelming heat at all.
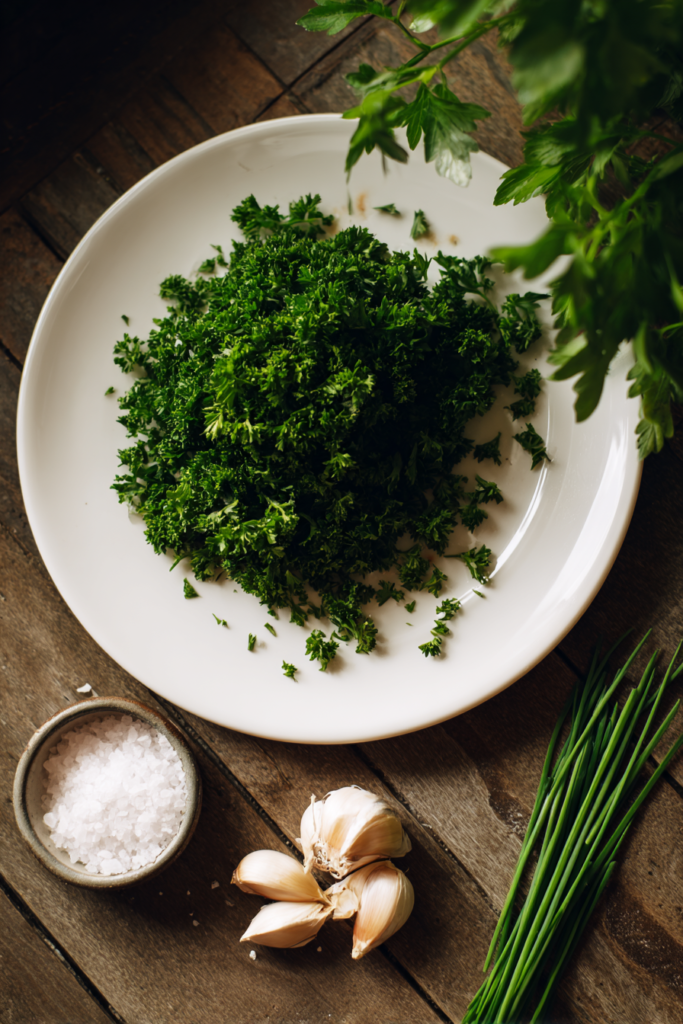
Fresh Herbs for Brightness
One tablespoon of finely chopped fresh parsley adds color and freshness.
Those little green flecks look beautiful. And they provide this subtle herbaceous note that ties everything together.
Fresh parsley is way better than dried here. Dried parsley just doesn’t have that vibrant flavor. It can even taste a bit dusty.
If you absolutely have to substitute? Use 1 teaspoon dried.
I also love throwing on extra parsley and chives after baking. The fresh herbs on top add another flavor layer. Plus they make it look like something you’d get at a fancy restaurant.
Seasoning Perfection
Just 1/8 teaspoon of sea salt brings everything together.
Sea salt has a cleaner taste than table salt. But if you’re using salted butter? You might want to skip the extra salt entirely.
Here’s a pro move: Taste your butter mixture before spreading it on the bread. This way you know it’s properly seasoned before it goes in the oven.
Optional Cheese Addition
Want to take this from great to absolutely extraordinary?
Add cheese.
You’ve got two excellent options:
Parmesan cheese (1/4 cup freshly grated): This adds a nutty, salty depth that’s incredible. Grate it yourself from a wedge for maximum flavor.
Mozzarella cheese (1/2 cup shredded): Creates that melty, stretchy goodness. Perfect if you’re a serious cheese lover.
I usually sprinkle the cheese on during the last 2 minutes of baking. This prevents it from burning while still getting it perfectly melted.
Your Complete Ingredient List
| Ingredient | Quantity | Notes |
|---|---|---|
| Italian or French loaf | 1 pound | Not baguette; needs soft interior |
| Unsalted butter | 1/2 cup | Must be softened, not melted |
| Fresh garlic cloves | 4 cloves | Finely minced; no substitutes |
| Fresh parsley | 1 tablespoon | Finely chopped; plus extra for garnish |
| Sea salt | 1/8 teaspoon | Adjust if using salted butter |
| Parmesan cheese | 1/4 cup | Optional; freshly grated preferred |
| Mozzarella cheese | 1/2 cup | Optional; shredded, not fresh |
| Fresh chives | For garnish | Optional; finely chopped |
What You’ll Need (Equipment-Wise)
Before we jump in, let me go over the tools you’ll need.
You probably have everything already. But I’ll mention a few things that make this way easier.
A large baking sheet is essential. Line it with parchment paper or aluminum foil for easy cleanup. Parchment prevents sticking better, but foil works just fine.
You’ll need a serrated bread knife for slicing. Regular knives just crush the bread’s interior. Serrated knives cut cleanly through the crust without squishing everything.
A small mixing bowl for the butter mixture. A fork or small spatula to spread it on the bread.
That’s honestly all you need.
How to Make It (Step by Step)
Step 1: Preheat and Prep (2 minutes)
Crank your oven to 425°F (220°C).
This high temperature is what creates those crispy edges while keeping the center nice and soft.
Line your baking sheet with parchment paper or foil. Set it aside while you get the bread ready.
Step 2: Slice the Bread (1 minute)
Grab your serrated knife. Slice the loaf in half lengthwise.
You want two equal halves, cut horizontally right through the middle.
Place both halves cut-side up on your prepared baking sheet. Make sure they’re laying flat with the cut surface completely exposed.
Step 3: Make the Garlic Butter (3 minutes)
In your small bowl, throw together the softened butter, minced garlic, chopped parsley, and sea salt.
Mix it thoroughly with a fork until everything’s evenly distributed.
The mixture should look creamy and pale yellow with little green parsley flecks throughout. You want every single bite of bread to have garlic and herbs in it.
Don’t rush this part. Proper mixing means consistent flavor across every slice.
Step 4: Spread the Magic (2 minutes)
Now for the fun part.
Spread that garlic butter mixture evenly over both bread halves. Cover the entire cut surface, including the edges.
Use the back of your spoon or a small spatula. Press the butter gently into the bread’s surface. This helps it absorb rather than just sitting on top.
Don’t leave any dry spots. The edges need butter too, or they’ll burn while everything else is cooking.
Step 5: Bake to Perfection (12-15 minutes)
Slide that baking sheet into your preheated oven.
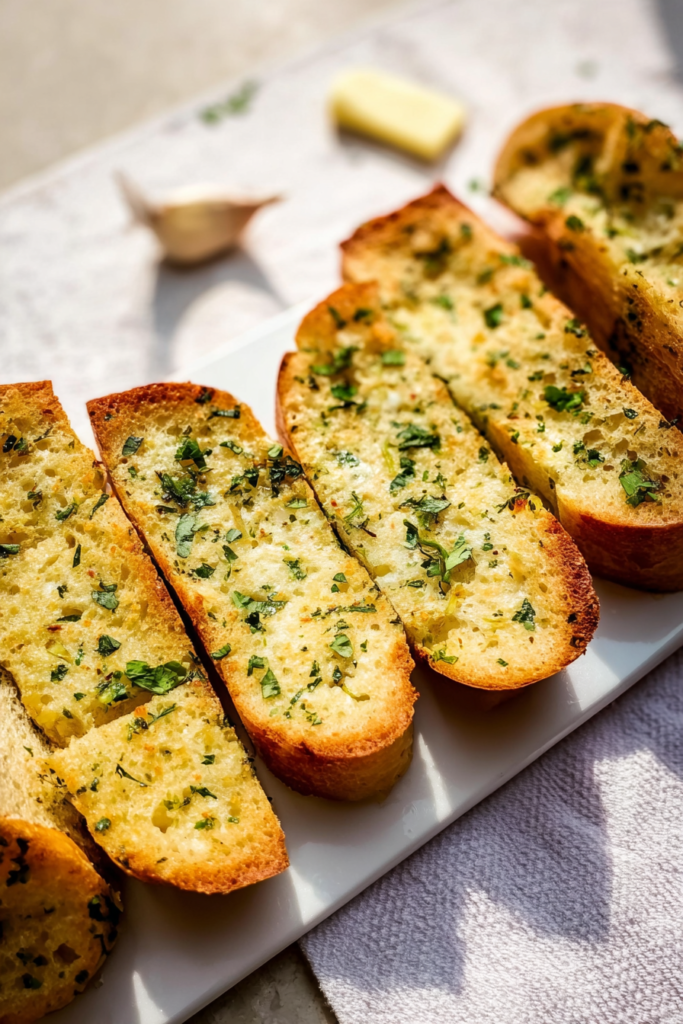
Bake for 12-15 minutes until the edges turn golden brown.
Watch it during the last few minutes. Ovens can vary a lot in how accurate they are. You’re looking for golden edges and a lightly toasted surface.
Adding cheese? Sprinkle it on during the last 2 minutes of baking. This melts it perfectly without burning.
Step 6: Cool and Slice (2 minutes)
Pull the baking sheet out of the oven.
Let the bread cool for 2 minutes. Trust me on this—it’s extremely hot right now.
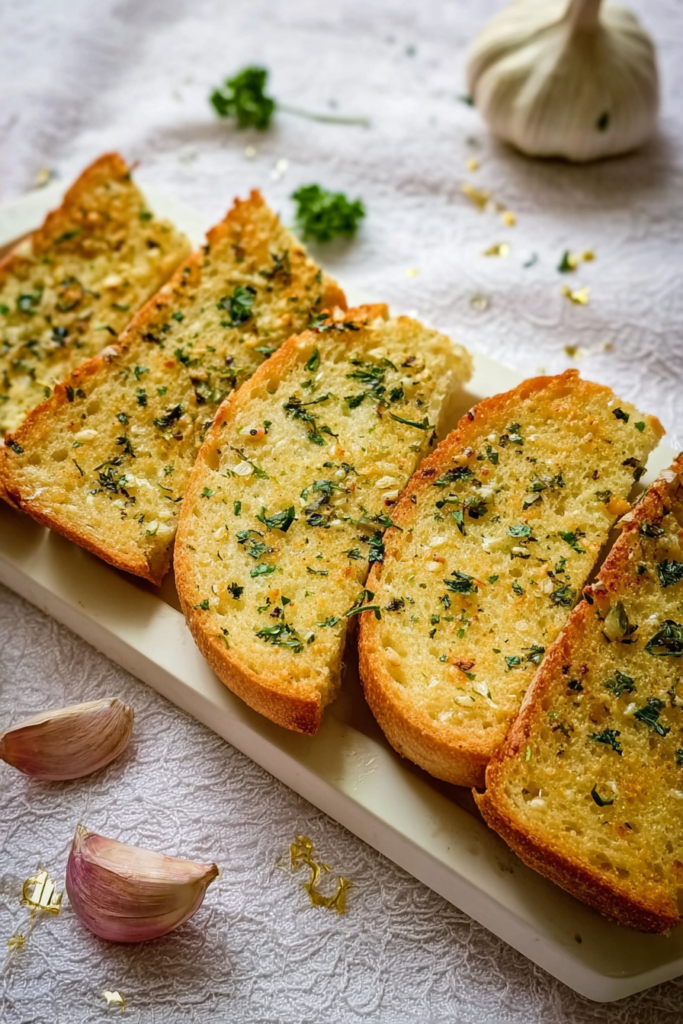
Using your serrated knife, cut each half into 1-inch slices. You should get about 8 slices total from a standard loaf.
Want to get fancy? Garnish with extra chopped parsley and chives.
Serve it immediately while it’s still warm. That’s when it’s at its absolute best.
Tips That’ll Make You Look Like a Pro
Temperature Control
Oven temperature affects the texture in a huge way.
Too low? Your bread turns oily without getting crispy.
Too high? The garlic burns before the bread even toasts.
425°F is the sweet spot. But if your oven runs hot, dial it back to 400°F. An oven thermometer is super helpful for checking accuracy.
Crispiness Customization
Everyone likes their garlic bread different.
Here’s how to adjust:
For softer bread: Bake for only 10-12 minutes. Or wrap the bread in aluminum foil before baking.
For crispier bread: Bake for 15-17 minutes. Just watch it carefully during those last few minutes so it doesn’t burn.
For extra crispy: After baking, stick it under the broiler for 1-2 minutes. But stay right there watching it. Broilers burn things fast.
Garlic Intensity Adjustment
Four cloves give you robust garlic flavor.
Sensitive to garlic? Start with 3 cloves.
Love garlic? Go up to 5 or even 6 cloves.
Want something milder? Try roasted garlic instead. Roast whole garlic cloves first, then mash them up and mix into the butter. It creates this sweet, caramelized flavor without any sharpness.
Butter Spreading Technique
Room temperature butter spreads easily without tearing the bread.
If your butter’s too cold? You’ll end up ripping the bread’s surface.
If your butter’s too soft (almost melted)? Pop the mixture in the fridge for 5 minutes. This firms it up for better spreading.
And here’s something important: Spread butter all the way to the edges.
The edge pieces are actually the best ones. Don’t skimp on them.
Mistakes to Watch Out For
Using Pre-Minced Garlic
That jarred minced garlic in your fridge?
It contains preservatives and lacks fresh garlic’s aromatic oils. The flavor is flat and kind of metallic.
Always use fresh cloves. I promise it’s worth it.
Melting the Butter
Melted butter just runs off the bread and pools on your baking sheet.
Softened butter stays put. It absorbs into the bread properly.
Big difference.
Skipping the Preheat
Putting bread in a cold oven? That results in greasy, unevenly toasted bread.
Always preheat. It ensures proper crisping from the start.
Overcrowding the Pan
Leave some space between the bread halves.
Air circulation is what ensures even browning on all sides.
What to Serve This With
This garlic bread pairs beautifully with so many dishes.
Here are my go-to combinations:
Italian Classics: Serve it with spaghetti, lasagna, or fettuccine alfredo. The bread soaks up extra sauce like a dream.
Soups: It’s perfect alongside tomato soup, minestrone, or creamy chicken soup. Use it for dipping.
Salads: Balance out a light Caesar salad or garden salad with this rich, buttery bread.
Standalone Snack: Real talk? It’s delicious on its own. I’ve definitely made entire lunches of just garlic bread. No regrets.
How to Store Your Garlic Bread
Want to keep your garlic bread delicious for days?
Here’s exactly how to do it.
Room Temperature Storage
Cover leftover garlic bread tightly with aluminum foil or plastic wrap.
Store it at room temperature for 1-2 days maximum.
Room temperature keeps the best texture. Refrigeration? That makes bread tough and dried out. Not good.
Before serving it again, reheat in a 350°F oven for 5-7 minutes. Wrap it in foil to prevent over-browning.
Freezing for Longer Storage
Garlic bread freezes beautifully.
This is actually my favorite meal prep trick for crazy busy weeknights.
Before Baking: Prepare the bread all the way through Step 4 (after spreading that garlic butter). Place the halves in a freezer-safe bag. They’ll keep for up to 3 months.
When you’re ready to eat? Bake directly from frozen. Just add 3-5 extra minutes to the baking time.
After Baking: Let your baked garlic bread cool completely. Wrap it tightly in aluminum foil, then stick it in a freezer bag. It’ll keep for up to 2 months.
Reheat from frozen in a 350°F oven for 10-12 minutes. The foil prevents burning while everything heats through.
Fun Variations to Try
Once you’ve got the basic recipe down, these twists are amazing.
Cheesy Garlic Bread Supreme
Use both parmesan and mozzarella for ultimate cheesiness.
Mix 2 tablespoons of parmesan right into the butter. Then sprinkle mozzarella on top during the last 2 minutes.
It’s ridiculously good.
Herb-Loaded Version
Add 1 teaspoon each of dried oregano, basil, and thyme to the butter mixture. This creates that Italian seasoning-style garlic bread.
Fresh rosemary (1 tablespoon minced) adds an elegant, aromatic twist. Rosemary pairs especially well with roasted meats.
Spicy Garlic Bread
Mix 1/4 teaspoon red pepper flakes into the butter.
Want more heat? Add a pinch of cayenne pepper.
Or brush the bread with chili-infused olive oil before spreading the garlic butter.
Roasted Garlic Version
Roast a whole garlic head at 400°F for 40 minutes. Squeeze out those soft cloves and mash them into the butter.
Roasted garlic gives you this sweet, caramelized flavor without any sharpness. It’s completely different from raw garlic.
Vegan Garlic Bread
Replace regular butter with vegan butter. Everything else stays the same.
For cheesy vegan garlic bread? Use dairy-free mozzarella or parmesan alternatives. They work surprisingly well.
Perfect Pairings
Wine Pairings
Light, crisp white wines complement garlic bread’s richness beautifully.
Try Pinot Grigio, Sauvignon Blanc, or Vermentino.
Prefer red wine? Choose medium-bodied options like Chianti or Sangiovese. These won’t overpower the garlic.
Complete Meal Ideas
Want to create a full Italian feast with garlic bread as the star side?
Here are my favorite combinations:
- Spaghetti carbonara with garlic bread and Caesar salad
- Chicken parmesan with garlic bread and roasted vegetables
- Minestrone soup with garlic bread and a simple green salad
- Shrimp scampi with garlic bread and steamed broccoli
Appetizer Transformation
Cut the bread into smaller pieces (about 2-inch squares) before baking.
Serve as an appetizer with marinara sauce for dipping.
Want to get fancy? Top each piece with a cherry tomato half before baking. Instant bruschetta-style appetizers.
Your Questions Answered
Can I use garlic powder instead of fresh garlic?
Fresh garlic gives you way better flavor. But garlic powder works in a pinch.
Use 1 teaspoon of garlic powder mixed into the softened butter. Just know that the flavor won’t be as complex or aromatic.
My garlic bread burned on top but is raw inside. What happened?
Your oven temperature is too high.
Reduce it to 400°F and bake a bit longer. Also, make sure your rack is in the center of the oven. Not too close to the top heating element.
Can I make the garlic butter mixture ahead of time?
Absolutely!
Mix the butter, garlic, parsley, and salt up to 3 days ahead. Store it covered in the refrigerator. Just bring it to room temperature before spreading on bread.
You can even freeze the butter mixture for up to 2 months. Thaw it overnight in the refrigerator when you’re ready to use it.
What’s the best way to reheat leftover garlic bread?
Wrap it in aluminum foil and heat at 350°F for 5-7 minutes.
The foil prevents the edges from over-browning while the center warms through.
Whatever you do, never microwave garlic bread. It becomes rubbery and soggy. Just trust me on this.
Can I use a baguette instead of Italian/French bread?
Baguettes work, but they create a different texture.
They’re crustier and denser. This results in harder garlic bread overall.
If you’re using a baguette, reduce baking time by 2-3 minutes. And watch it carefully to prevent it from getting too hard.
Here’s the Thing
This garlic bread recipe has become my go-to for almost every dinner.
It’s simple enough for weeknight meals. But impressive enough for when you have people over.
The key? Quality ingredients. Fresh garlic, real butter, and good bread. These simple things combine into something truly special.
And listen—don’t be intimidated if you’ve never made garlic bread before.
This recipe is genuinely foolproof. Follow the steps, watch the baking time, and you’ll get perfect results.
Your family’s going to request this constantly. Mine sure does. I’ve honestly lost count of how many loaves I’ve made over the years.
Make it tonight alongside your favorite pasta dish.
You’ll finally understand why homemade garlic bread beats store-bought every single time.
Pro Tip: Double the garlic butter mixture and store half in the freezer. You’ll always have it ready for those impromptu garlic bread cravings. (And trust me, those cravings happen a lot.)
Enjoy this delicious, aromatic garlic bread fresh from your oven. It’s about to become your new favorite side dish.
Homemade Garlic Bread
Ingredients
Method
- Preheat your oven to 425°F (220°C). Line a large baking sheet with parchment paper or aluminum foil and set aside.
- Using a serrated knife, slice the loaf in half lengthwise. Place both halves cut-side up on the prepared baking sheet.
- In a small bowl, combine the softened butter, minced garlic, chopped parsley, and sea salt. Mix thoroughly with a fork until evenly distributed and creamy.
- Spread the garlic butter mixture evenly over both bread halves, covering the entire cut surface including the edges. Press gently into the bread so it absorbs.
- Bake for 12-15 minutes until the edges turn golden brown. If adding cheese, sprinkle it on during the last 2 minutes of baking.
- Remove from oven and let cool for 2 minutes. Cut each half into 1-inch slices (about 8 slices total). Garnish with extra parsley and chives if desired. Serve immediately while warm.
Leave a Reply