Category: Desserts

  • Overnight French Toast Bake Easy Make-Ahead Recipe

    Overnight French Toast Bake Easy Make-Ahead Recipe

    The Make-Ahead Breakfast That Wins Every Morning

    Why This Recipe Will Change Your Mornings

    There are few things better than waking up to breakfast that is practically already done. No rushing. No mess. Just the smell of cinnamon filling your kitchen while everyone shuffles in half-asleep.

    That is exactly what this Overnight French Toast Bake delivers.

    I first made this on a holiday morning when I had a full house of hungry guests. I needed something impressive, but I did not want to spend the whole morning standing at the stove flipping individual slices. This casserole was the answer. And honestly? It has been in my regular rotation ever since.

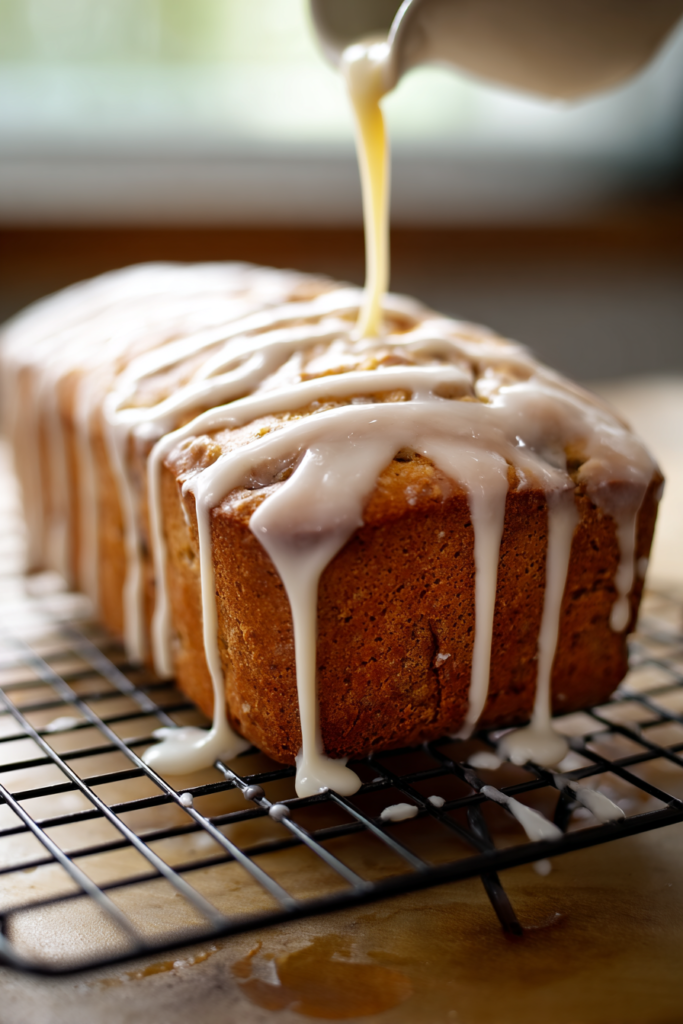
    The magic happens the night before. You tear crusty bread into chunks, layer it into a buttered pan, and pour a rich spiced custard over the top. Then the fridge does all the heavy lifting. The bread slowly soaks up every drop of that creamy egg mixture overnight. By morning, all you have to do is add the crumb topping and slide it into the oven.

    Simple. Stress-free. And so worth it.

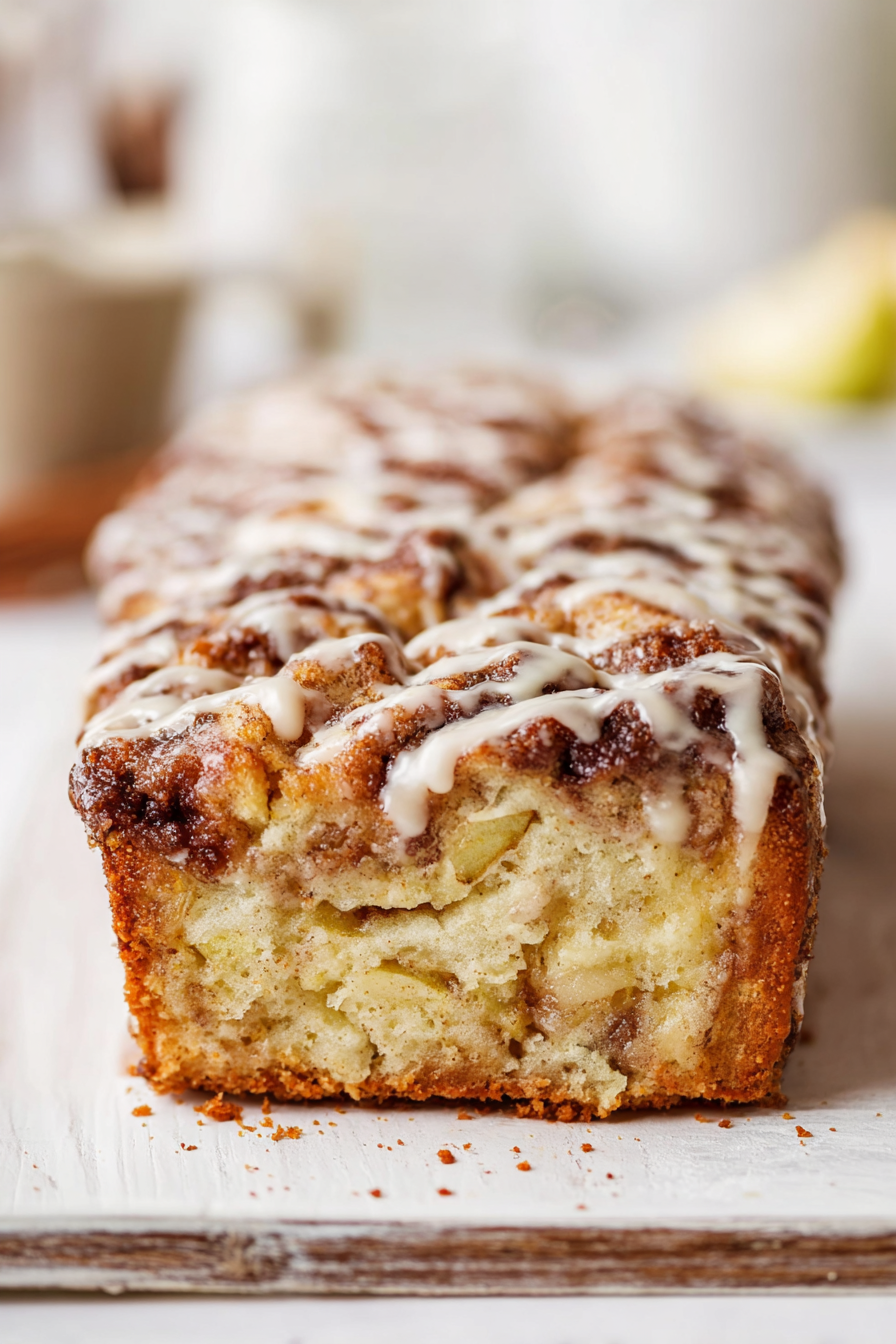
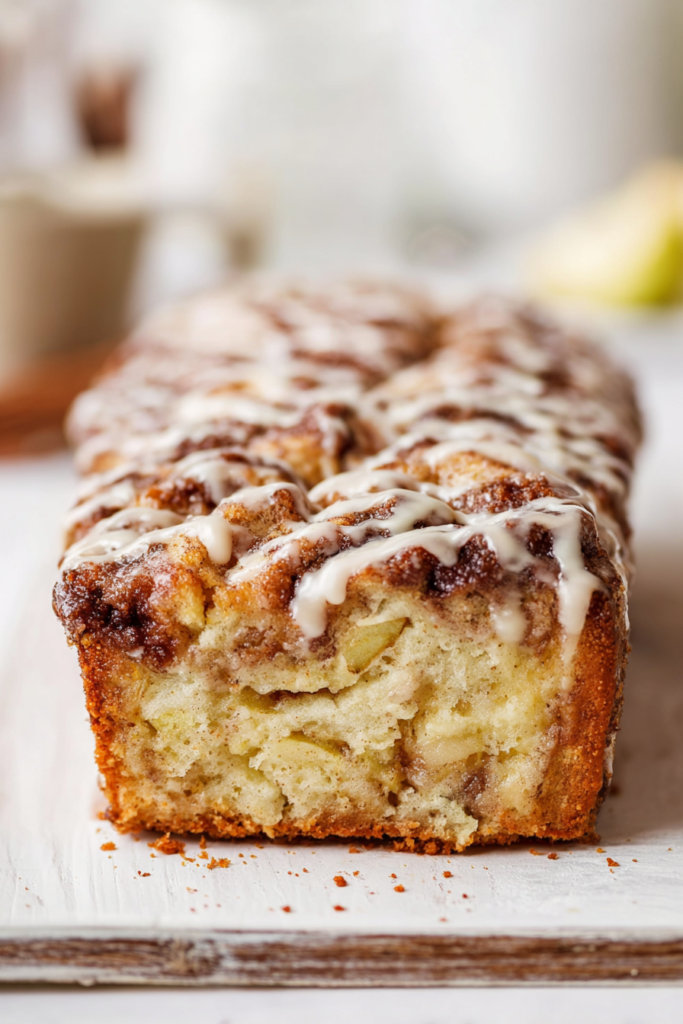
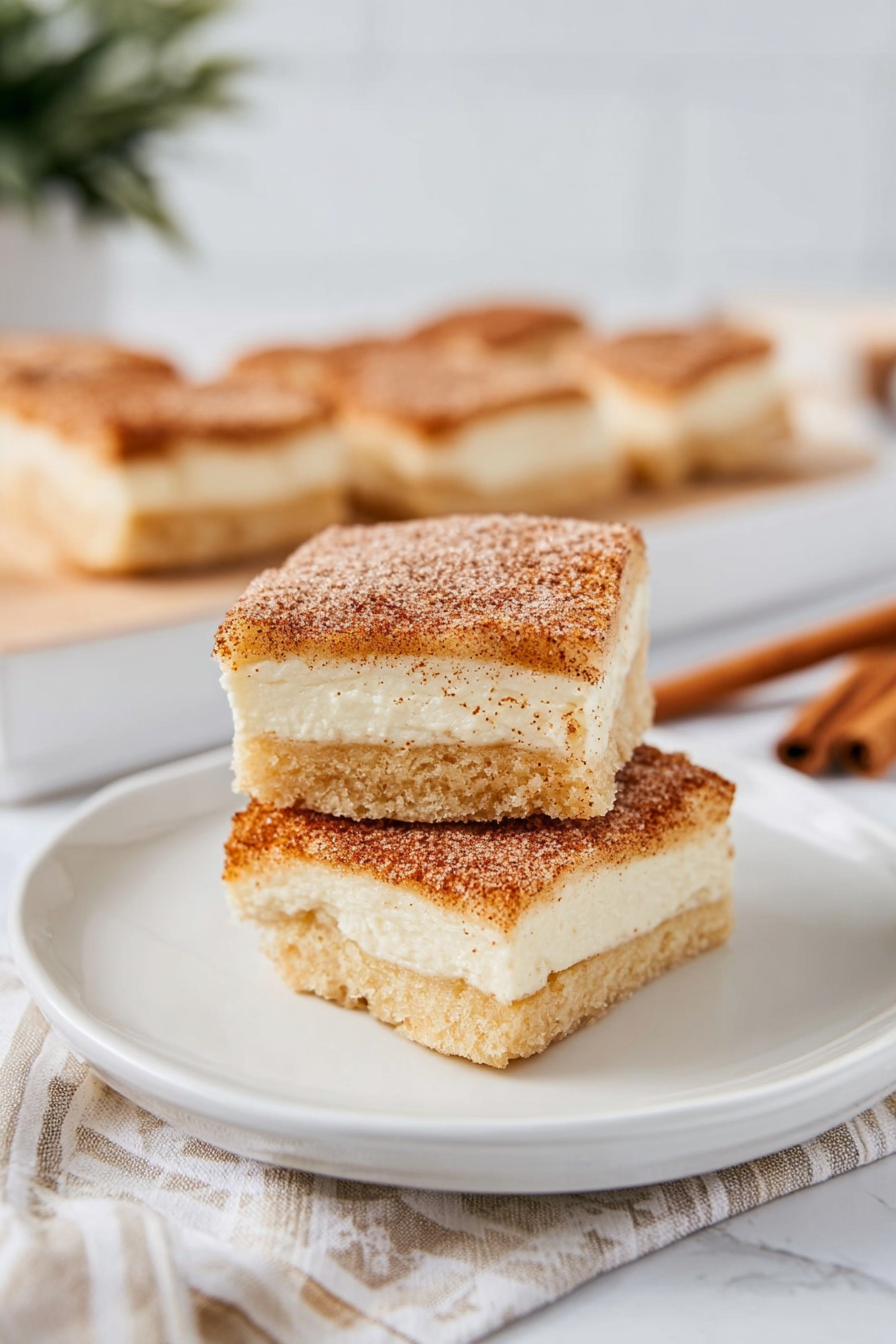
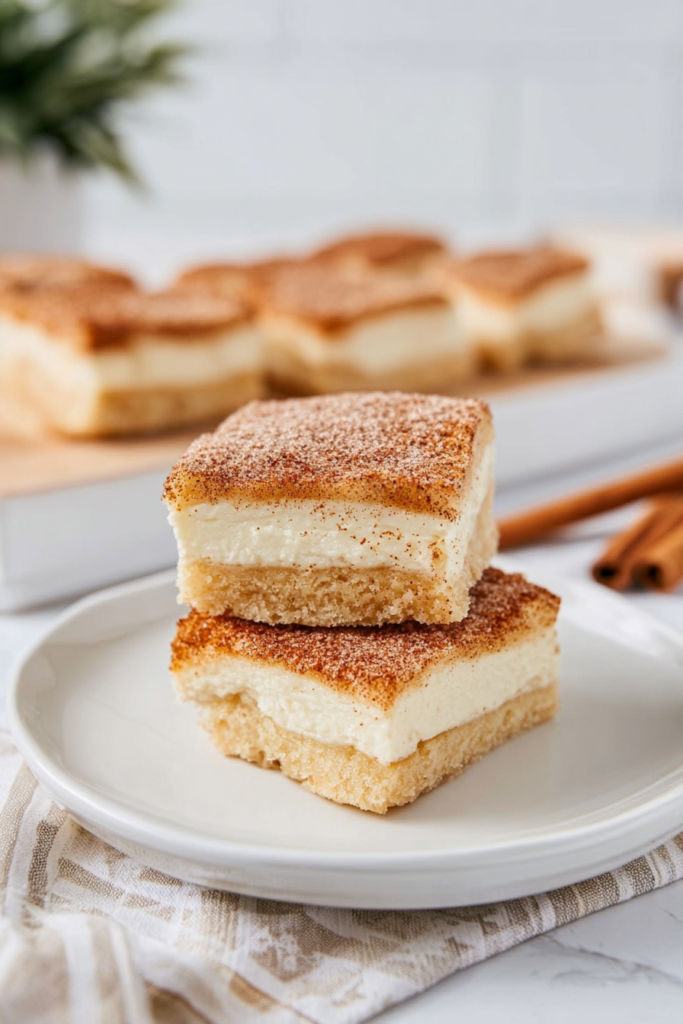
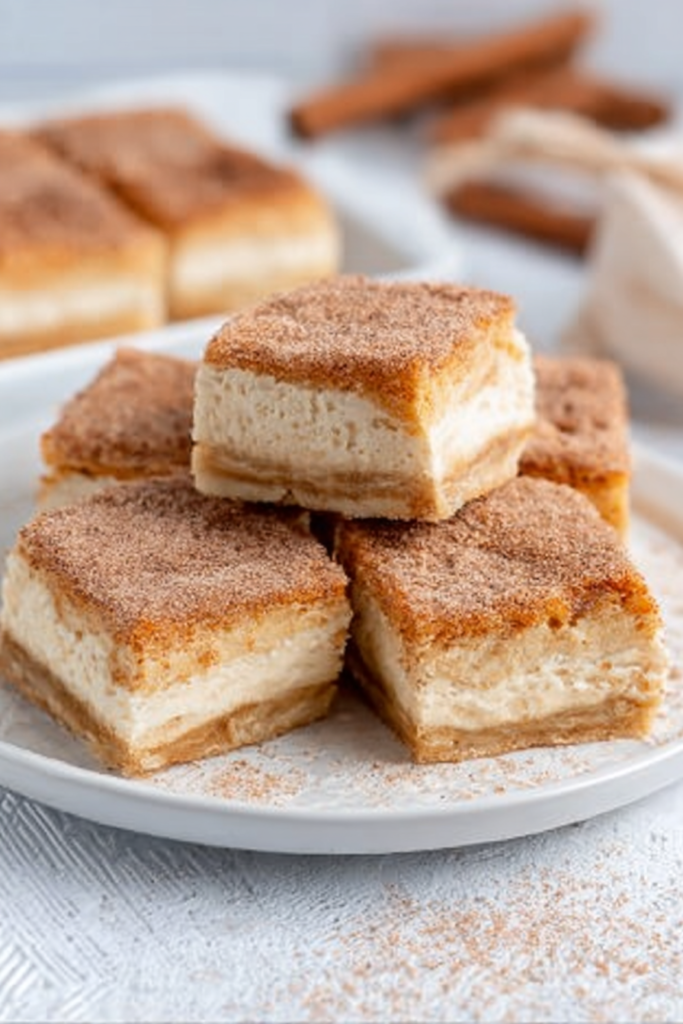
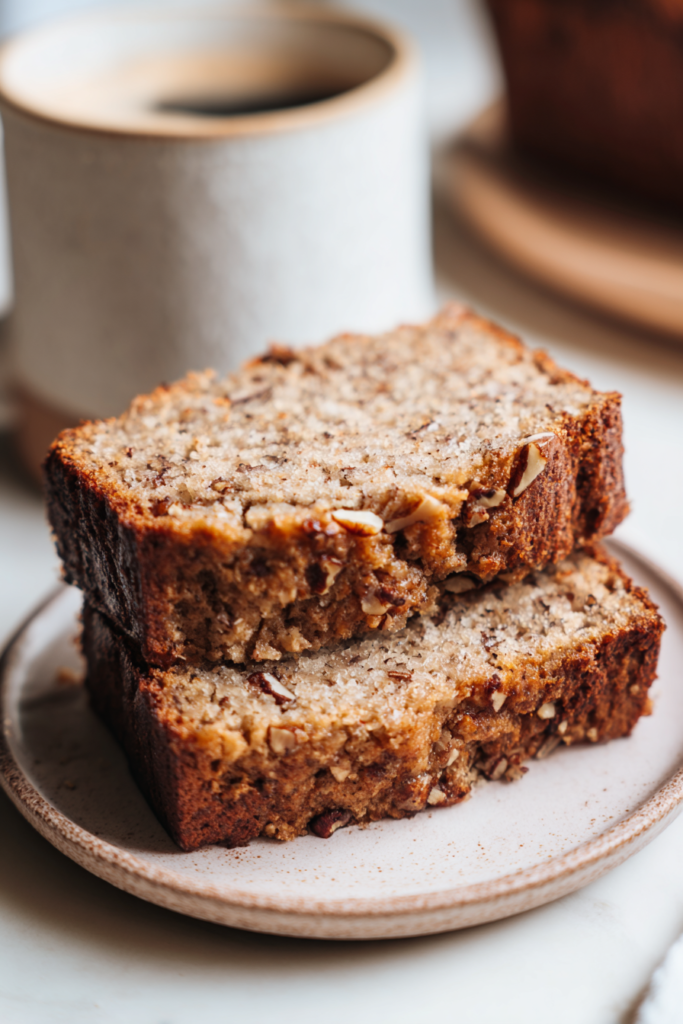
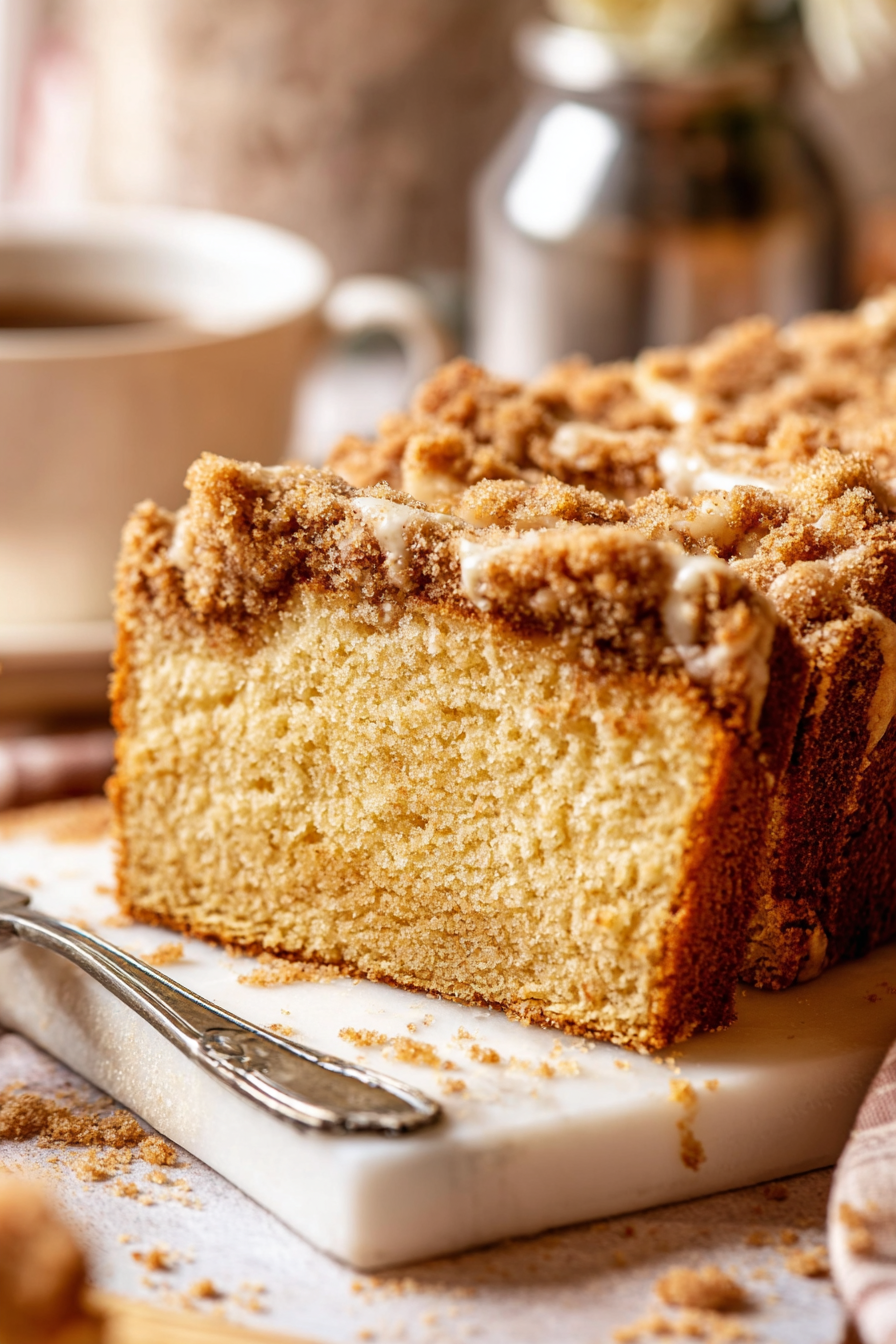
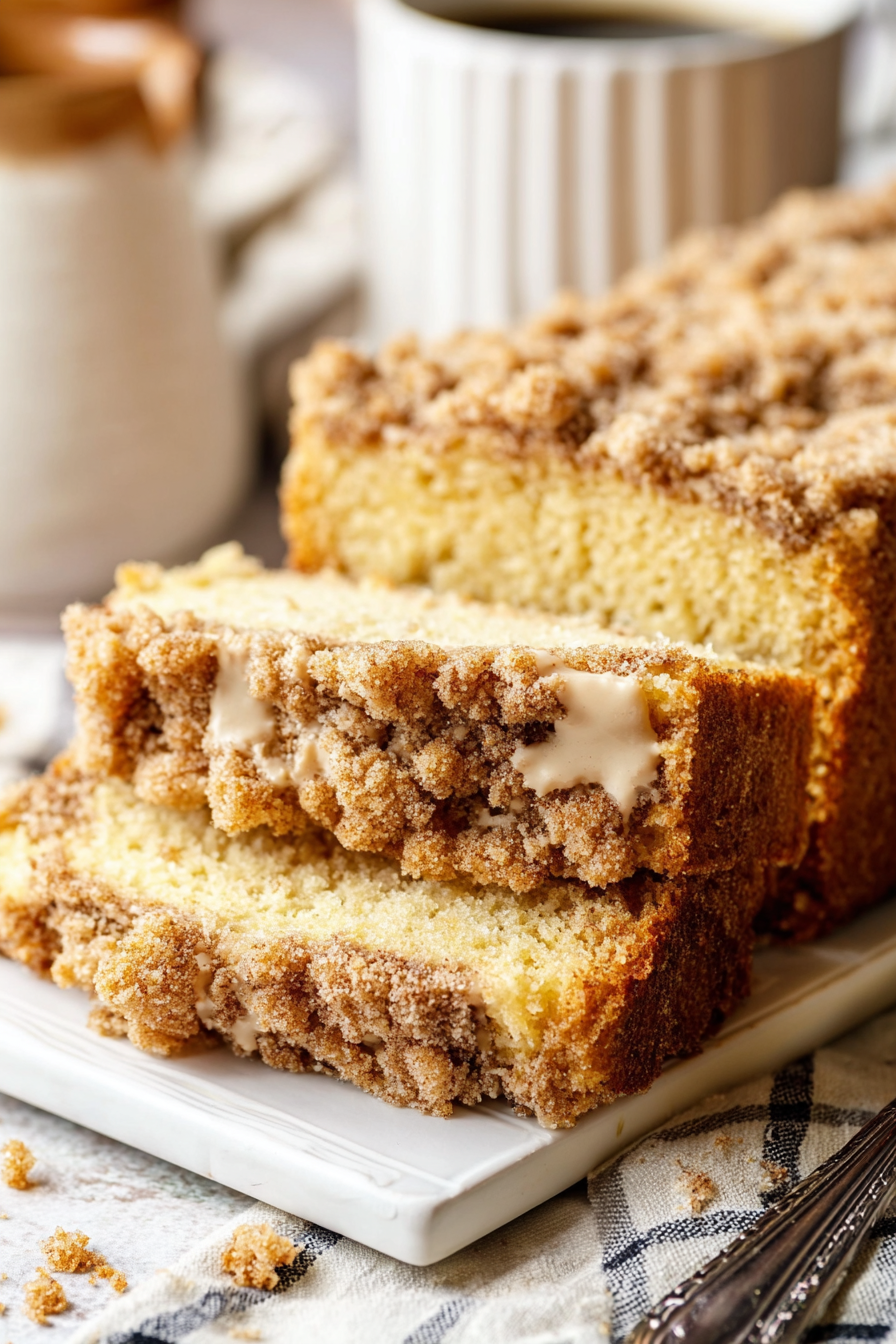
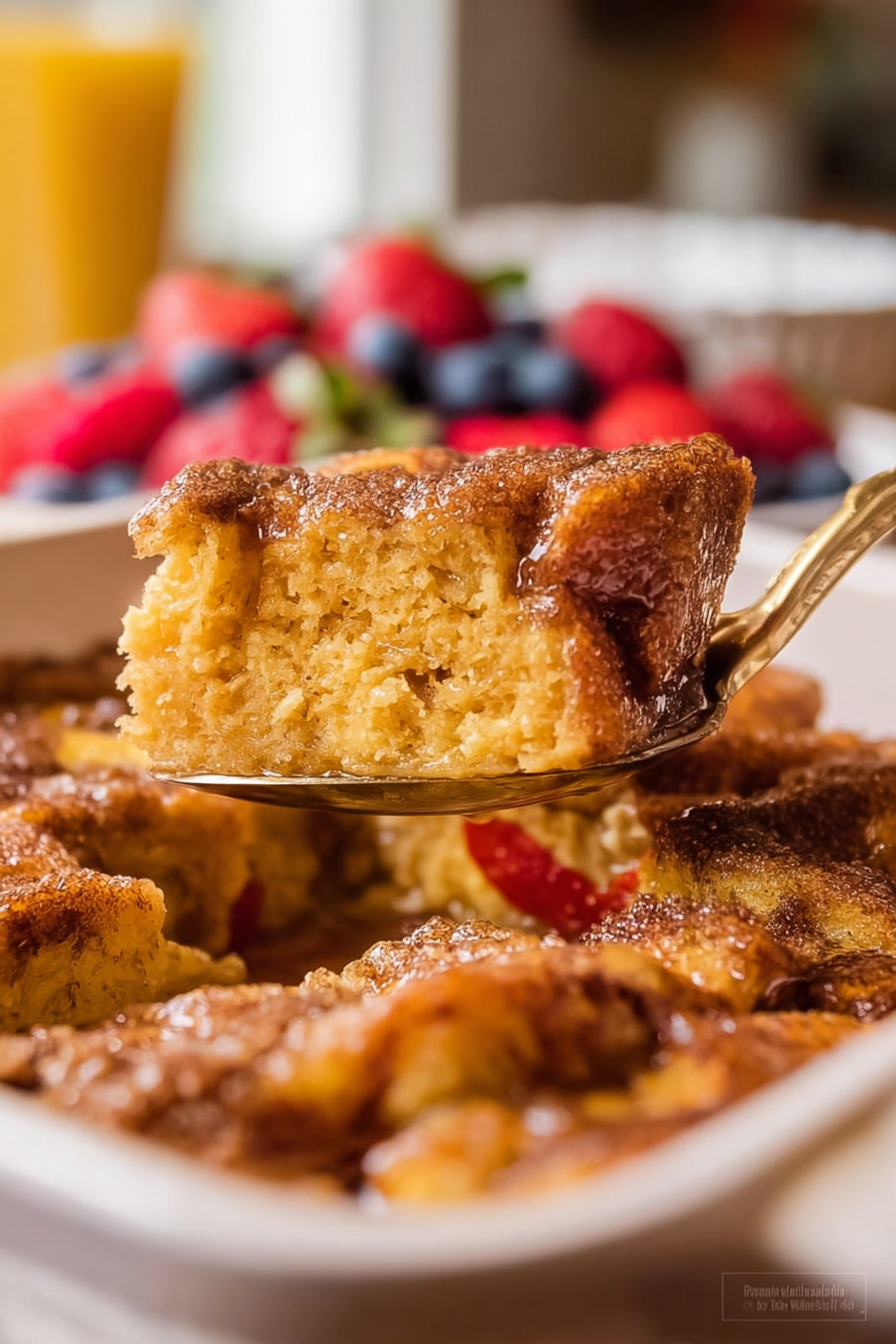
    What really sets this recipe apart is the cinnamon crumb topping. It bakes into a buttery, caramelized crunch right over a soft, custardy center. Think bread pudding meets French toast, with the best of both worlds in every single bite.

    A quick note on bread: Day-old bread is your best friend here. Slightly stale bread has less moisture, which means it absorbs the custard deeply without turning to mush. If your bread is fresh, just tear it into chunks and spread them on a sheet pan while you prep everything else. Even 20 minutes of open-air drying makes a real difference.

    overnight french toast bake

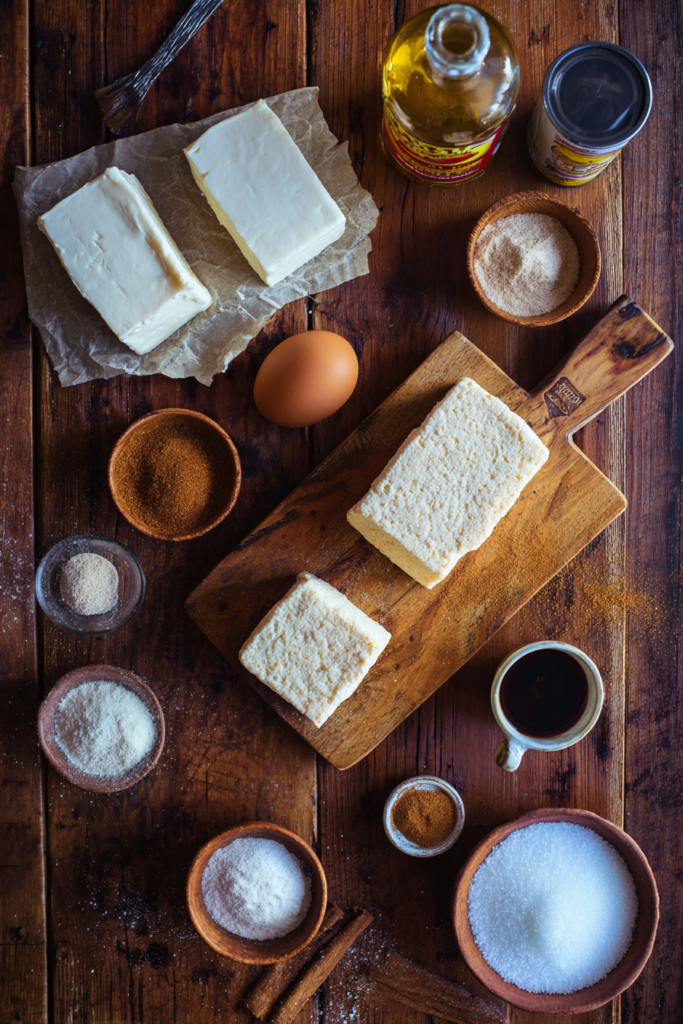
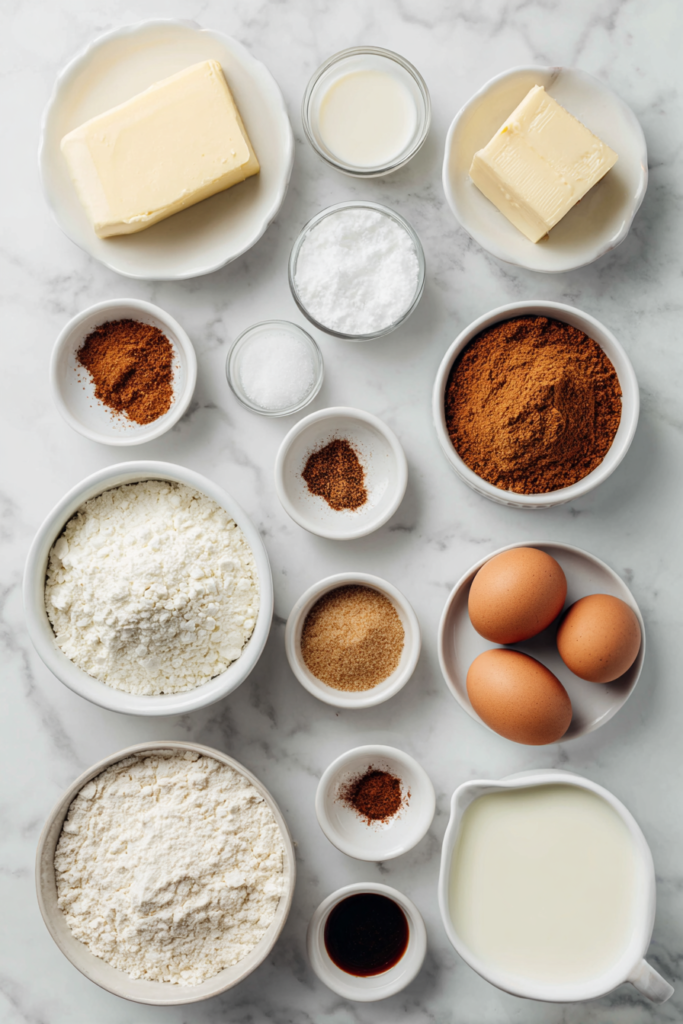
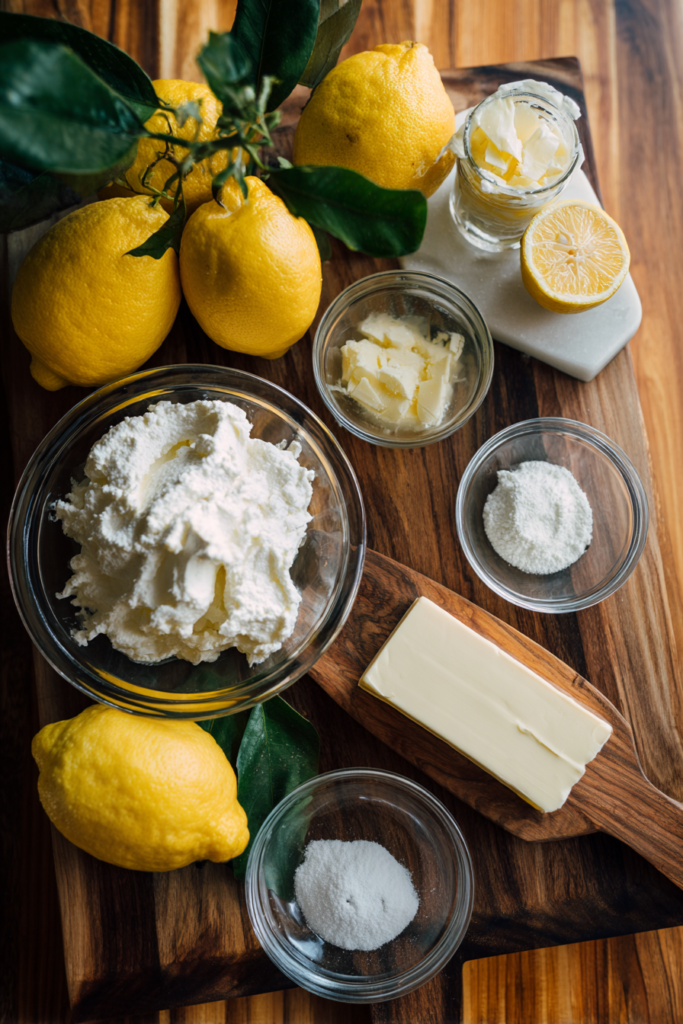
    What You Need to Know About Each Ingredient

    Understanding what each ingredient does helps you make smarter choices, both at the store and in the kitchen.

    • Butter: Just a little to grease the baking dish. It helps with easy cleanup and adds richness to the bottom layer.
    • Bread: French bread, sourdough, brioche, or challah all work beautifully. Day-old is ideal, but fresh bread dried slightly on a sheet pan works too.
    • Eggs: Use large, quality eggs. They form the base of the custard, so freshness really does matter here.
    • Whole Milk: Provides the creamy backbone of the custard. Lower-fat milk can be used, but the result will be less rich.
    • Heavy Cream: Just half a cup makes the custard noticeably silkier and more indulgent. Do not skip it.
    • Granulated Sugar: Organic cane sugar or regular white sugar both work. You can reduce it slightly if you prefer a less sweet bake.
    • Brown Sugar: Used in both the custard and the crumb topping. It adds a warm, molasses-like depth that plain white sugar simply cannot match.
    • Vanilla Extract: Because the ingredient list is simple, quality matters. Use real vanilla extract, not imitation.
    • Kosher Salt: Just a pinch in the custard balances all that sweetness beautifully.
    • Crumb Topping: All-purpose flour, brown sugar, cinnamon, sea salt, nutmeg, and cold butter combine into the most addictive crunchy layer you will ever put on a breakfast dish. Freshly grated nutmeg is worth the extra step if you have a whole nutmeg on hand.

    Ingredients at a Glance

    IngredientQuantityNotes
    Butter1–2 tbspFor greasing pan
    Crusty bread (French, Sourdough, Brioche, or Challah)1 large loafDay-old works best
    Large eggs8Use quality fresh eggs
    Whole milk2 cupsOrganic preferred
    Heavy cream½ cupOrganic preferred
    Granulated sugar½ cupOrganic cane or white sugar
    Brown sugar (custard)½ cupLight or dark, packed
    Vanilla extract2 tbspUse real vanilla
    Kosher salt (custard)1 pinchBalances sweetness
    All-purpose flour (topping)½ cupUnbleached preferred
    Brown sugar (topping)½ cupPacked
    Ground cinnamon (topping)1 tsp
    Sea salt (topping)¼ tsp
    Nutmeg (topping)¼ tspFreshly grated is best
    Cold butter (topping)½ cupCut into chunks, chilled
    Real maple syrupTo tasteWarmed, for serving
    Softened butterTo tasteFor serving
    Fresh berriesAs desiredOptional topping

    Recipe Timing

    Prep TimeCook TimeTotal TimeServings
    10 minutes45–60 minutes8–10 hours (including overnight soak)10–12 servings, Difficulty: Easy

    How to Make Overnight French Toast Bake

    The whole process breaks down into three easy steps. Build the base, make the crumb topping, and bake in the morning. Each step is simple on its own. Together? They create something really special.

    Step 1: Prepare the French Toast Base

    Start by greasing your 9×13-inch baking dish generously with softened butter. Use a paper towel to spread it right into the corners. This small step adds flavor to every bite and makes cleanup much easier later.

    Tear or cut your bread into rough chunks, about 1 to 2 inches each. Uneven shapes are actually better here. They create little pockets that catch and hold the custard in the most delicious way. Scatter the bread evenly across the prepared pan.

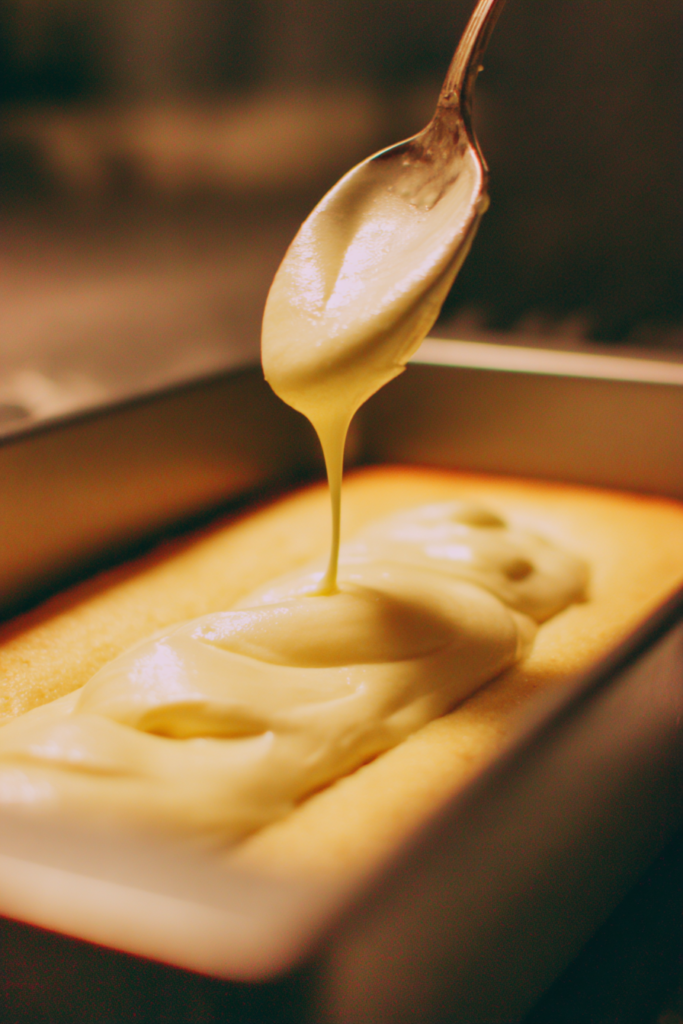
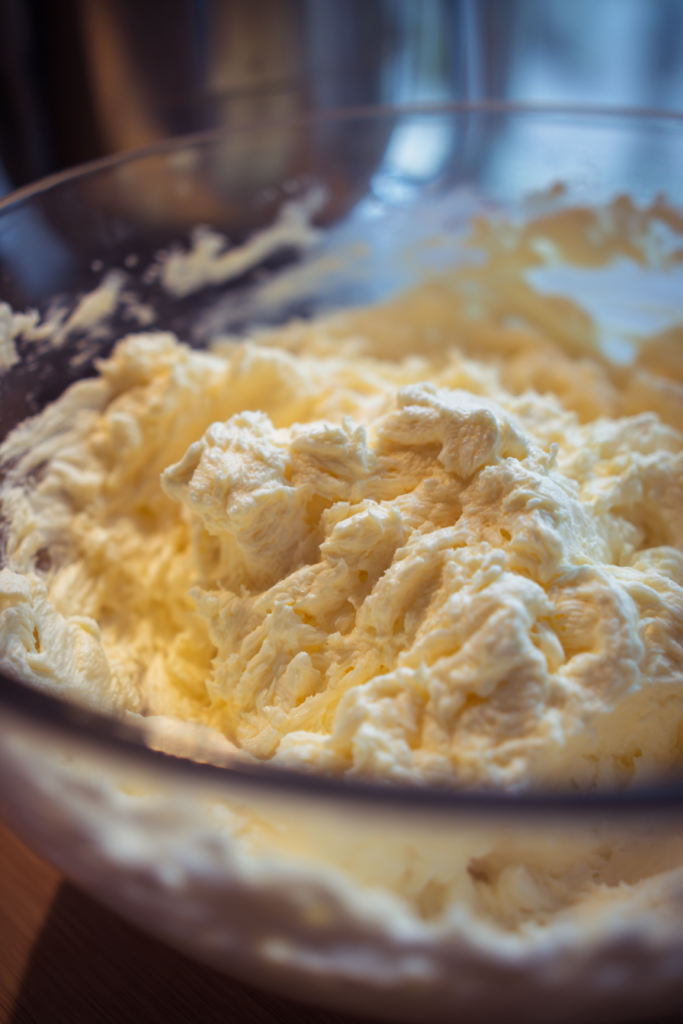
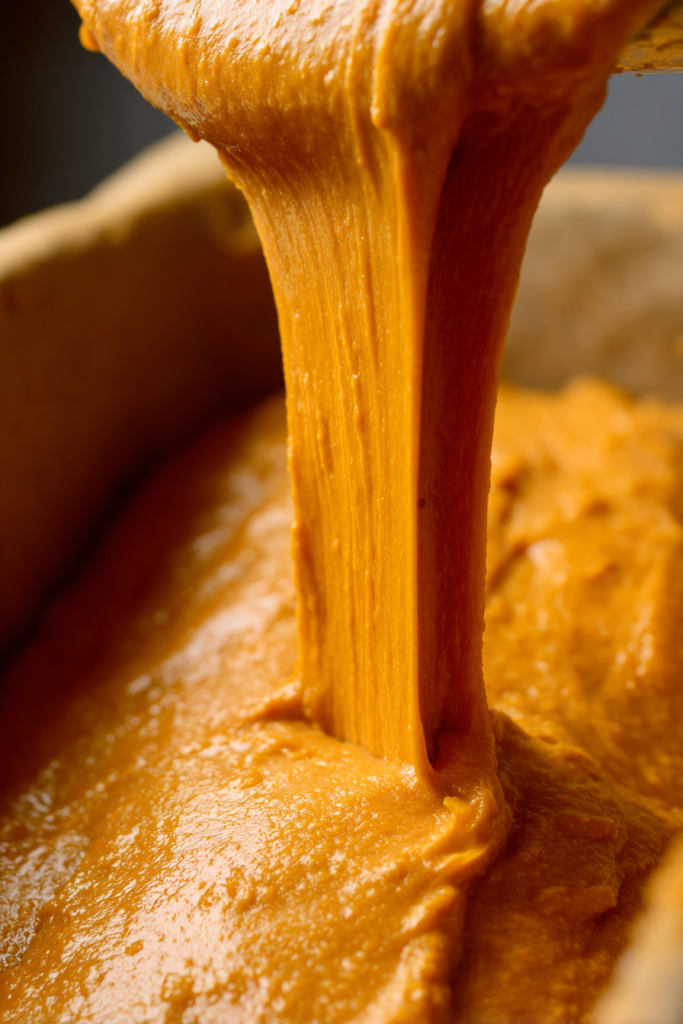
    Crack all eight eggs into a large mixing bowl. Whisk them well before adding anything else. Getting them fully broken up first ensures a smooth, even custard. Then add the whole milk, heavy cream, both sugars, vanilla extract, and that pinch of kosher salt.

    Whisk everything together vigorously until the mixture is thick, creamy, and fully combined. You want absolutely no visible streaks of egg white remaining. The custard should look silky and uniform before it goes anywhere near the bread.

    Pour the custard slowly and evenly over the bread chunks in the pan. Make sure every piece gets coated. Gently press down on any dry spots to help the bread start absorbing the liquid right away.

    overnight french toast bake

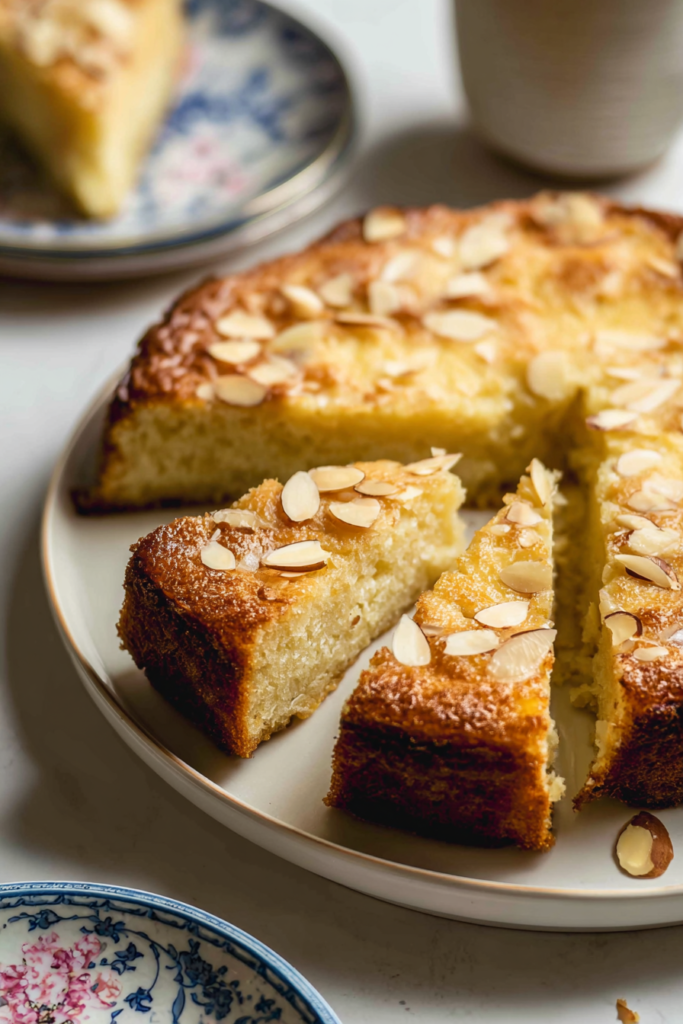
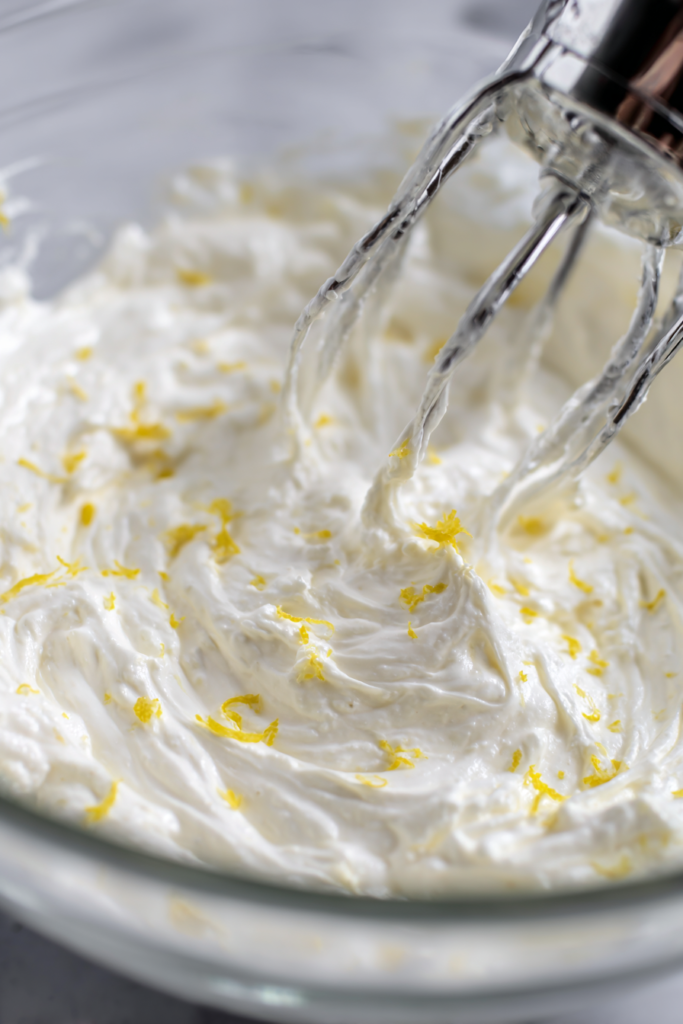
    Step 2: Make the Cinnamon Crumb Topping

    I’ll be honest. This crumb topping is my favorite part of the whole recipe. It is the kind of thing you might be tempted to eat straight from the bowl. And I cannot blame you one bit if you do.

    In a medium mixing bowl, combine the all-purpose flour, packed brown sugar, cinnamon, sea salt, and nutmeg. Stir with a fork until evenly mixed. The dry ingredients should look uniform before you add anything else.

    Add the cold butter chunks. Use a fork, a pastry blender, or simply your fingertips to work the butter into the dry mixture. Keep going until you have rough, pea-sized crumbles. Do not overmix it into a paste. You want real texture here. Those visible clumps are what bake into that glorious crunchy top.

    Fresh nutmeg makes a noticeable difference in this topping. A few swipes across a fine grater releases an aroma that pre-ground nutmeg simply cannot match. If you have a whole nutmeg on hand, this is absolutely the time to use it.

    Once your crumble is ready, you have two options. You can spread it directly on top of the soaked bread before refrigerating. Or you can store it separately in an airtight container or zip-lock bag in the fridge overnight. Personally, I prefer storing it separately. It stays at peak crunchiness that way.

    overnight french toast bake

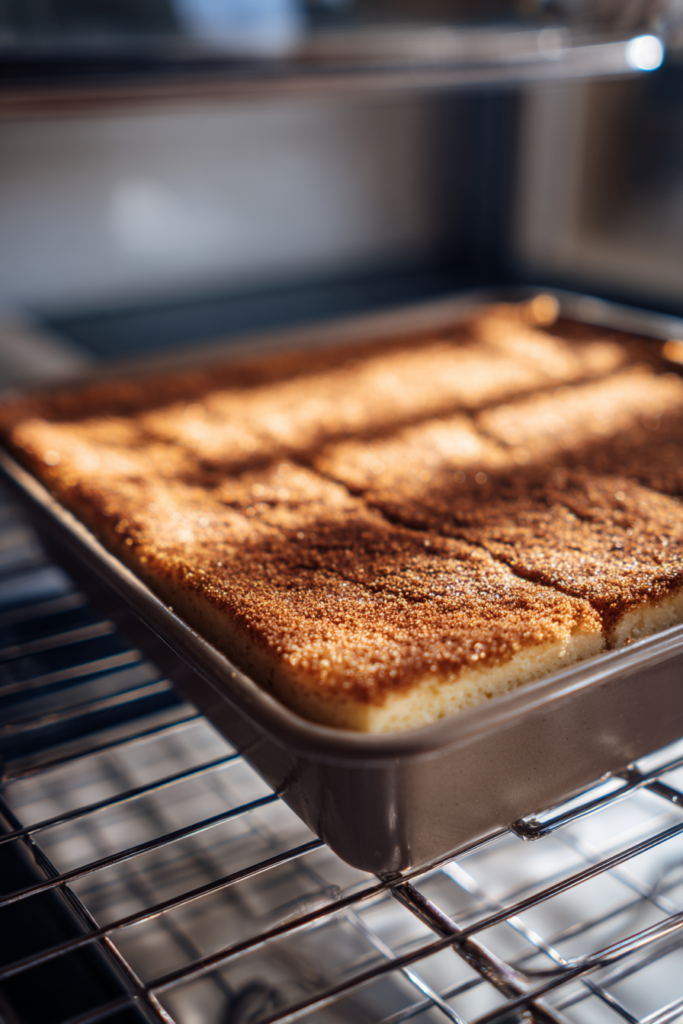
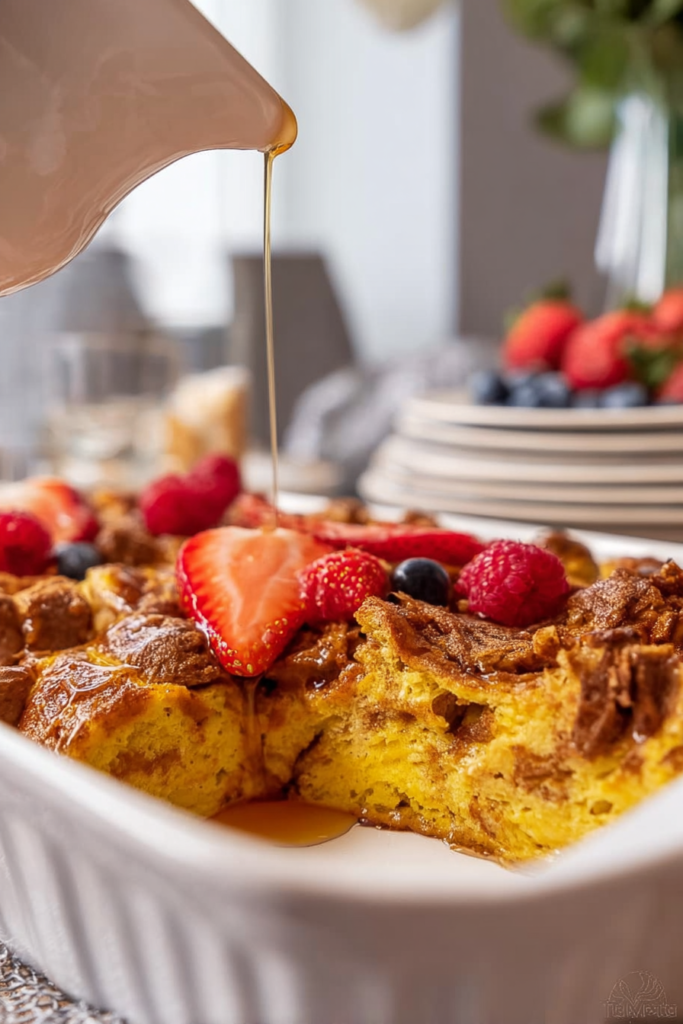
    Step 3: Bake the French Toast Casserole

    The next morning is the easy part. Remove the casserole from the refrigerator and let it sit at room temperature while the oven preheats to 350 degrees Fahrenheit (175 degrees Celsius).

    If you stored the crumb topping separately, take it out of the fridge and crumble it evenly over the entire surface of the casserole. Try to cover every inch so every bite gets a share of that crunchy top.

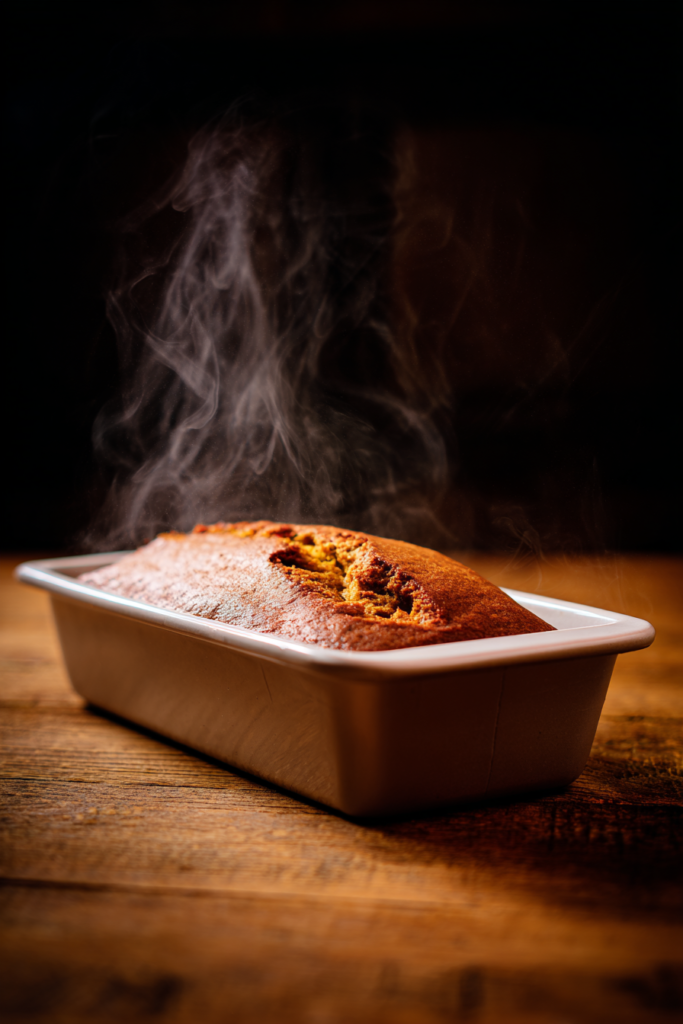
    Slide the casserole into the preheated oven, uncovered. Bake for 45 minutes for a softer, bread pudding-style texture. Bake closer to 60 minutes for a firmer, more caramelized finish. I usually split the difference and go about 50 to 55 minutes. That sweet spot gives you the best of both worlds.

    You will know it is done when the top is deep golden brown and the center feels set when gently pressed. The whole kitchen will smell like cinnamon, vanilla, and toasted sugar. It is absolutely wonderful.

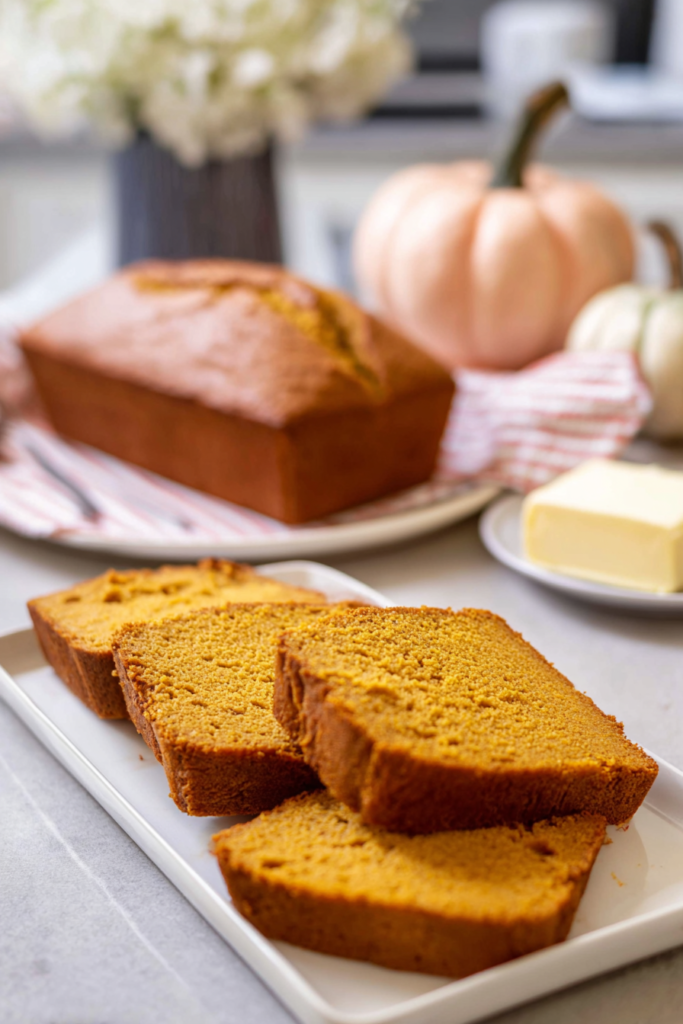
    Let the casserole rest for about 10 minutes before cutting into it. This brief rest allows the custard to set just enough so it slices cleanly and holds its shape on the plate.

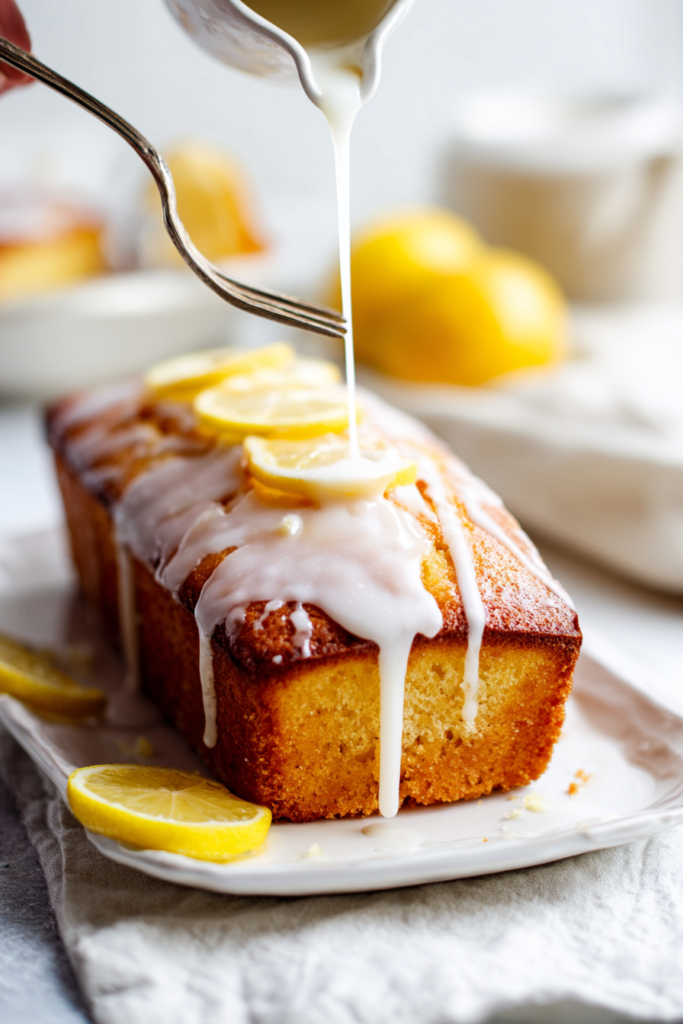
    Serve warm with real maple syrup that you have gently heated on the stove. Add a pat of softened butter on top and a handful of fresh berries on the side. That combination, in my opinion, is close to perfect.

    Make-Ahead and Storage Tips

    This recipe was built for convenience. Here is exactly how to handle leftovers and freezing so nothing goes to waste.

    Refrigerating Before Baking

    Assemble the casserole up to 24 hours in advance. Cover tightly and refrigerate until ready to bake. Add the crumb topping just before it goes into the oven.

    Freezing Before Baking

    Prepare the casserole without the crumb topping. Wrap tightly in plastic wrap, then cover with aluminum foil. Freeze for up to 2 to 3 months. Thaw overnight in the refrigerator, add the topping, and bake as directed.

    Storing Leftovers

    Let the baked casserole cool completely. Store leftovers in an airtight container in the refrigerator for up to 4 days. Reheat individual portions in the microwave for 30 to 60 seconds.

    Reheating the Whole Pan

    Cover the pan loosely with foil and reheat at 325 degrees Fahrenheit for 15 to 20 minutes. This method keeps the topping from softening too much during the reheating process.

    Variations, Serving Ideas, and FAQs

    Creative Variations to Try

    Once you have the base recipe down, it is incredibly easy to put your own spin on it. The custard base and crumb topping are a great blank canvas.

    Berry French Toast Bake

    Scatter a cup of frozen mixed berries over the soaked bread just before adding the crumb topping. The berries soften as they bake and create little pockets of fruity sweetness throughout the whole dish.

    Peach and Brown Sugar

    Lay sliced fresh or canned peaches over the bread layer before pouring the custard. Add a pinch of cardamom to the crumb topping for a warm, summery twist that feels a little different from the classic version.

    Chocolate Chip and Hazelnut

    Sprinkle a generous handful of semi-sweet chocolate chips and chopped hazelnuts between the bread layers. This version is decadent enough to pass as dessert.
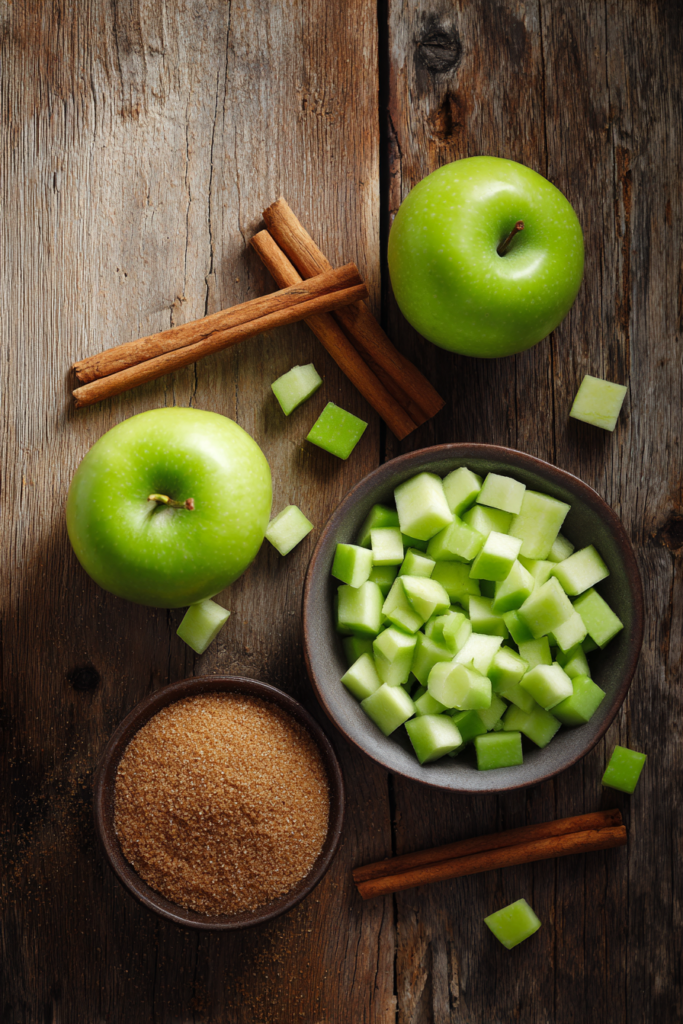
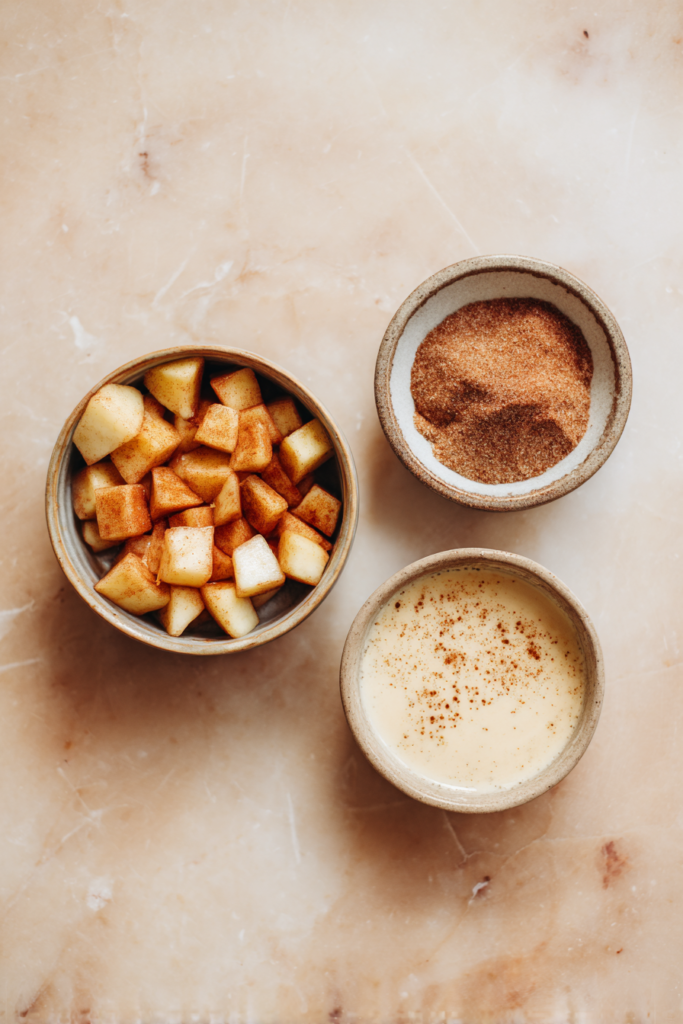
    Apple Cinnamon

    Peel and thinly slice two apples. Toss them with a tablespoon of brown sugar and a teaspoon of cinnamon, then layer them throughout the bread. This is a fantastic autumn variation that the whole family tends to love.

    Serving Suggestions

    This casserole is a complete breakfast on its own. But the right accompaniments take it to another level entirely.

    • Warmed real maple syrup drizzled generously over each slice
    • A pat of softened butter that melts slowly into the warm casserole
    • Fresh seasonal berries on the side or scattered across the top
    • A dusting of powdered sugar just before serving for a bakery-style finish
    • Whipped cream for a brunch dessert feel
    • Crispy bacon or maple sausage links for a savory counterbalance

    Frequently Asked Questions

    Can I use any type of bread for this recipe?

    Sturdy, slightly stale breads work best. French bread, sourdough, brioche, and challah are all excellent choices. Avoid soft white sandwich bread entirely. It does not hold up to overnight soaking and becomes unpleasantly mushy by morning.

    Do I really have to let it soak overnight?

    Overnight soaking gives you the best flavor and texture. However, if you are short on time, a minimum soak of 30 minutes with gentle pressing will still produce a good result. The longer the bread soaks, the more deeply flavored and custardy the final bake will be.

    Why did my casserole come out soggy?

    Sogginess usually comes down to one of two things. Either the bread was too fresh and soft when you assembled the dish, or too much liquid was used relative to the amount of bread. Make sure your bread is slightly stale or has been dried out. Also make sure every chunk of bread is nestled snugly in the pan so the custard distributes evenly.

    Can I make this dairy-free?

    Yes. Substitute the whole milk with full-fat oat milk or coconut milk for the richest result. Swap the heavy cream for full-fat coconut cream. Use a plant-based butter for the crumb topping. The texture will be slightly different, but the flavor is still really good.

    Can I skip the crumb topping?

    You can, but I would strongly encourage you not to. The topping is what gives this casserole its signature contrast between soft and crunchy. Without it, the dish is pleasant but fairly one-note. If you must skip it, consider adding a generous dusting of cinnamon sugar just before baking to at least capture some of that caramelized finish on top.

    This Overnight French Toast Bake is one of those recipes you will find yourself returning to again and again. It makes ordinary mornings feel like a celebration, and holiday brunches feel completely effortless. Try it once and it will earn a permanent spot in your breakfast rotation.

    Overnight French Toast Bake

    Overnight French Toast Bake

    A make-ahead breakfast casserole with a rich spiced custard and buttery cinnamon crumb topping. Prep it the night before and bake fresh in the morning.
    Prep Time 10 minutes
    Cook Time 55 minutes
    Overnight Soak 8 hours
    Total Time 10 hours
    Servings: 10 servings
    Course: Breakfast, Brunch
    Cuisine: American
    Calories: 420

    Ingredients
      

    French Toast Base
    • 2 tbsp butter softened, for greasing pan
    • 1 large loaf crusty bread French bread, sourdough, brioche, or challah — day-old works best
    • 8 large eggs fresh, quality eggs
    • 2 cups whole milk organic preferred
    • 1/2 cup heavy cream organic preferred
    • 1/2 cup granulated sugar organic cane or white sugar
    • 1/2 cup brown sugar light or dark, packed
    • 2 tbsp vanilla extract real vanilla, not imitation
    • 1 pinch kosher salt
    Cinnamon Crumb Topping
    • 1/2 cup all-purpose flour unbleached preferred
    • 1/2 cup brown sugar packed
    • 1 tsp ground cinnamon
    • 1/4 tsp sea salt
    • 1/4 tsp nutmeg freshly grated preferred
    • 1/2 cup cold butter cut into chunks, chilled
    For Serving
    • real maple syrup warmed, to taste
    • softened butter to taste
    • fresh berries optional

    Method
     

    Prepare the French Toast Base
    1. Grease a 9×13-inch baking dish generously with softened butter, spreading it into the corners with a paper towel.
    2. Tear or cut the bread into rough 1 to 2-inch chunks and scatter them evenly across the prepared pan.
    3. Crack all 8 eggs into a large mixing bowl and whisk well. Add the whole milk, heavy cream, granulated sugar, brown sugar, vanilla extract, and kosher salt. Whisk vigorously until thick, creamy, and fully combined with no visible egg white streaks.
    4. Pour the custard slowly and evenly over the bread. Gently press down on any dry spots so the bread begins absorbing the liquid. Cover tightly and refrigerate overnight, or for at least 8 hours.
    Make the Cinnamon Crumb Topping
    1. In a medium bowl, combine the flour, brown sugar, cinnamon, sea salt, and nutmeg. Stir with a fork until evenly mixed.
    2. Add the cold butter chunks and work them in with a fork, pastry blender, or fingertips until rough pea-sized crumbles form. Do not overmix. Store in an airtight container or zip-lock bag in the refrigerator overnight.
    Bake the Casserole
    1. Remove the casserole from the refrigerator and let it sit at room temperature while you preheat the oven to 350°F (175°C).
    2. Crumble the chilled topping evenly over the entire surface of the casserole, covering every inch.
    3. Bake uncovered for 45 to 60 minutes, until the top is deep golden brown and the center feels set when gently pressed. For a soft bread pudding texture bake 45 minutes; for a firmer, more caramelized finish bake up to 60 minutes.
    4. Let the casserole rest for 10 minutes before slicing. Serve warm with heated maple syrup, a pat of softened butter, and fresh berries on the side.

    Notes

    Bread tip: Day-old bread is best. If using fresh bread, spread chunks on a sheet pan for 20 minutes to dry out before assembling.
    Crumb topping: Store separately in the fridge overnight for maximum crunch. Add just before baking.
    Freezing: Assemble without the topping, wrap tightly, and freeze for up to 3 months. Thaw overnight in the fridge, add topping, and bake as directed.
    Leftovers: Store in an airtight container in the fridge for up to 4 days. Reheat individual portions in the microwave for 30 to 60 seconds, or cover the whole pan with foil and reheat at 325°F for 15 to 20 minutes.
    Dairy-free option: Substitute whole milk with full-fat oat or coconut milk, heavy cream with full-fat coconut cream, and use plant-based butter in the topping.
  • Cranberry Bread with Orange Glaze | Easy Holiday Recipe

    Prep Time: 10 minutes | Cook Time: 50 minutes | Total Time: 1 hour | Servings: 8 | Difficulty: Easy

    The Story Behind This Cranberry Bread

    You know that feeling when you open the oven door and the smell just hits you? That warm, sweet, citrusy wave that makes everyone in the house wander into the kitchen? That is exactly what happens every single time I bake this cranberry bread with orange glaze.

    I stumbled onto this recipe almost by accident. A bag of fresh cranberries sat in my fridge for almost a week. Two oranges on the counter were about to go soft. I did not want a complicated project. I just wanted something that tasted like it came from a good bakery without the bakery price tag. This loaf was the answer.

    And wow. Did it deliver.

    Every slice is a little work of art. Bright red cranberry pieces nestled into a soft, buttery crumb. A glossy white glaze draped over the top that smells faintly of citrus and tastes like sunshine. I have brought this to holiday brunches, tucked it into gift bags, and eaten way too many slices standing over the kitchen counter at 7am.

    cranberry bread with orange glaze

    Here is what I love most about this recipe. It is not precious or complicated. No stand mixer required. No fancy pastry techniques. Just a hand mixer, two bowls, a loaf pan, and ingredients you probably already have. Yet the result looks like you spent hours on it.

    There is one small trick that makes a real difference. Tossing the cranberries in a little flour before folding them into the batter. Think of it like giving each cranberry a grip. Without the flour, they slide down to the bottom of the pan as the batter bakes. With it, they stay perfectly distributed throughout every slice.

    The other detail worth mentioning? Fresh orange zest. Both in the bread and the glaze. Zest is not the same as juice. It carries the aromatic oils from the orange skin, and those oils give the whole loaf a fragrant, floral citrus punch that juice alone just cannot match.

    Why You Will Love This Recipe

    • Ready in about one hour from start to finish
    • Uses simple, everyday baking ingredients
    • Stays moist and tender for several days after baking
    • Makes a stunning homemade gift during the holiday season
    • The orange glaze takes just three ingredients and two minutes to make

    Ingredients and What They Do

    Before you start mixing, it helps to know why each ingredient is in here. Understanding the purpose behind each one makes it easier to troubleshoot if something goes wrong, and easier to swap things out when needed.

    IngredientQuantityNotes
    All-purpose flour1 1/2 cupsGives the loaf structure and body
    Baking powder1 tspPrimary leavening agent for rise
    Salt1/4 tspBalances the sweetness throughout
    Milk1/4 cupRoom temperature; whole milk preferred
    Orange zestZest of 1 large orangeReserve 1 tsp for the glaze
    Orange juice1/4 cupFreshly squeezed for best flavor
    Unsalted butter6 TbspSoftened to room temperature
    Granulated sugar3/4 cupSweetens and tenderizes the crumb
    Large eggs2Room temperature; adds moisture and structure
    Fresh cranberries1 1/2 cupsRinsed and patted dry before use
    All-purpose flour (for berries)1/2 TbspCoats cranberries to prevent sinking
    Powdered sugar1 cupBase for the orange glaze
    Orange juice (for glaze)1 1/2 TbspFreshly squeezed; adjust for consistency
    Orange zest (for glaze)1 tspReserved from above; adds depth to glaze

    Butter: This is what gives the loaf that soft, cake-like texture. The key is making sure it is truly softened, not melted, not cold from the fridge. Press a finger into it. It should leave an indent easily. If it does not, give it more time on the counter.

    Cranberries: Fresh is best. They hold their shape during baking and give you those beautiful bursts of tart flavor in every bite. Frozen cranberries work too. Just add them straight from the freezer without thawing. Thawed berries get mushy and watery. Plan to add a few extra minutes of bake time when using frozen.

    Orange zest and juice: Both go into the batter and both matter. The juice adds moisture and brightness. The zest is where the real orange flavor lives. It is concentrated, fragrant, and impossible to replicate with bottled juice. Always zest your orange before you cut it for juicing. Once you squeeze the juice out, zesting becomes nearly impossible.

    Step-by-Step Instructions

    Alright, here is where the magic happens. Follow these steps in order and you will have a perfect loaf.

    cranberry bread with orange glaze

    Before You Start

    • Preheat your oven to 350 degrees F (175 degrees C).
    • Butter a 6-cup loaf pan (8.5 x 4.5 inches), then dust it with flour. Tap out the excess flour.
    • Set all refrigerated ingredients out 30 minutes early so they can come to room temperature.

    This last point matters more than most people realize. Cold butter and cold eggs behave differently in batter. They can make the mixture look broken or curdled. Room temperature ingredients blend together smoothly and give you a better final texture.

    Making the Batter

    Step 1. Mix the dry ingredients. In a medium bowl, whisk together the flour, baking powder, and salt. Set this bowl aside.

    Step 2. Prepare the wet mixture. Pour the milk into a measuring cup. Add the orange juice and most of the orange zest, keeping 1 teaspoon of zest reserved for the glaze. Stir gently to combine.

    Step 3. Cream the butter and sugar. In a large mixing bowl, beat the softened butter and granulated sugar together at medium-high speed for 2 to 3 minutes. The mixture will look a bit rough, not smooth. That is totally fine. You are not going for fluffy here.

    Step 4. Add the eggs. Beat in the eggs one at a time, mixing well after each addition until both eggs are fully incorporated.

    Step 5. Alternate adding flour and liquid. Add half of the flour mixture to the butter mixture and mix on low speed. Then pour in half of the milk mixture and mix again. Repeat with the remaining flour and milk, mixing just until the batter comes together. Avoid overmixing.

    Pro Tip: Alternating the flour and liquid additions keeps the batter smooth and prevents gluten from overdeveloping. Overmixing quick bread batter leads to a dense, tough loaf instead of the light, tender crumb you want.

    Step 6. Prepare and fold in the cranberries. Rinse and pat the cranberries completely dry. Place them in a small bowl and toss with the 1/2 tablespoon of flour until evenly coated. Gently fold the cranberries into the batter, stirring just enough to distribute them throughout.

    cranberry bread with orange glaze

    Baking the Bread

    Step 7. Fill the pan. Spread the batter evenly into the prepared loaf pan using a spatula.

    Step 8. Bake. Place in the preheated oven and bake for 45 to 50 minutes, until the top is golden and a toothpick inserted in the center comes out clean.

    Step 9. Cool in the pan. Remove the loaf from the oven and let it cool in the pan for 10 to 15 minutes. Then run a butter knife around the edges and transfer the loaf to a wire rack.

    Step 10. Cool completely. Let the bread cool completely on the wire rack before adding the glaze. This step is important. Glazing a warm loaf causes the glaze to run right off instead of setting on the surface. I know it is tempting to rush. Do not.

    Making the Orange Glaze

    The glaze is the finishing touch that takes this bread from homemade to bakery-level. Three ingredients. Two minutes. That is it.

    Step 11. In a small bowl, combine the powdered sugar, 1 1/2 tablespoons of fresh orange juice, and the reserved teaspoon of orange zest.

    Step 12. Stir until completely smooth.

    Step 13. The glaze should flow in a slow, steady drizzle from a spoon. Too thick? Add orange juice a few drops at a time. Too thin? Stir in a bit more powdered sugar.

    Step 14. Drizzle the glaze over the fully cooled loaf. Allow it to set for 10 minutes before slicing.

    cranberry bread with orange glaze

    Mini Loaf Option

    Want to give this as a gift? Make mini loaves. Divide the batter evenly among three mini loaf pans (5.5 x 3 inches each), filling each one halfway to two-thirds full. Bake at the same temperature for 22 to 28 minutes. Cool and glaze as directed above.

    They look adorable. They travel well. And people absolutely love receiving them.

    Storage Instructions

    Storage MethodHow LongDetails
    Room temperatureUp to 3 daysWrap loosely in plastic wrap or store in an airtight container
    RefrigeratorUp to 1 weekCover the loaf well before refrigerating
    FreezerUp to 3 monthsCool completely, place in a freezer-safe zip bag, remove excess air. Thaw overnight in the fridge.

    Tips, Variations, and FAQs

    Tips for the Best Results

    Room temperature matters. Cold butter will not cream properly with the sugar. Cold eggs can cause the batter to look curdled. Pull everything out of the fridge at least 30 minutes before baking. It is a small habit that makes a real difference.

    Measure flour correctly. Spoon the flour into your measuring cup and level it off with a knife. Scooping directly from the bag compacts the flour and adds more than you need. The result is a denser, drier loaf.

    Do not skip the flour coating on cranberries. That light dusting is a small step with a big impact. It grips the batter and holds each cranberry in place during baking. Without it, all the berries sink straight to the bottom.

    Zest before juicing. It is almost impossible to zest a citrus fruit once you have squeezed all the juice out of it. Always zest first. Then cut and juice.

    Use a light-colored loaf pan. Darker pans absorb more heat and can lead to over-browning on the bottom and sides. If you only have a dark pan, reduce the oven temperature by 25 degrees F and start checking early.

    Tent with foil if browning too fast. Around the 30-minute mark, peek at the top of the loaf. If it is getting dark before the center is fully baked, lay a sheet of foil loosely over the top for the rest of the bake time.

    Variations Worth Trying

    Add nuts: Fold in 1/2 cup of chopped walnuts or pecans along with the cranberries. They add a wonderful crunch to each slice and pair beautifully with the tart berries.

    Dried cranberries: Fresh or frozen cranberries not available? Use 2/3 cup of dried cranberries. Soak them in warm water for 10 minutes first, then drain and pat dry. Also reduce the sugar in the recipe to 2/3 cup, since dried berries are naturally sweeter than fresh.

    Lemon variation: Swap the orange juice and zest for lemon juice and lemon zest. Use the same amounts. The result is brighter and more tart. Great for spring baking.

    cranberry bread with orange glaze

    Frequently Asked Questions

    Can I use frozen cranberries instead of fresh?

    Yes, frozen cranberries work well in this recipe. Add them directly from the freezer without thawing first. Thawed cranberries release too much water and can make the batter watery. Also expect the bake time to increase by a few minutes when using frozen berries. Start checking for doneness at the 50-minute mark.

    My loaf always seems dense. What am I doing wrong?

    Dense quick bread usually comes down to one of three things. First, the butter may not have been soft enough before creaming. Second, the batter may have been overmixed after adding the flour. Quick breads need a light hand once the dry ingredients go in. Third, you may have used too much flour. Spoon the flour into the measuring cup and level it off rather than scooping directly from the bag.

    Can I make this bread ahead of time?

    Absolutely. This cranberry bread actually tastes even better the next day once the flavors have had time to settle in. Bake and cool the loaf completely, then wrap it tightly in plastic wrap and store at room temperature. Add the glaze just before serving for the freshest presentation.

    Why did the glaze sink into the bread instead of sitting on top?

    This happens when the glaze is applied to a warm loaf. The heat causes the glaze to absorb into the surface rather than setting on top. Always let the bread cool fully on a wire rack before glazing. If you prefer a glaze that soaks in slightly for added moisture, apply a thin first coat when the bread is just barely warm, then add a second coat once everything is completely cool.

    How do I know when the bread is done baking?

    Insert a toothpick into the very center of the loaf. If it comes out clean or with just a few dry crumbs, the bread is done. If you see wet batter on the toothpick, give it another 5 minutes and test again. The top of the loaf should also be a deep golden brown and feel firm when gently pressed.

    This cranberry bread with orange glaze is the kind of recipe that earns a permanent spot in your kitchen rotation. Simple enough for a regular weekend bake. Special enough to give as a holiday gift. The tartness of the cranberries and the sweet citrus glaze are a pairing that just works every single time. Give it a try. I think you will be really glad you did.

    Cranberry Bread with Orange Glaze

    Cranberry Bread with Orange Glaze

    A moist, tender cranberry loaf topped with a sweet citrus glaze. Ready in just 1 hour with simple ingredients and no stand mixer required.
    Prep Time 10 minutes
    Cook Time 50 minutes
    Total Time 1 hour
    Servings: 8 slices
    Course: Bread, Breakfast, Brunch
    Cuisine: American
    Calories: 310

    Ingredients
      

    Bread Batter
    • 1 1/2 cups all-purpose flour
    • 1 tsp baking powder
    • 1/4 tsp salt
    • 1/4 cup whole milk room temperature
    • 1/4 cup fresh orange juice freshly squeezed
    • 1 large orange zested; reserve 1 tsp zest for glaze
    • 6 tbsp unsalted butter softened to room temperature
    • 3/4 cup granulated sugar
    • 2 large eggs room temperature
    • 1 1/2 cups fresh cranberries rinsed and patted dry
    • 1/2 tbsp all-purpose flour for coating cranberries
    Orange Glaze
    • 1 cup powdered sugar
    • 1 1/2 tbsp fresh orange juice adjust for consistency
    • 1 tsp orange zest reserved from above

    Method
     

    1. Preheat your oven to 350°F (175°C). Butter and flour an 8.5 x 4.5 inch loaf pan, tapping out the excess flour. Set all refrigerated ingredients out 30 minutes early to reach room temperature.
    2. In a medium bowl, whisk together the flour, baking powder, and salt. Set aside.
    3. In a measuring cup, combine the milk, orange juice, and orange zest (reserving 1 tsp of zest for the glaze). Stir gently.
    4. In a large bowl, beat the softened butter and granulated sugar together at medium-high speed for 2 to 3 minutes.
    5. Beat in the eggs one at a time, mixing well after each addition.
    6. Add half the flour mixture to the butter mixture on low speed. Pour in half the milk mixture and mix. Repeat with the remaining flour and milk, mixing just until combined. Do not overmix.
    7. Toss the rinsed, dried cranberries with 1/2 tablespoon of flour until lightly coated. Gently fold them into the batter.
    8. Spread the batter evenly into the prepared loaf pan. Bake for 45 to 50 minutes, until the top is golden and a toothpick inserted in the center comes out clean.
    9. Cool in the pan for 10 to 15 minutes, then transfer to a wire rack and cool completely before glazing.
    10. To make the glaze, stir together the powdered sugar, orange juice, and reserved orange zest until smooth. Drizzle over the fully cooled loaf and let set for 10 minutes before slicing.

    Notes

    Toss cranberries in flour before folding into the batter to prevent sinking. Always zest the orange before juicing. For frozen cranberries, add them straight from the freezer and increase bake time by a few minutes. Mini loaf variation: divide batter among three mini pans and bake for 22 to 28 minutes.
  • Apple Fritter Bread Recipe (Easy, No-Fry!)

    Apple Fritter Bread Recipe (Easy, No-Fry!)

    It was a chilly Saturday morning. A bowl of Granny Smith apples sat on my counter and I had no real plan for them. I wanted something warm, cozy, and a little special. So I started mixing. What came out of the oven that day was this apple fritter bread, and I am not exaggerating when I say it has become the most-requested thing I bake all season.

    Friends ask for it. Family asks for it. Someone once asked me to bring it to a potluck three weeks in a row.

    So what makes it so good?

    It takes everything you love about a classic apple fritter and puts it in a loaf pan. The juicy apple chunks. The cinnamon sugar swirl. That sweet vanilla glaze dripping down the sides. You get all of it without standing over a pot of hot oil.

    The batter is rich and tender. Butter, eggs, and sour cream do the heavy lifting there. And that sour cream? That is the real secret. It keeps every slice soft and moist for days after baking. No dry, crumbly bread here.

    apple fritter bread

    Why You Will Keep Coming Back to This Recipe

    This bread is simple enough to make on a Tuesday morning before work. But it looks and tastes impressive enough to bring to a holiday brunch. That combination is hard to beat.

    Here is what sets it apart:

    • No yeast, no proofing, no waiting around. Just mix, layer, and bake.
    • The sour cream batter stays moist well beyond day one.
    • Dark brown sugar adds a deep, almost caramel-like richness to both the swirl and the apple mixture.
    • The glaze sets on the surface without making the bread soggy.
    • Once fully cooled, it slices cleanly every single time.

    It is the kind of recipe you make once and then add to your permanent rotation.

    Prep Time: 15 minutes | Cook Time: 55 minutes | Total Time: 1 hour 10 minutes | Servings: 10-12 slices | Difficulty: Easy

    Choosing the Right Apples

    I almost always grab Granny Smith apples for this one. Their tartness plays really nicely against all that sweet brown sugar. But the good news? This recipe is forgiving. Honeycrisp, Fuji, Gala, Braeburn, and Pink Lady all work beautifully here.

    Whatever apple you use, the size of your dice matters more than the variety. Cut them into small cubes, roughly half an inch or smaller. Think of it like this: big chunks act like little weights and sink straight to the bottom of the pan. Small pieces stay spread throughout the batter, so you get apple in every bite, not just the bottom layer.

    apple fritter bread

    Everything You Need

    This recipe has four components. Sounds like a lot, but each one takes less than two minutes to put together. Here is the full breakdown:

    IngredientQuantityNotes
    For the Cinnamon Apples
    Apples, peeled and diced small2 mediumGranny Smith preferred; any firm apple works
    Dark brown sugar2 tbspAdds deep caramel flavor to the apples
    Ground cinnamon1 tspWarm spice coating for the apple pieces
    For the Cinnamon Sugar
    Dark brown sugar1/2 cupCreates that signature fritter sugar swirl
    Ground cinnamon2 tspLayered inside and on top of the bread
    For the Bread
    Unsalted butter, room temp1/2 cupSoftened; creates a rich, tender crumb
    Granulated sugar2/3 cupSweetens the base batter
    Large eggs, room temp2Room temp eggs blend more smoothly
    Vanilla extract1 tspPure extract for best flavor
    All-purpose flour1 1/2 cupsSpooned and leveled, not scooped
    Baking powder2 1/2 tspGives the loaf a good rise
    Salt1/2 tspBalances the sweetness
    Milk1/3 cupWhole or 2% both work well
    Sour cream (or yogurt)1/3 cupKeeps the bread incredibly moist
    For the Glaze
    Powdered sugar1/2 cupSifted for a smooth, lump-free glaze
    Milk1 tbspAdjust by drops for preferred thickness
    Vanilla extract1/4 tspAdds flavor depth to the glaze
    SaltPinchCuts the sweetness of the glaze

    Pro tip: Do not scoop your flour straight from the bag. Spoon it into the measuring cup instead, then level off the top with a straight edge. Scooping packs the flour down and you end up with too much, which makes the loaf dense and dry.

    How to Make Apple Fritter Bread Step by Step

    apple fritter bread

    Once everything is measured out, the active prep is about 15 minutes total. I always prepare all three components first before I even think about the loaf pan. It makes the assembly so much smoother.

    Step 1: Prep the Cinnamon Apples

    Peel, core, and dice your apples into small cubes and add them to a medium bowl. Sprinkle over 2 tablespoons of dark brown sugar and 1 teaspoon of ground cinnamon. Toss everything together until the apple pieces are evenly coated. Set this bowl aside while you prepare the rest.

    Step 2: Mix the Cinnamon Sugar

    In a separate small bowl, stir together the half cup of dark brown sugar and 2 teaspoons of ground cinnamon until combined. This mixture will be used as the layered swirl inside and on top of the bread. Set it aside.

    Step 3: Preheat the Oven and Prepare the Pan

    Preheat your oven to 350 degrees Fahrenheit. Line a standard 1-pound loaf pan with parchment paper on all sides, leaving a slight overhang on the long edges. This overhang acts as handles and makes lifting the finished loaf out of the pan effortless.

    Step 4: Make the Bread Batter

    In the bowl of a stand mixer fitted with the paddle attachment, beat the softened butter and granulated sugar together on medium speed until the mixture turns pale and fluffy. This usually takes about 2 to 3 minutes. Scrape down the sides of the bowl with a silicone spatula.

    Add the eggs one at a time, beating briefly after each addition and scraping the bowl between each one. Mix in the vanilla extract until incorporated.

    In a separate bowl, whisk together the all-purpose flour, baking powder, and salt. With the mixer running on low, add half the flour mixture and let it partially combine. Next, pour in the milk and sour cream together. Finally, add the remaining flour mixture and mix only until no streaks of flour remain. Do not over-mix at this stage.

    Key technique: Switch to a spatula as soon as the flour goes in. Over-mixing builds up gluten. That gives you a tough, chewy loaf instead of the soft, tender one you are going for.

    Step 5: Layer the Loaf

    Using your silicone spatula, transfer roughly half of the batter into the prepared loaf pan and spread it into an even layer. Scatter half of the cinnamon apple mixture over the batter in an even layer. Sprinkle half of the cinnamon sugar mixture over the apples.

    Spoon the remaining batter over this layer and gently spread it to the edges. Top with the remaining cinnamon apples, then finish with the rest of the cinnamon sugar mixture. The top of your loaf will look generously covered and that is exactly what you want.

    Step 6: Bake

    Place the loaf pan in the center rack of your preheated oven. Bake for 50 to 55 minutes. Start checking at the 45-minute mark. When the top is deep golden brown and a butter knife inserted into the center of the loaf comes out clean with no wet batter, it is ready.

    If the top starts browning faster than the center is cooking through, just tent the pan loosely with a piece of aluminum foil. It lets the inside finish baking without the top getting too dark.

    Step 7: Make the Glaze and Finish

    While the loaf cools in the pan, whisk together the powdered sugar, 1 tablespoon of milk, vanilla extract, and a pinch of salt in a small bowl until completely smooth. If the glaze feels too thick, add milk a few drops at a time. If it seems too thin, add a little more powdered sugar.

    Allow the bread to cool in the pan for at least 20 minutes before lifting it out using the parchment handles. Transfer to a wire rack and let it cool completely before drizzling with the glaze. I know waiting is hard. But a fully cooled loaf slices cleanly and holds the glaze on the surface where it looks beautiful.

    apple fritter bread

    Tips for the Best Apple Fritter Bread Every Time

    Use room-temperature ingredients. Cold butter will not cream properly with the sugar. Cold eggs can cause the batter to curdle slightly. A simple fix: pull everything out of the fridge at least 30 minutes before you start.

    Dark brown sugar makes a real difference. Light brown sugar will work in a pinch, but dark brown sugar has more molasses in it. That molasses is what gives the cinnamon swirl that deep, almost caramel apple flavor. Worth seeking out.

    Do not skip lining the pan. The caramelized cinnamon sugar gets sticky. Really sticky. Parchment paper makes the whole removal process clean and easy. Skipping it is a risk not worth taking.

    Cool completely before glazing. A warm loaf will just absorb the glaze and it disappears. A cool loaf holds it right on the surface, exactly where it should be. Think of it like icing a warm cake. It just melts away.

    Check doneness carefully. Here is the tricky part. The cinnamon apple mixture stays naturally moist inside the bread even when it is fully baked. Do not confuse that good gooeyness with under-baked batter. Use a thin knife or toothpick and look specifically for no wet, sticky batter clinging to it.

    apple fritter bread

    Variations and Swaps

    This recipe is a great base to play around with. A few ideas:

    • Sour cream substitute: Plain whole-milk yogurt works cup-for-cup and gives you an equally moist crumb.
    • Butter substitute: The same quantity of a neutral oil like avocado oil or light olive oil works in place of butter for a slightly different texture.
    • Add-ins: Fold a half cup of chopped walnuts or pecans into the batter before pouring it into the pan for a nutty crunch throughout.
    • Spice it up: Add a quarter teaspoon of ground nutmeg or cardamom to the cinnamon apple mixture for a deeper, more complex spice profile.
    • Maple glaze: Swap the milk in the glaze for pure maple syrup. It creates a warm, autumnal drizzle that pairs really well with the apples.
    • Muffin version: Divide the batter evenly into a lined 12-cup muffin tray and bake at 350 degrees for 22 to 25 minutes.

    How to Store Apple Fritter Bread

    Fresh fruit in baked goods means you want to store this one in the fridge. Wrap the cooled, glazed loaf tightly in plastic wrap or pop it into an airtight container. It keeps well for up to 5 days.

    When you are ready for a slice, 15 to 20 seconds in the microwave brings it right back. Soft, warm, and tasting like it just came out of the oven.

    Freezing works well too. Just freeze the slices before glazing. Wrap each slice individually in plastic wrap and place them in a freezer-safe bag. They keep for up to 2 months. Thaw overnight in the fridge or leave them on the counter for about an hour, then drizzle with fresh glaze right before serving.

    Storage MethodConditionHow Long
    Room temperatureWrapped in plasticUp to 2 days
    RefrigeratorAirtight containerUp to 5 days
    Freezer (unglazed)Individually wrappedUp to 2 months

    Frequently Asked Questions

    Can I use a different size loaf pan?

    This recipe is designed for a standard 1-pound loaf pan. If you use a 9×5-inch pan, the loaf will be slightly shallower and may bake a few minutes faster, so start checking at the 45-minute mark. Avoid using a very large pan because there simply will not be enough batter to fill it properly.

    My bread sank in the middle. What went wrong?

    A sunken center usually comes down to one of three things. The oven temperature was too high and the outside set before the center cooked through. The baking powder was old or not measured accurately. Or the loaf was pulled from the oven before it was fully done. Always check that your baking powder is fresh, use an oven thermometer if you can, and make sure your knife comes out completely clean before calling it done.

    Can I make this bread ahead of time?

    Yes, and honestly it tastes even better the next day. The flavors settle and deepen overnight. Bake and cool it fully, wrap it tightly without the glaze, and refrigerate. Add the glaze right before serving.

    Is sour cream necessary, or can I leave it out?

    Sour cream does real structural work in this recipe. It keeps the crumb tender and moist. Leaving it out makes for a noticeably drier loaf. If you do not have any, plain whole-milk yogurt in the same quantity is a seamless swap.

    How do I know when the apples are diced small enough?

    Think blueberry-sized. Roughly a quarter to half an inch across. Pieces that are too large act like weights and sink during baking, which also creates pockets of extra moisture in the crumb. Smaller pieces stay where you want them and give you a little burst of apple flavor in every single bite.

    Happy baking. This loaf is just the thing to fill your kitchen with that warm, spiced autumn smell you want on a quiet weekend morning.

    Apple Fritter Bread

    Apple Fritter Bread

    All the flavors of a classic apple fritter in an easy loaf – juicy cinnamon apples, a brown sugar swirl, and a vanilla glaze. No frying required.
    Prep Time 15 minutes
    Cook Time 55 minutes
    Cooling Time 20 minutes
    Total Time 1 hour 10 minutes
    Servings: 10 slices
    Course: Breakfast, Brunch, Dessert
    Cuisine: American
    Calories: 285

    Ingredients
      

    Cinnamon Apples
    • 2 medium apples, peeled and diced small Granny Smith preferred; any firm apple works
    • 2 tbsp dark brown sugar
    • 1 tsp ground cinnamon
    Cinnamon Sugar Swirl
    • 1/2 cup dark brown sugar
    • 2 tsp ground cinnamon
    Bread Batter
    • 1/2 cup unsalted butter, room temperature softened
    • 2/3 cup granulated sugar
    • 2 large eggs, room temperature
    • 1 tsp vanilla extract
    • 1 1/2 cups all-purpose flour spooned and leveled
    • 2 1/2 tsp baking powder
    • 1/2 tsp salt
    • 1/3 cup milk whole or 2%
    • 1/3 cup sour cream or plain whole-milk yogurt
    Vanilla Glaze
    • 1/2 cup powdered sugar sifted
    • 1 tbsp milk adjust by drops for preferred thickness
    • 1/4 tsp vanilla extract
    • pinch salt

    Method
     

    1. Peel, core, and dice apples into small cubes (about 1/4 to 1/2 inch). Toss with 2 tbsp dark brown sugar and 1 tsp cinnamon until evenly coated. Set aside.
    2. In a small bowl, stir together 1/2 cup dark brown sugar and 2 tsp cinnamon until combined. Set aside.
    3. Preheat oven to 350°F (175°C). Line a standard 1-pound loaf pan with parchment paper on all sides, leaving an overhang on the long edges for easy removal.
    4. Beat softened butter and granulated sugar together on medium speed for 2 to 3 minutes until pale and fluffy. Scrape down the bowl. Add eggs one at a time, beating after each addition. Mix in vanilla extract.
    5. In a separate bowl, whisk together flour, baking powder, and salt. With the mixer on low, add half the flour mixture, then pour in the milk and sour cream, then add the remaining flour mixture. Mix only until no streaks of flour remain. Do not over-mix.
    6. Spread half the batter into the prepared loaf pan. Scatter half the cinnamon apples over the batter, then sprinkle with half the cinnamon sugar. Spoon remaining batter on top, spread gently, then top with remaining apples and cinnamon sugar.
    7. Bake on the center rack for 50 to 55 minutes, checking at 45 minutes. The loaf is done when the top is deep golden brown and a knife inserted in the center comes out clean. If the top browns too quickly, tent loosely with aluminum foil.
    8. While the loaf cools in the pan, whisk together powdered sugar, 1 tbsp milk, vanilla extract, and a pinch of salt until smooth. Adjust consistency with drops of milk or extra powdered sugar as needed.
    9. Cool the loaf in the pan for at least 20 minutes, then lift out using the parchment handles and transfer to a wire rack. Cool completely before drizzling with glaze.

    Notes

    Use room-temperature butter and eggs for best results – pull them from the fridge at least 30 minutes before starting. Spoon flour into the measuring cup and level off; do not scoop directly from the bag. Dark brown sugar gives the swirl a deeper, caramel-like flavor and is worth using over light brown sugar. Cool the loaf completely before glazing so the glaze sits on the surface instead of absorbing in. The apple mixture stays naturally moist inside even when fully baked – look for no wet batter on the knife, not dry crumbs.
  • Lemon Loaf Cake with Cream Cheese Filling

    Lemon Loaf Cake with Cream Cheese Filling

    Prep TimeCook TimeTotal TimeServings
    15 minutes50 minutes1 hour 5 minutes10 slices
    lemon loaf cake with cream cheese filling

    I’ll be honest with you. I did not expect much the first time I made this cake.

    It looked simple. A basic loaf. Nothing flashy. But then I took one bite and just stopped. The lemon hit first. Then the cream cheese. That soft, rich ribbon hiding right in the middle. I put my fork down and thought, “I need to make this every single week.”

    And I basically have.

    This is the kind of cake you bring to a potluck and someone asks for the recipe before they finish their slice. I have made it for Sunday brunches, for a neighbor who was having a rough week, and once for no reason at all on a random Tuesday afternoon. It has never failed me.

    The best part? You do not need to be an experienced baker to pull this off. No stand mixer required. No pastry skills. Just a loaf pan, a hand mixer, and ingredients you probably already have at home.

    Why This Recipe Actually Works

    Let me break down what is really going on here.

    The sour cream is doing heavy lifting in this batter. It keeps the crumb moist and adds a gentle tanginess that balances the sweetness perfectly. Think of it like adding buttermilk to pancakes. You do not taste it directly, but you would notice if it was missing.

    Fresh lemon zest is where the real flavor lives. Not the juice. The zest. Those tiny bits of lemon peel are packed with natural citrus oils that perfume the whole batter. Always zest your lemon first, before you juice it. Trust me on this one.

    And then there is the cream cheese. Room temperature. Non-negotiable. Cold cream cheese will not beat smooth. You will end up with tiny lumps in your filling, and nobody wants that. Take it out of the fridge at least an hour before you start baking.

    Same goes for the butter.

    Ingredients You Will Need

    Here is everything you need for the cake, the filling, and that final lemon drizzle on top:

    IngredientQuantityNotes
    For the Cake
    Unsalted butter1/2 cupRoom temperature, softened
    White sugar1 cupGranulated
    Large eggs3Room temperature recommended
    Lemon zest2 tablespoonsFrom about 2 fresh lemons
    Lemon juice2 tablespoonsFreshly squeezed preferred
    Vanilla extract1 teaspoonPure extract for best flavor
    All-purpose flour1 1/2 cupsSpooned and leveled
    Salt1/4 teaspoonFine table salt
    Baking soda1/4 teaspoonCheck it is not expired
    Baking powder1/4 teaspoonCheck it is not expired
    Sour cream1/3 cupFull-fat for best moisture
    For the Cream Cheese Filling
    Cream cheese8 ouncesFull-fat block, room temperature
    Large egg1For the filling mixture
    White sugar1/4 cupGranulated
    All-purpose flour3 tablespoonsHelps filling set properly
    For the Lemon Drizzle
    Confectioners sugar1/2 cupSifted to avoid lumps
    Lemon juice2 tablespoonsAdjust for desired consistency

    Quick note on the flour. Spoon it into the measuring cup and level it off with a knife. Do not scoop directly from the bag. Scooping packs the flour down and you will end up with too much. More flour means a drier, tougher cake.

    How to Make Lemon Loaf Cake with Cream Cheese Filling

    lemon loaf cake with cream cheese filling

    Okay, here we go. Six steps. That is all this takes.

    Step 1: Get Your Oven and Pan Ready

    Preheat your oven to 350 degrees Fahrenheit before you do anything else.

    Coat your 8×4 inch loaf pan generously with non-stick spray. Set it aside. Getting the oven hot at the start ensures your leaveners activate at exactly the right moment once the batter goes in.

    Do not skip this step and try to preheat while you mix. The timing matters.

    Step 2: Build the Cake Batter

    Add your softened butter and white sugar to a large mixing bowl. Beat them together with an electric mixer on medium speed for about two minutes.

    What you want to see: the mixture turns pale, noticeably fluffy, and almost creamy looking. This is the creaming process. It traps tiny air bubbles into the fat, and those bubbles are what gives the loaf its lift in the oven. It is like inflating a tiny balloon inside the batter.

    Once that looks right, add your eggs one at a time. Mix between each one. Scrape the sides and bottom of the bowl as you go.

    Now add the lemon juice, lemon zest, sour cream, and vanilla extract. Beat everything together for one more minute.

    In a separate bowl, whisk the flour, salt, baking soda, and baking powder together. Add this dry mixture to the wet batter in two additions. Mix gently after each one.

    Pro Tip: Once the flour goes in, mix only until just combined. Overmixing after this point develops too much gluten. The result? A tough, chewy loaf instead of a soft, tender one. Stop as soon as you stop seeing dry streaks.

    Step 3: Prepare the Cream Cheese Filling

    Grab a clean bowl. Add the softened cream cheese, egg, sugar, and flour.

    Beat with your electric mixer until the mixture is completely smooth. This takes about two minutes. Take your time here. A lumpy filling does not create a clean ribbon inside the loaf. It creates random pockets, and the texture gets uneven.

    Smooth filling equals beautiful slices.

    lemon loaf cake with cream cheese filling

    Step 4: Layer the Batter and Filling

    Pour exactly half the cake batter into your prepared loaf pan. Spread it into an even layer across the bottom.

    Now here is the technique that makes all the difference. Instead of pouring the cream cheese mixture over the batter in one go, drop it in by the tablespoon. Work across the surface in small dollops rather than one big pour.

    Why does this matter? Pouring all at once can push the batter beneath it out of place. Dolloping keeps each layer clean and separate.

    Cover the filling with the remaining cake batter. Smooth it gently to the edges of the pan.

    Pro Tip: Do not press down on the cream cheese layer or try to flatten it. Keep it in loose dollops. That is exactly what creates the defined ribbon you will see when you slice into the finished loaf.

    Step 5: Bake It to Perfection

    Slide the loaf pan into your preheated oven. Bake for approximately 50 minutes.

    To check if it is done, press the center of the top lightly with your fingertip. A fully baked loaf feels firm and springs back. It should not leave an indent. The edges will have pulled slightly away from the sides of the pan and turned a very light golden brown.

    If the top starts to darken before the center is set, lay a piece of foil loosely over the top. Do not press it down. Just drape it on.

    Once it comes out of the oven, resist the urge to cut into it right away. Let it cool completely on a wire rack. Cutting into a warm loaf will cause it to crumble apart. I learned this the hard way.

    Step 6: Finish with the Lemon Drizzle

    lemon loaf cake with cream cheese filling

    Combine the confectioners sugar and lemon juice in a small bowl. Stir until completely smooth with no dry lumps at all.

    Pro Tip: Use a fork to drizzle the glaze, not a spoon. A fork spreads the glaze into thin, delicate lines across the top of the loaf. A spoon dumps it in thick, uneven blobs. The fork trick takes about three extra seconds and makes the whole cake look like it came from a bakery.

    Storing and Freezing Your Loaf

    Because this cake has a cream cheese center, treat it like you would a cheesecake when it comes to storage. Wrap it snugly in plastic wrap and keep it in the refrigerator. It stays fresh for up to five days.

    Want to make it ahead and freeze it? Absolutely. Here is how:

    • Let the fully baked and cooled loaf sit on the counter until it reaches room temperature
    • Wrap it tightly in plastic wrap, making sure no air can get in
    • Place the wrapped loaf into a zip-top freezer bag
    • Label it with the date and freeze for up to three months

    When you are ready to serve it, pull it from the freezer and let it thaw at room temperature for a couple of hours. No reheating needed. It slices perfectly and tastes just as good as the day you made it.

    Easy Variations to Try

    Once you have made the base recipe once or twice, try mixing it up a little. Here are some of my favorite ways to switch things around:

    • Lemon blueberry version: Fold a handful of fresh blueberries into the batter right before layering. The berries burst during baking and pair beautifully with the lemon.
    • Poppy seed twist: Stir one tablespoon of poppy seeds into the batter. Classic flavor combination and it adds a subtle crunch.
    • Citrus medley glaze: Swap the lemon juice in the drizzle for freshly squeezed orange juice. It gives the top a slightly sweeter, rounder citrus flavor.
    • Decorative lemon top: Press thin lemon slices onto the top of the batter right before baking. They caramelize slightly and look stunning.
    • Extra filling: You can increase the cream cheese filling by up to half the original amount. Any more than that and the center may collapse under the weight during baking.

    Troubleshooting Common Issues

    ProblemLikely CauseFix
    Top browning too fastOven runs hot or rack position too highTent loosely with foil halfway through baking
    Cake is dense or heavyBatter overmixed after flour was addedMix only until just combined once flour goes in
    Filling sinks to the bottomBatter too thin or filling too heavyUse full-fat cream cheese and do not thin the batter
    Drizzle is lumpy or grainyConfectioners sugar not fully dissolvedStir longer and add lemon juice one teaspoon at a time
    Loaf sticks to the panPan not properly greasedCoat all sides generously with non-stick spray before baking

    Frequently Asked Questions

    Can I use low-fat cream cheese for the filling?

    I would strongly advise against it. Low-fat cream cheese has a much higher water content than the full-fat block version. That extra moisture makes the filling too soft and loose, which causes the center to sink during baking. Stick with full-fat block cream cheese. The texture depends on it.

    Can I substitute the sour cream with something else?

    Yes. Plain full-fat yogurt is the closest substitute and works well here. Greek yogurt also does the job and adds a similar tang and moisture to the batter. Just avoid fat-free versions of either. They lack the richness needed to keep the loaf moist all the way through.

    Why is my lemon flavor not coming through strongly enough?

    Two likely culprits. First, check that you are using fresh lemon zest and not pre-packaged bottled zest flavoring. There is a big difference. Fresh zest is where the concentrated citrus oils live. Second, if you want an even bigger lemon punch, add one extra teaspoon of zest to the batter. It will not change the texture at all, just the intensity.

    Can I bake this in a different sized pan?

    You can divide the batter between two smaller loaf pans for mini versions. Just reduce the baking time to around 25 minutes and start checking early with a toothpick. I would avoid a 9×5 inch pan. The batter spreads thinner in a wider pan and the loaf ends up flatter and less impressive looking when you slice it.

    How do I know when the cake is fully baked?

    Press the center of the top gently with one fingertip. A done loaf feels firm and bounces back without leaving any impression. The sides should be pulling slightly away from the pan edges. For a second check, insert a toothpick into the cake portion, not directly into the cream cheese filling. It should come out clean with no wet batter clinging to it.

    I hope this lemon loaf brings as much joy to your kitchen as it has to mine. Happy baking!

    Lemon Loaf Cake with Cream Cheese Filling

    Lemon Loaf Cake with Cream Cheese Filling

    A soft, moist lemon loaf with a rich cream cheese ribbon in the middle and a sweet lemon drizzle on top. Easy to make with no stand mixer required.
    Prep Time 15 minutes
    Cook Time 50 minutes
    Total Time 1 hour 5 minutes
    Servings: 10 slices
    Course: Brunch, Dessert
    Cuisine: American
    Calories: 385

    Ingredients
      

    For the Cake
    • 1/2 cup unsalted butter room temperature, softened
    • 1 cup white sugar granulated
    • 3 large eggs room temperature recommended
    • 2 tbsp lemon zest from about 2 fresh lemons
    • 2 tbsp lemon juice freshly squeezed
    • 1 tsp vanilla extract pure extract
    • 1 1/2 cups all-purpose flour spooned and leveled
    • 1/4 tsp salt fine table salt
    • 1/4 tsp baking soda
    • 1/4 tsp baking powder
    • 1/3 cup sour cream full-fat
    For the Cream Cheese Filling
    • 8 oz cream cheese full-fat block, room temperature
    • 1 large egg
    • 1/4 cup white sugar granulated
    • 3 tbsp all-purpose flour
    For the Lemon Drizzle
    • 1/2 cup confectioners sugar sifted
    • 2 tbsp lemon juice adjust for desired consistency

    Method
     

    1. Preheat your oven to 350°F (175°C). Coat an 8×4 inch loaf pan generously with non-stick spray and set aside.
    2. Beat the softened butter and white sugar together in a large mixing bowl with an electric mixer on medium speed for about 2 minutes, until pale and fluffy.
    3. Add the eggs one at a time, mixing between each addition. Scrape down the sides of the bowl as needed.
    4. Add the lemon juice, lemon zest, sour cream, and vanilla extract. Beat for one more minute until combined.
    5. In a separate bowl, whisk together the flour, salt, baking soda, and baking powder. Add this dry mixture to the wet batter in two additions, mixing gently after each. Stop mixing as soon as no dry streaks remain.
    6. In a clean bowl, beat the softened cream cheese, egg, sugar, and flour together with an electric mixer until completely smooth, about 2 minutes.
    7. Pour half the cake batter into the prepared loaf pan and spread into an even layer. Drop the cream cheese filling over the batter in tablespoon-sized dollops across the surface.
    8. Cover with the remaining cake batter and smooth gently to the edges. Do not press down on the cream cheese layer.
    9. Bake for approximately 50 minutes, until the center feels firm and springs back when lightly pressed. If the top darkens early, tent loosely with foil. Let cool completely on a wire rack before slicing.
    10. Stir together the confectioners sugar and lemon juice until smooth. Use a fork to drizzle the glaze in thin lines across the top of the cooled loaf.

    Notes

    Use full-fat block cream cheese only. Low-fat versions contain excess moisture and will cause the center to sink. Spoon and level your flour rather than scooping directly from the bag. Both butter and cream cheese must be fully at room temperature before mixing. Store wrapped in plastic wrap in the refrigerator for up to 5 days. To freeze, wrap tightly and place in a zip-top freezer bag for up to 3 months. Thaw at room temperature before serving.
  • Churro Cheesecake Bars Recipe – Easy & Ready in 40 Minutes

    Churro Cheesecake Bars Recipe – Easy & Ready in 40 Minutes

    DetailTime
    Prep Time10 minutes
    Cook Time30 minutes
    Total Time40 minutes
    Servings15 bars
    DifficultyEasy

    What Makes These Bars So Irresistible

    Okay, real talk. The first time I made churro cheesecake bars, I ate three of them before they even fully cooled. No regrets.

    That’s what happens when two of the best desserts in existence collide in one pan.

    Close your eyes for a second. Think about a churro. That warm, crunchy outside dusted in cinnamon sugar. That light, slightly crispy bite. Now imagine that same coating wrapped around a cool, tangy cheesecake center.

    Yeah. That’s what these bars are.

    churro cheesecake bars

    And here’s the thing nobody tells you. You don’t need any special equipment or baking skills to pull this off. The whole recipe is built around a genius shortcut: refrigerated crescent dough sheets. They bake up buttery and flaky. No deep frying. No complicated dough-making. Just open, layer, and bake.

    Why you’ll keep making these:

    • No tricky techniques. Layer, mix, bake. That’s it.
    • Done in about 40 minutes from start to finish. Great when you need a last-minute dessert.
    • Every single time I’ve brought these somewhere, people ask me for the recipe.
    • Cinnamon sugar crust on both the top and bottom. Every bite has that crunch.
    • The cream cheese filling is rich and velvety. It balances the sweetness perfectly.

    These bars don’t fit neatly into one category. They’re part dessert bar, part cheesecake, part pastry. Honestly? They’re better than any of those things on their own.

    Ingredients You’ll Need

    Nothing fancy here. Everything on this list is at your regular grocery store.

    IngredientQuantityNotes
    Granulated sugar½ cup (divided)Split between the cinnamon topping and the filling
    Ground cinnamon2 tablespoonsUse fresh, fragrant cinnamon for best flavor
    Cream cheese2 (8 oz) packagesFully softened to room temperature
    Egg1 largeRoom temperature blends more smoothly
    Vanilla extract1 teaspoonPure vanilla extract gives the best taste
    Pillsbury crescent dough sheets2 (8 oz) cansRefrigerated; keep cold until ready to use

    A Few Things Worth Knowing About These Ingredients

    Cream cheese: Go full-fat. I mean it. Low-fat cream cheese gets runny in the oven and doesn’t set up properly. The rich, stable texture you want in that filling comes from the real stuff.

    Crescent dough sheets vs. crescent rolls: Sheets are the better pick because they’re one solid piece with no perforations. But if your store only has the triangle-cut crescent rolls? No problem. Just press all the seams together firmly with your fingers until the whole thing looks like one even sheet of dough.

    The egg: Think of it as the glue holding your filling together. It keeps everything from turning into soup inside the oven. One important thing: your cream cheese needs to be fully softened before the egg goes in. Cold, stiff cream cheese and a fresh egg don’t mix well. You’ll end up chasing lumps around the bowl for five minutes.

    Pro tip: Pull both packages of cream cheese out of the fridge at least 30 minutes before you start baking. Soft cream cheese beats smoother, mixes faster, and gives you that silky, lump-free filling you’re going for.

    churro cheesecake bars

    How to Make Churro Cheesecake Bars Step by Step

    Once everything is prepped, this moves fast. Read through the steps once before you start. It helps a lot.

    Step 1. Preheat your oven to 350 degrees Fahrenheit. Lightly spray a 9×13 inch baking pan with non-stick cooking spray and set it aside.

    Step 2. Make your cinnamon sugar blend. Add the sugar and cinnamon together in a small bowl and stir until evenly combined. Set this aside. You’ll use it in two stages, so don’t dump it all in at once.

    Step 3. Prepare the cheesecake filling. In a medium mixing bowl, beat the softened cream cheese on medium speed until completely smooth and lump-free. Add in the egg, vanilla extract, and sugar. Beat again until the mixture is creamy and uniform. Don’t rush this step. A smooth filling makes a real difference in the final texture.

    Step 4. Lay down the first crust layer. Sprinkle half of the cinnamon sugar mixture evenly across the bottom of your prepared pan. Open the first can of crescent dough, unroll it carefully, and lay it into the pan. Gently press it out to the edges. If the dough stretches a little past the edges, just trim the extra so it fits cleanly inside.

    churro cheesecake bars

    Step 5. Add the cheesecake layer. Pour the cream cheese mixture over the bottom crust. Use a spatula to spread it into an even layer right to the edges of the dough.

    Step 6. Top with the second crust. Open the second can of dough, unroll it, and gently lay it over the cream cheese filling. Trim if needed just like you did with the bottom layer. Sprinkle the remaining cinnamon sugar generously across the top.

    Step 7. Bake the bars. Slide the pan into the oven and bake for 30 minutes, or until the top turns a nice golden brown and you can see it has puffed up slightly. The filling may look a little wobbly through the oven door. That’s normal. It firms up as it cools.

    Step 8. Cool before cutting. Remove the pan from the oven and let it rest at room temperature for at least one hour. For cleaner cuts and a firmer filling, refrigerate for an additional one to two hours before slicing into bars.

    churro cheesecake bars

    Tips for Getting These Right Every Time

    Keep the second dough can cold. Leave it in the fridge while you work with the first. Cold dough is so much easier to handle. It holds its shape, transfers without tearing, and behaves itself.

    Don’t skip the non-stick spray. Even if your pan looks non-stick, use it anyway. The cinnamon sugar layer hits the hot pan and caramelizes. Without grease, it bonds to the metal like glue.

    Watch the color, not just the clock. You want the top to be a solid medium golden brown. Pale means underdone. Soft, doughy crust is what you get when it hasn’t baked long enough.

    Bottom crust came out underdone? Ovens run differently. Some heat more from the top than the bottom. If that happens to you, try this fix: pre-bake the bottom crust layer at 350 degrees for about 8 minutes before adding the filling and top layer. Problem solved.

    Filling too runny after baking? This usually means the cream cheese was too warm before mixing. The fix is simple. Give the bars more time in the fridge. Two to four hours of chilling typically sets everything right.

    Variations Worth Trying

    Once you’ve nailed the classic version, here are a few ways to switch it up:

    • Spiced cinnamon sugar: Add a pinch of nutmeg or a small amount of ground cloves to your cinnamon sugar mix. It gives the whole thing a warmer, deeper flavor.
    • Citrus lift: Stir a teaspoon of lemon or orange zest into the cream cheese filling before spreading. It adds brightness that cuts right through the richness.
    • Caramel drizzle: Warm caramel sauce over the top right before serving. Simple. Over-the-top delicious.
    • Chocolate topping: A light drizzle of dark chocolate works beautifully if you love the chocolate-cinnamon combo.

    Serving, Storing, and Everything Else You Need to Know

    How to Serve Churro Cheesecake Bars

    The good news? These bars are flexible. Cold from the fridge, they have a firmer texture with a dense, creamy center. A lot of people prefer them this way, especially on a warm day. It’s almost like biting into chilled cheesecake wrapped in a cinnamon pastry.

    At room temperature, the crust stays a touch crisper and the filling gets softer and silkier. Both are great. It really just comes down to what you like.

    Hosting a party? Cut them into smaller squares instead of long bars. Bite-sized pieces are easy to grab, and guests don’t feel like they’re committing to a huge portion. Which means they’ll absolutely take two.

    Serving ideas that work really well:

    • A scoop of vanilla ice cream on the side turns one bar into a full dessert.
    • Whipped cream with a dusting of cinnamon on top looks beautiful and tastes great.
    • Caramel sauce drizzled right before serving. Always a hit.
    • Fresh strawberries or raspberries on the side cut through the richness nicely.

    Storage Guide

    Storage MethodHow LongNotes
    RefrigeratorUp to 3 daysStore in airtight container or cover pan with plastic wrap. Crust softens over time.
    FreezerUp to 2 monthsWrap individual bars in plastic wrap, place in freezer-safe container. Thaw overnight in fridge.
    Room temperature2 hours maxCream cheese filling means these need to stay chilled when not being served.

    These taste best the day they’re made. The crust is crispiest, the filling is perfectly set, and everything is exactly as it should be.

    That said, they do store well enough to make ahead.

    Pro tip: If you’re baking these for a special event, bake them the same morning. Assemble everything the night before if you want, then bake fresh on the day. Best of both worlds.

    Frequently Asked Questions

    Can I use regular crescent rolls instead of dough sheets?

    Yes, totally. Open the can, unroll the dough, and press all the seams and perforations together with your fingers until you have one solid sheet. Take your time doing this. Any gaps in the dough can let the filling leak through while it bakes. Not a disaster, but worth avoiding.

    Can I make these ahead of time?

    You can bake them a day ahead and keep them covered in the fridge. Just know the crust softens the longer it sits. For the crunchiest texture, bake on the day you’re serving. If you need to work ahead, baking the morning of is a solid middle ground.

    Why did my filling look too thin?

    Two things usually cause this. First, the pan might be too big. A 9×13 inch pan is the right size. Bigger than that and your filling spreads out way too thin. Second, the cream cheese may have been a little too soft or slightly melted before mixing. You want it soft and cool to the touch, not warm.

    Can I add more cinnamon to the filling?

    Definitely. Stir one to two tablespoons of ground cinnamon directly into the cream cheese mixture before spreading it over the dough. A lot of bakers do this and say it makes the whole bar taste more intensely like a churro. Worth trying.

    How do I get clean, even cuts?

    Chill the bars for at least one to two hours before cutting. Use a sharp knife and wipe it clean between each cut. Scoring the top lightly before pressing all the way down also helps keep your lines straight and your bars looking neat.

    That’s everything. All the tips, all the tricks, and a recipe that genuinely delivers every time. Whether you’re making these for a Tuesday night at home or a big get-together, they always hit. Hope your kitchen smells like cinnamon sugar very soon.

    Churro Cheesecake Bars

    Churro Cheesecake Bars

    Buttery crescent dough layered with a creamy cheesecake filling and coated in cinnamon sugar on both sides. Ready in just 40 minutes with no special skills needed.
    Prep Time 10 minutes
    Cook Time 30 minutes
    Chilling Time 2 hours
    Total Time 40 minutes
    Servings: 15 bars
    Course: Dessert
    Cuisine: American
    Calories: 285

    Ingredients
      

    Cinnamon Sugar Coating
    • 1/2 cup granulated sugar divided, split between cinnamon coating and filling
    • 2 tbsp ground cinnamon use fresh, fragrant cinnamon for best flavor
    Cheesecake Filling
    • 2 packages cream cheese 8 oz each, fully softened to room temperature
    • 1 large egg room temperature
    • 1 tsp vanilla extract pure vanilla extract recommended
    Crust
    • 2 cans Pillsbury crescent dough sheets 8 oz each, keep refrigerated until ready to use

    Method
     

    1. Preheat your oven to 350°F. Lightly spray a 9×13 inch baking pan with non-stick cooking spray and set aside.
    2. Combine the granulated sugar and ground cinnamon in a small bowl and stir until evenly mixed. Set aside — you will use it in two stages.
    3. Beat the softened cream cheese in a medium mixing bowl on medium speed until completely smooth and lump-free. Add the egg, vanilla extract, and half of the cinnamon sugar mixture. Beat again until creamy and uniform.
    4. Sprinkle half of the cinnamon sugar mixture evenly across the bottom of the prepared pan. Unroll the first can of crescent dough and lay it into the pan, pressing it gently to the edges. Trim any excess dough.
    5. Pour the cream cheese filling over the bottom crust and spread it into an even layer using a spatula, reaching all the way to the edges.
    6. Unroll the second can of crescent dough and lay it carefully over the cream cheese filling. Trim to fit if needed. Sprinkle the remaining cinnamon sugar generously over the top.
    7. Bake for 30 minutes, or until the top is golden brown and slightly puffed. The filling may look a little wobbly through the oven door — this is normal and will firm up as it cools.
    8. Remove from the oven and let rest at room temperature for at least 1 hour. For cleaner cuts and a firmer filling, refrigerate for an additional 1 to 2 hours before slicing into bars.

    Notes

    Use full-fat cream cheese only — low-fat versions can turn runny in the oven. If your store only has crescent rolls instead of dough sheets, press all the seams firmly together until you have one solid sheet. Keep the second dough can in the fridge until you need it for easier handling. For a deeper churro flavor, stir 1 to 2 tablespoons of cinnamon into the cream cheese filling before spreading. Store leftovers in an airtight container in the refrigerator for up to 3 days, or freeze individual bars for up to 2 months.
  • Sweet Alabama Pecan Bread Recipe – Easy & Moist

    Sweet Alabama Pecan Bread Recipe – Easy & Moist

    The first time I pulled this pan out of the oven, I stood there for a second just breathing it in. Toasted pecans. Caramelized sugar. A little vanilla floating through the air. I was not expecting much. I was wrong.

    Sweet Alabama Pecan Bread does not taste like bread at all. That is the first thing people say when they try it. It is dense and moist, somewhere between a thick blondie and a buttery coffee cake, with a crackly golden top and a chewy, nutty inside. One bite and you get it.

    The best part? It comes together with basic pantry staples and one bowl. No stand mixer. No fancy technique. Just stir, pour, and bake.

    Sweet Alabama Pecan Bread

    What Makes This Recipe So Good

    Two kinds of sugar do a lot of the heavy lifting here. White granulated sugar gives you structure and that gentle crunch on top. Brown sugar brings a deep, almost caramel-like richness that you can taste in every bite. Together they give the bread its signature golden color and incredible smell while it bakes.

    Then there are the pecans. Two full cups of finely chopped pecans go straight into the batter. That means every single piece you cut is packed with buttery, earthy flavor. If you have a few extra minutes, toast them first. You will notice the difference. It is like the difference between fresh ground coffee and instant. Same ingredient, completely different experience.

    What I also love about this recipe is how forgiving it is. You do not need to measure everything perfectly. You do not need to worry about over-proofing or temperature gradients. It is the kind of bake that is hard to mess up, which makes it perfect for beginner bakers and experienced ones who just want something easy and delicious.

    Sweet Alabama Pecan Bread

    Recipe Details

    DetailInfo
    Prep Time10 minutes
    Cook Time30 to 35 minutes
    Total TimeAbout 45 minutes
    Servings12 to 16 bars
    DifficultyEasy

    Ingredients

    IngredientQuantityNotes
    Granulated sugar1 cupWhite sugar for sweetness and structure
    Brown sugar1 cupPacked; adds caramel depth and moisture
    Large eggs4, beatenRoom temperature recommended
    Vegetable oil1 cupKeeps the bread moist and tender
    Self-rising flour1 1/2 cupsAlready contains baking powder and salt
    Vanilla extract1 teaspoonPure vanilla for best flavor
    Pecans, finely chopped2 cupsToast first for a deeper nutty flavor

    Pro tip: Set your eggs out about 20 minutes before you start. Room temperature eggs blend into the batter more smoothly. Cold eggs can cause the oil to seize a little, which messes with the final texture.

    How to Make Sweet Alabama Pecan Bread

    Making this is one of the most relaxed baking experiences I know. No creaming butter. No chilling dough. No complicated steps. You mix, you fold, you bake.

    Here is exactly how it goes:

    Sweet Alabama Pecan Bread
    1. Preheat your oven to 350 degrees F. Lightly grease and flour a 9×13 inch baking dish.
    2. Using a wooden spoon, stir together sugar, brown sugar, eggs, and oil in a medium bowl until smooth.
    3. Stir in self-rising flour and vanilla extract.
    4. Add pecans. Then stir until evenly mixed.
    5. Spoon into prepared pan.
    6. Bake for 30 to 35 minutes.

    That is genuinely it. Simple as that.

    Tips That Actually Make a Difference

    A few things I have learned from making this more times than I can count:

    Do not overmix once the flour goes in. Stir until the dry ingredients are just combined and then stop. Overmixing develops gluten and makes the texture tough. You want tender and chewy, not dense and rubbery.

    Use a metal pan. Glass and ceramic hold heat differently. They can give you a soft, undercooked center even when the top looks perfectly done. Metal is more reliable and gives you consistent results every time.

    Watch the top around the 20-minute mark. If it is browning fast but the center still looks wet, loosely tent the pan with aluminum foil. That slows the browning down while the inside finishes cooking.

    Toast your pecans. I said it once and I will say it again. Spread them on a dry baking sheet. Pop them in the oven for 6 to 8 minutes before you start mixing. The flavor difference is significant. It takes almost no extra effort and it is absolutely worth it.

    Pro tip: The center might look slightly underset when you first pull the pan out. Do not panic. It firms up as it cools. Give it at least 10 to 15 minutes before you cut into it. Clean cuts, better texture. Worth the wait.

    Sweet Alabama Pecan Bread

    How to Serve It

    Warm from the oven, this bread needs nothing. A plain square on its own is deeply satisfying. The crackly top and chewy inside do all the work.

    But if you want to dress it up a little, here are a few ideas that work really well:

    • A scoop of vanilla ice cream on the side turns this into a proper dessert. The cold and creamy against the warm, nutty bread is a combination that just works.
    • A light drizzle of caramel sauce before serving amplifies the brown sugar flavor already in the bread. It feels indulgent without being over the top.
    • Dust the top with powdered sugar if you are bringing it to a gathering. It looks beautiful and takes about 10 seconds.
    • Pair a square with your morning coffee or afternoon tea. It is sweet but not overwhelming, which makes it a great match for something bitter and strong.

    Substitutions and Variations

    This recipe is flexible. Here are some swaps that work well:

    Nut swaps. No pecans? Finely chopped walnuts or almonds both hold up well in this recipe. The flavor shifts slightly but the result is still really good. Some people use a mix of pecans and almonds when they are running low on one. The varied texture is actually kind of nice.

    Add-ins. Fold in half a cup of chocolate chips, dried cranberries, or shredded coconut along with the pecans. Each one takes the bread in a slightly different direction. All of them are delicious.

    Spiced version. Add half a teaspoon of cinnamon or a pinch of nutmeg to the batter. It gives the bread a warm, cozy quality that is especially good in fall and winter.

    Oil adjustments. You can reduce the vegetable oil to 3/4 cup if you want a slightly less rich texture. Replacing part of it with melted coconut oil also works and adds a subtle, pleasant flavor in the background. Just do not go below 3/4 cup total or you risk losing that signature moistness.

    Storage and Make-Ahead

    Store cooled bars in an airtight container at room temperature for up to 5 days. Here is a fun thing I noticed: the bread actually gets better on day two. The sugars settle and the texture gets even chewier. So do not feel like you need to rush through it.

    To freeze, wrap individual bars in plastic wrap and tuck them into a zip-top bag. They keep well for up to 2 months. When you are ready to eat one, just leave it at room temperature for about 30 minutes.

    Making this ahead for a party or holiday gathering? Bake it the day before. It holds beautifully and slices much more cleanly once it has had a full night to cool and set. Less stress day-of and honestly better results.

    Frequently Asked Questions

    QuestionAnswer
    Can I use all-purpose flour instead of self-rising flour?Yes, but you need to add 2 teaspoons of baking powder and 1/2 teaspoon of salt per 1 1/2 cups of all-purpose flour. That combination replicates what self-rising flour already contains.
    Do I need to toast the pecans?Toasting is optional but highly recommended. Spread the chopped pecans on a dry baking sheet and toast at 350 degrees F for 6 to 8 minutes before you start mixing. The flavor deepens significantly.
    Can I reduce the amount of oil?You can go down to 3/4 cup if you prefer a slightly less rich texture. Going lower than that risks losing the moistness that makes this bread so good.
    How do I know when it is done baking?Insert a toothpick into the center around the 30-minute mark. If it comes out with just a few moist crumbs and no wet batter, it is ready. The top should be deep golden brown.
    How long does it keep and how should I store it?Store in an airtight container at room temperature for up to 5 days. For longer storage, wrap individual pieces and freeze for up to 2 months. Thaw at room temperature before serving.

    Sweet Alabama Pecan Bread is the kind of recipe that earns a permanent spot in your baking rotation. Simple enough for a weeknight. Impressive enough for company. Once you make it the first time, you will completely understand why Southern kitchens have been passing this recipe down for generations.

    Sweet Alabama Pecan Bread

    Sweet Alabama Pecan Bread

    A dense, moist Southern classic packed with chopped pecans and two kinds of sugar. One bowl, no mixer, ready in 45 minutes.
    Prep Time 10 minutes
    Cook Time 32 minutes
    Cooling Time 15 minutes
    Total Time 45 minutes
    Servings: 14 bars
    Course: Dessert, Snack
    Cuisine: American, Southern
    Calories: 380

    Ingredients
      

    • 1 cup granulated sugar white sugar for sweetness and structure
    • 1 cup brown sugar packed; adds caramel depth and moisture
    • 4 large eggs beaten; room temperature recommended
    • 1 cup vegetable oil keeps the bread moist and tender
    • 1 1/2 cups self-rising flour already contains baking powder and salt
    • 1 tsp vanilla extract pure vanilla for best flavor
    • 2 cups pecans finely chopped; toast first for deeper flavor

    Method
     

    1. Preheat your oven to 350°F (175°C). Lightly grease and flour a 9×13 inch baking dish.
    2. Optional but recommended: Spread the chopped pecans on a dry baking sheet and toast in the preheated oven for 6 to 8 minutes. Remove and let cool slightly.
    3. In a medium bowl, use a wooden spoon to stir together the granulated sugar, brown sugar, beaten eggs, and vegetable oil until smooth.
    4. Stir in the self-rising flour and vanilla extract. Mix until just combined. Do not overmix.
    5. Fold in the chopped pecans and stir until evenly distributed throughout the batter.
    6. Spoon the batter into the prepared pan and spread it out evenly.
    7. Bake for 30 to 35 minutes, until the top is deep golden brown and a toothpick inserted in the center comes out with just a few moist crumbs. If the top browns too quickly, loosely tent with aluminum foil around the 20-minute mark.
    8. Remove from the oven and let cool in the pan for at least 10 to 15 minutes before cutting. The center will firm up as it cools.

    Notes

    Flour substitute: If you only have all-purpose flour, add 2 tsp baking powder and 1/2 tsp salt per 1 1/2 cups of flour to replicate self-rising flour.
    Nut swaps: Finely chopped walnuts or almonds work well as a substitute for pecans.
    Add-ins: Fold in 1/2 cup of chocolate chips, dried cranberries, or shredded coconut along with the pecans for a fun variation.
    Spiced version: Add 1/2 tsp cinnamon or a pinch of nutmeg for a warm, cozy flavor.
    Storage: Store in an airtight container at room temperature for up to 5 days. Freeze individual wrapped bars for up to 2 months. The bread tastes even better on day two!
  • Sour Cream Coffee Cake Loaf with Cinnamon Streusel

    Sour Cream Coffee Cake Loaf with Cinnamon Streusel

    Some recipes you make once and never think about again. This is not one of those recipes.

    This sour cream coffee cake loaf is the kind of bake that earns a permanent spot in your kitchen. It is tender, deeply buttery, and warmly spiced. A ribbon of brown sugar and cinnamon hides inside every single slice. And a crumbly streusel topping adds that satisfying crunch on top.

    I have been making this loaf for lazy weekend mornings, holiday tables, and those last-minute “we have guests coming” moments. Every single time, the pan comes back empty. People always ask for the recipe.

    If you want something that feels effortless but tastes like you spent all day on it, this is it.

    Why bake it in a loaf pan? Most coffee cakes are baked in a round or square pan. The loaf shape changes the whole experience. You get thicker slices, a denser crumb, and that cinnamon swirl stays neatly in the center instead of drifting around. It is also way easier to wrap, store, and slice cleanly.

    And here is something a lot of people do not know. Despite the name, coffee cake has zero coffee in it. The name simply means a cake meant to be enjoyed alongside a hot cup. I had a friend who avoided coffee cake for years because she thought she would not like the flavor. Once she found out, she was pretty annoyed she had missed out for so long.

    The secret ingredient? Full-fat sour cream. Its lactic acid tenderizes the gluten and keeps the crumb moist for days. The fat content adds a richness that oil simply cannot match. Do not swap it for a low-fat version. I am serious about this one.

    Prep Time: 20 minutes | Cook Time: 60 to 70 minutes | Total Time: About 1 hour 30 minutes | Servings: 10 slices | Difficulty: Easy

    Ingredients at a Glance

    ComponentIngredientQuantityNotes
    StreuselAll-purpose flour1/3 cupSpooned and leveled
    StreuselBrown sugar1/3 cupLight or dark works
    StreuselGround cinnamon1/2 tspAdjust to taste
    StreuselFine sea salt1/4 tspBalances sweetness
    StreuselUnsalted butter, melted2 tbspMelted, not softened
    Cinnamon SwirlBrown sugar3 tbspForms the ribbon center
    Cinnamon SwirlGround cinnamon1 1/2 tspMixed with sugar
    CakeUnsalted butter1 stick (4 oz)Room temperature
    CakeGranulated sugar1 cupCreamed with butter
    CakeLarge eggs2Room temperature
    CakeFull-fat sour cream2/3 cupRoom temperature, no low-fat
    CakePure vanilla extract2 tspHigh quality preferred
    CakeAll-purpose flour1 3/4 cups (240g)Spooned and leveled
    CakeBaking powder1 1/4 tspCheck it is fresh
    CakeBaking soda1/2 tspWorks with baking powder
    CakeWhole milk1/4 cupLoosens the batter
    CakeFine sea salt1/4 tspEnhances all flavors
    sour cream coffee cake loaf

    What Each Ingredient Actually Does

    Before you start baking, it helps to understand why each ingredient is in there. Think of it like a team. Everyone has a role.

    Butter (cake): Needs to be softened, not melted. Cold butter will not cream properly. This is non-negotiable. Oil will not work here either because creaming butter and sugar together traps air. That air is what gives the loaf a lighter texture.

    Granulated sugar + brown sugar: Using both is intentional. Granulated sugar adds clean sweetness. Brown sugar brings in those molasses notes that make the swirl and streusel taste warm and complex.

    Eggs: Two large eggs. They bind the batter and add structure. Always bring them to room temperature first. A quick 5-minute soak in warm tap water works perfectly when you forget to take them out ahead of time.

    Full-fat sour cream: This is the whole point. Sour cream makes the crumb tender and rich. It also adds a subtle tang that balances the sugar beautifully. Nothing else comes close to replicating it.

    Vanilla extract: Use good quality vanilla. It rounds out every other flavor in the batter. You will notice the difference in aroma alone.

    Whole milk: Just a quarter cup. It loosens the batter slightly. Without it, the loaf can feel a bit too dense.

    Baking powder + baking soda: Both leaveners are needed. Together they create a properly risen loaf with an open, tender crumb. Check that yours are fresh before you start. Old leaveners are a silent recipe killer.

    Cinnamon: Used in three different places. The streusel. The swirl. And the warmth it lends to the finished loaf overall. Buy a good-quality ground cinnamon and you will notice the difference immediately.

    sour cream coffee cake loaf

    How to Make Sour Cream Coffee Cake Loaf

    Step 1: Make the Streusel First

    This step trips people up all the time. They leave it for last. Big mistake.

    The streusel needs time to chill in the refrigerator before it goes on top of the batter. Chilling re-solidifies the melted butter. That is what creates those distinct, crunchy crumbles. Skip the chill and you end up with a greasy paste that just sinks into the cake as it bakes. Nobody wants that.

    Combine the flour, brown sugar, cinnamon, and sea salt in a small bowl. Drizzle the melted butter over the top. Stir with a fork until large, uneven clumps form. Cover and refrigerate while you work on everything else.

    Pro tip: Use a fork instead of your fingers. Fork tines create bigger, more irregular clumps. Those chunky crumbles look and taste far more dramatic on top of the finished loaf.

    Step 2: Prepare the Cinnamon Swirl

    This one takes about 30 seconds. Stir together the brown sugar and cinnamon in a small bowl until there are no lumps. Set it aside. That is it. Simple is sometimes the best move.

    Step 3: Cream the Butter and Sugar (Do Not Rush This)

    This is the most important step in the entire recipe. I cannot say that loudly enough.

    Add the room-temperature butter and granulated sugar to a mixing bowl. Beat them together on medium speed using a hand mixer for a full 4 to 5 minutes. You are looking for the mixture to turn pale, almost white, and noticeably fluffy in volume.

    Rushing this step means less air trapped in the batter. Less air means a denser, heavier loaf. Give it the time it needs.

    Pro tip: Scrape down the sides and bottom of the bowl at least twice during creaming. Butter clings to the edges and avoids the beaters entirely if you do not check.

    sour cream coffee cake loaf

    Step 4: Add the Wet Ingredients

    Once the butter-sugar mixture looks pale and fluffy, add the two eggs, the sour cream, and the vanilla extract. Mix on medium-low speed for about 30 seconds. You want a smooth, cohesive mixture.

    The batter might look slightly curdled right after you add the eggs. Totally normal. Keep mixing and it will come together.

    Step 5: Fold in the Dry Ingredients

    Whisk the flour, baking powder, baking soda, and salt together in a separate bowl. Add this dry mixture to the wet ingredients along with the milk. Here is the key moment: put down the hand mixer and pick up a rubber spatula.

    Fold everything together with the spatula just until no visible streaks of flour remain. Over-mixing activates the gluten. And activated gluten turns a tender crumb into a tough, rubbery one. Aim for 12 to 15 folds maximum.

    Pro tip: Lumpy batter is fine. A few lumps from gentle mixing are far better than a tough cake from over-mixing.

    Step 6: Assemble the Loaf

    Preheat your oven to 325°F. Yes, lower than you might expect. The lower temperature lets the loaf bake evenly all the way through without the outside drying out before the center is done. This is the trick for getting that perfectly moist crumb.

    Line a 9×5-inch loaf pan with parchment paper. Leave some overhang on the long sides. Lightly spray with nonstick spray.

    Now assemble the layers:

    • Spread exactly half the batter into the pan and smooth it out
    • Sprinkle the entire cinnamon-sugar swirl evenly over the surface
    • Cover with the remaining batter and smooth the top
    • Take the streusel out of the fridge and break it into large crumbles with a fork
    • Scatter it generously over the top of the loaf
    sour cream coffee cake loaf

    Step 7: Bake and Cool

    Bake at 325°F for 60 to 70 minutes. Start checking at the 60-minute mark. Insert a thin cake tester or skewer into the center. It should come out clean or with just a dry crumb or two. Wet batter means it needs more time.

    Remove from the oven. Let the loaf cool in the pan for 10 minutes. Then use the parchment overhang to lift it out onto a wire rack.

    Wait at least 20 more minutes before slicing. Cutting too early compresses the crumb and ruins that clean cinnamon ribbon in the center.

    Tips That Make a Real Difference

    I have made this loaf more times than I can count. Here is what I have learned:

    • Bring everything to room temperature. Butter, eggs, sour cream, and milk all need to be at room temperature before you begin. Cold dairy causes the batter to curdle and prevents proper mixing.
    • Use a light-colored metal pan. Dark pans absorb more heat and can cause the edges and bottom to overbake before the center sets properly.
    • Measure flour correctly. Spoon the flour into the measuring cup and level it off with a knife. Scooping directly from the bag can add up to 20% more flour than the recipe needs.
    • Never skip chilling the streusel. Even 15 minutes in the fridge is enough to firm it up and give you that crunchy, defined topping.
    • Use the parchment sling. It makes removing the loaf completely effortless and keeps your beautiful streusel topping perfectly intact.

    How to Store and Freeze

    Wrap the fully cooled loaf in a layer of parchment and then plastic wrap. It keeps at room temperature for up to 3 days. For a refresh, microwave individual slices for 10 to 15 seconds. The texture comes back beautifully.

    To freeze, wrap the whole loaf tightly in plastic wrap and seal it inside a freezer-safe bag. It keeps well for up to 3 months. Thaw overnight in the refrigerator and warm gently before serving. You can also freeze individual slices for a grab-and-go option on busy mornings.

    Serving Suggestions

    This loaf shines at weekend brunch alongside fresh fruit and strong coffee. It holds beautifully for holiday morning gatherings when you need something you can prepare the night before. Serve slices slightly warm for maximum comfort. A light dusting of powdered sugar before serving adds a lovely finishing touch without adding any complexity.

    Frequently Asked Questions

    Can I substitute plain Greek yogurt for the sour cream?

    Yes. Full-fat plain Greek yogurt is the closest substitute. It has a similar fat content and tanginess. Avoid nonfat Greek yogurt. The reduced fat content will result in a drier, less tender crumb. The texture will be very close to the original, though the flavor may be slightly milder.

    My streusel sank into the cake. What went wrong?

    The most common cause is skipping the refrigerator step. When the streusel is warm or soft, it melts into the batter surface as it bakes instead of staying on top and crisping up. Always chill it while preparing the rest of the batter. Adding a little more flour to the streusel mixture can also help it hold its shape.

    Can I bake this in a different pan size?

    Yes, with some adjustments. A 10×5-inch loaf pan will produce a slightly flatter loaf and will need a shorter bake time. Start checking at 50 minutes. An 8×4-inch pan creates a taller loaf and may need up to 75 minutes. Avoid glass pans if possible. They conduct heat unevenly and often result in an undercooked center.

    Why is my coffee cake dense instead of light?

    Two likely culprits. Under-creamed butter and sugar, or over-mixed batter. The creaming step needs a full 4 to 5 minutes to whip enough air into the mixture. Once the dry ingredients go in, fold gently and stop as soon as the flour disappears. Also confirm that your baking powder and baking soda are fresh. Expired leaveners will prevent the loaf from rising properly.

    Can I add mix-ins to change things up?

    Absolutely. Fold in up to 1/2 cup of chopped walnuts or pecans with the dry ingredients for a nutty version. Fresh blueberries work beautifully scattered over the bottom batter layer before you add the cinnamon swirl. A teaspoon of orange or lemon zest stirred into the batter adds a bright, citrusy lift. Just avoid adding too many mix-ins at once. They can weigh down the batter and affect the rise.

    Final Thoughts

    This sour cream coffee cake loaf is proof that simple, well-executed baking hits harder than anything overly complicated. The buttery crumb, the cinnamon ribbon, and the crackly streusel each play their part perfectly. Bake it once and it will become one of those recipes you quietly memorize. The best kind of recipe there is.

    Sour Cream Coffee Cake Loaf

    Sour Cream Coffee Cake Loaf

    A tender, buttery loaf with a cinnamon-brown sugar swirl and crunchy streusel topping. Made with full-fat sour cream for an incredibly moist crumb that stays fresh for days.
    Prep Time 20 minutes
    Cook Time 1 hour 5 minutes
    Cooling Time 30 minutes
    Total Time 1 hour 30 minutes
    Servings: 10 slices
    Course: Breakfast, Brunch, Dessert
    Cuisine: American
    Calories: 318

    Ingredients
      

    Streusel Topping
    • 1/3 cup all-purpose flour spooned and leveled
    • 1/3 cup brown sugar light or dark
    • 1/2 tsp ground cinnamon
    • 1/4 tsp fine sea salt
    • 2 tbsp unsalted butter melted
    Cinnamon Swirl
    • 3 tbsp brown sugar
    • 1 1/2 tsp ground cinnamon
    Cake Batter
    • 1/2 cup unsalted butter 1 stick (4 oz), room temperature
    • 1 cup granulated sugar
    • 2 large eggs room temperature
    • 2/3 cup full-fat sour cream room temperature, do not use low-fat
    • 2 tsp pure vanilla extract high quality preferred
    • 1 3/4 cups all-purpose flour 240g, spooned and leveled
    • 1 1/4 tsp baking powder check it is fresh
    • 1/2 tsp baking soda
    • 1/4 cup whole milk room temperature
    • 1/4 tsp fine sea salt

    Method
     

    1. Make the Streusel: Combine flour, brown sugar, cinnamon, and sea salt in a small bowl. Drizzle melted butter over the top and stir with a fork until large, uneven clumps form. Cover and refrigerate while you prepare the rest of the batter.
    2. Make the Cinnamon Swirl: Stir together the brown sugar and cinnamon in a small bowl until no lumps remain. Set aside.
    3. Cream Butter and Sugar: Beat the room-temperature butter and granulated sugar together on medium speed with a hand mixer for 4 to 5 full minutes, until the mixture is pale, nearly white, and noticeably fluffy. Scrape down the sides and bottom of the bowl at least twice during this step.
    4. Add Wet Ingredients: Add the eggs, sour cream, and vanilla extract to the creamed butter mixture. Mix on medium-low speed for about 30 seconds until smooth and cohesive. The batter may look slightly curdled at first — keep mixing and it will come together.
    5. Fold in Dry Ingredients: In a separate bowl, whisk together the flour, baking powder, baking soda, and salt. Add the dry ingredients to the wet mixture along with the milk. Switch to a rubber spatula and fold gently just until no streaks of flour remain — about 12 to 15 folds. Do not over-mix.
    6. Preheat and Prepare Pan: Preheat your oven to 325°F (163°C). Line a 9×5-inch loaf pan with parchment paper, leaving overhang on the long sides. Lightly spray with nonstick spray.
    7. Assemble the Loaf: Spread half the batter evenly into the prepared pan. Sprinkle the entire cinnamon-sugar swirl over the surface. Cover with the remaining batter and smooth the top. Remove the streusel from the fridge, break into large crumbles with a fork, and scatter generously over the top.
    8. Bake: Bake at 325°F for 60 to 70 minutes, until a skewer inserted into the center comes out clean or with just a dry crumb. Start checking at the 60-minute mark.
    9. Cool: Let the loaf cool in the pan for 10 minutes. Use the parchment overhang to lift it onto a wire rack. Wait at least 20 more minutes before slicing to preserve the clean cinnamon ribbon in the center.

    Notes

    All dairy and eggs must be at room temperature before you begin — cold ingredients cause the batter to curdle.
    Use a light-colored metal loaf pan. Dark pans can overbake the edges before the center sets.
    Never skip chilling the streusel. Even 15 minutes in the fridge is enough to keep it crunchy and defined on top.
    Measure flour by spooning into the cup and leveling — scooping directly can add up to 20% extra flour.
    Storage: Wrap cooled loaf in parchment then plastic wrap. Keeps at room temperature for up to 3 days. Freeze whole or in slices for up to 3 months.
    Greek Yogurt Swap: Full-fat plain Greek yogurt can replace sour cream in a pinch. Avoid nonfat versions.
  • Easy Chocolate Chip Banana Bread Recipe (One Bowl!)

    Easy Chocolate Chip Banana Bread Recipe (One Bowl!)

    You know those bananas sitting on your counter? The ones with brown spots that nobody wants to eat anymore?

    Don’t toss them.

    I’m about to show you how to turn them into something incredible.

    I’ve been baking this chocolate chip banana bread for years now. And honestly? It’s become my favorite way to deal with overripe bananas. The smell alone is worth making it. Your whole kitchen will smell like a bakery.

    Here’s what makes this recipe special. You need one bowl. That’s it. No mixer. No complicated steps. Just throw everything in one bowl, stir it up, and bake.

    The chocolate chips? They melt into these perfect little pockets of sweetness. Combined with the banana flavor, it’s just… chef’s kiss.

    Recipe Timing:

    • Prep Time: 10 minutes
    • Cook Time: 50-60 minutes
    • Total Time: 1 hour 10 minutes
    • Servings: 8-10 slices
    • Difficulty: Easy
    chocolate chip banana bread

    Why This Actually Works

    I’ll be real with you. I’ve tried so many banana bread recipes over the years.

    This one wins. Every time.

    Want to know the secret?

    Melted butter.

    Most recipes tell you to use softened butter. But melted butter creates this dense, moist crumb that’s just better. Trust me on this.

    And those mini chocolate chips? They spread out perfectly through the batter. You get chocolate in every single bite.

    The one-bowl thing isn’t just about being lazy (though that’s a nice bonus). When you mix everything in the same bowl, you actually handle the batter less. Less handling means less gluten development. And less gluten means your bread stays tender instead of turning into a hockey puck.

    What You’ll Need

    Grab these ingredients before you start. Makes the whole process way smoother.

    IngredientQuantityNotes
    Ripe bananas3 mediumThe spottier, the better
    Butter⅓ cup (75g)Melted and cooled slightly
    Sugar½ cup (100g)Regular white sugar
    Egg1 largeRoom temp if possible
    Vanilla extract1 teaspoonReal vanilla tastes better
    Baking soda1 teaspoonCheck the expiration date
    SaltTo tasteAround ¼ teaspoon
    All-purpose flour1½ cups (185g)Don’t pack it down
    Mini chocolate chips½ cup (85g)Save some for the top
    chocolate chip banana bread

    Equipment You’ll Need

    Nothing fancy here. Just basic kitchen stuff:

    • One large mixing bowl (seriously, that’s the whole point)
    • A fork (for smashing bananas)
    • Wooden spoon or rubber spatula
    • 9×5 inch loaf pan
    • Measuring cups and spoons
    • Toothpick (for the doneness test)

    That’s it.

    No stand mixer. No food processor. Just simple tools you probably already have.

    Let’s Make This Bread

    Getting Set Up

    First things first. Turn your oven to 350°F (180°C).

    Do this before you start mixing. Your oven needs time to heat up properly.

    While it’s heating, grab your loaf pan. Grease it really well with butter or cooking spray. I mean really well. You don’t want your beautiful bread sticking to the pan later.

    Pro tip? Line the bottom with parchment paper. Makes getting the bread out so much easier.

    Mixing the Batter

    Step 1: Smash Those Bananas

    Throw your three bananas right into your big mixing bowl. Grab a fork and start mashing.

    Mash them until they’re mostly smooth. A few lumps? That’s fine. Actually adds nice texture to the final bread.

    The browner your bananas, the better this will taste. Those super ripe bananas are sweeter and have more flavor. So if your bananas look like they’re about to go bad? Perfect.

    Step 2: Mix in the Butter

    Pour in your melted butter while it’s still a bit warm. Not hot though. You don’t want to cook the egg later.

    Stir it all together. The butter should blend smoothly with the bananas. You’ll get this thick, creamy mixture.

    chocolate chip banana bread

    Step 3: Add the Sweet Stuff

    Dump in your sugar. Stir hard for about 30 seconds.

    Then crack in your egg. Add the vanilla. Mix it all up until everything looks uniform.

    This is where your bread gets its flavor base. So don’t rush this part.

    Step 4: Time for Dry Ingredients

    Sprinkle the baking soda and salt over everything. Then add all your flour at once.

    Here’s where people mess up. They stir too much.

    Don’t do that.

    Stir just until you don’t see dry flour anymore. Some small lumps? Leave them. Overmixing makes tough bread. Nobody wants tough bread.

    I usually mix for maybe 20-30 seconds. That’s it.

    Step 5: Chocolate Time

    Set aside a small handful of chocolate chips. You’ll use these for the top later.

    Take the rest and fold them into your batter. Use gentle motions. Like you’re folding laundry, not stirring soup.

    This keeps your batter light and airy.

    Baking Time

    Pour everything into your greased loaf pan. Spread it out evenly with your spatula.

    Now sprinkle those reserved chocolate chips on top. This makes it look bakery-level fancy. Plus, some will sink down during baking and create these amazing melty chocolate pockets.

    Pop it in your oven. Center rack.

    Set a timer for 50 minutes. But start checking then. Every oven is different.

    How do you know it’s done?

    Stick a toothpick in the center. It should come out with a few moist crumbs. Not wet batter. Just crumbs.

    chocolate chip banana bread

    The Waiting Game

    This part is torture.

    Let the bread sit in the pan for 10 minutes. I know it smells amazing. But wait.

    After 10 minutes, run a knife around the edges. Flip it onto a cooling rack.

    Now wait another 30 minutes before cutting.

    I know. I know. But warm bread falls apart and tears when you slice it. You’ve come this far. Don’t mess it up now.

    When you’re ready to cut, use a serrated knife. Sawing motion. Nice and gentle.

    That first slice though? When you see all those chocolate chips scattered through the golden crumb? That’s the moment that makes it worth it.

    Tips I’ve Learned the Hard Way

    The Banana Situation

    Browner is better. Like, way better.

    I actually look for bananas with completely black peels. They’re sweeter and easier to mash. Your bread will taste better.

    Bananas not ripe enough? Put them in a paper bag overnight. They’ll ripen faster.

    The Overmixing Problem

    Once that flour goes in, stop yourself.

    Mix just until combined. You should still see tiny lumps in there. That’s what you want.

    Overmixing = tough, chewy bread. Nobody wants to chew their banana bread like it’s a bagel.

    Oven Issues

    Every oven is a liar.

    Yours might run hot. Or cold. If your bread is browning too fast on top but still raw inside? Cover it with foil after 40 minutes.

    This lets the inside cook without burning the top.

    Keeping It Fresh

    Once your bread is completely cool, wrap it tight in plastic wrap.

    Room temperature? It’ll stay good for four days.

    Want to keep it longer? Wrap it in foil and freeze it. Lasts up to three months. Just thaw it on the counter overnight.

    chocolate chip banana bread

    Ways to Mix It Up

    Add Some Crunch

    Fold in ½ cup of chopped walnuts or pecans with the chocolate chips. Adds this nice texture contrast.

    Go Chocolate Crazy

    Use ¾ cup of chocolate chips instead of ½ cup. Because sometimes you just need more chocolate in your life.

    Make It Healthier

    Replace half the flour with whole wheat flour. Your bread will be a bit denser. But it’s got more fiber and nutrients.

    Less Sweet Version

    Cut the sugar down to ⅓ cup. The bananas add plenty of natural sweetness on their own.

    When Things Go Wrong

    My Bread Sank in the Middle

    You underbaked it. Or your baking soda is old.

    Always do the toothpick test. And check your baking soda expiration date.

    It’s Too Dense

    Two reasons this happens. Either you overmixed the batter. Or your bananas weren’t ripe enough.

    Mash those bananas really well. And mix gently once the flour goes in.

    Came Out Dry

    You overbaked it.

    Start checking at 50 minutes. As soon as that toothpick comes out with moist crumbs, pull it out. Don’t wait longer.

    Stuck to the Pan

    You didn’t grease it enough. Or at all.

    Really coat that pan. And use parchment paper on the bottom. Life-changing.

    Questions People Always Ask

    Can I use regular chocolate chips instead of mini ones?

    Yep. Regular chips work great.

    Mini chips spread out more evenly. But regular chips give you bigger chocolate pockets. Both are delicious. Just depends what you’re after.

    How do I know my bananas are ripe enough?

    Look for heavy spotting. Or completely brown peels.

    Press them gently. They should feel soft. The darker they are, the sweeter your bread.

    Don’t use green or bright yellow bananas. They won’t work.

    What if I don’t have eggs?

    No problem. Use ¼ cup of unsweetened applesauce instead. Or add extra mashed banana.

    You can also try a flax egg. Mix 1 tablespoon ground flaxseed with 3 tablespoons water. Let it sit for 5 minutes.

    The texture will be slightly different. But still really good.

    Why is mine raw inside but burnt on top?

    Your oven is running too hot.

    Drop the temperature to 325°F. Bake it longer. And tent the top with foil halfway through to protect it from burning.

    Can I double this?

    Absolutely. Double everything.

    Use two loaf pans. Baking time stays the same because the pan size is the same.

    Great for meal prep. Or if you want to give one away as a gift.

    My Final Thoughts

    This banana bread has saved me so many times.

    Unexpected guests showing up? Bake this.

    Overripe bananas taking over the counter? Bake this.

    Just want something sweet with your coffee? You guessed it. Bake this.

    The best part? Even if you’ve never baked anything before, you can make this. It’s that simple. One bowl. Basic ingredients. Foolproof method.

    And the results? They look and taste like you spent hours in the kitchen. But we both know you didn’t.

    Forgot to soften your butter? Use melted. Only have two bananas? Throw in some yogurt. This recipe is forgiving. It works with you, not against you.

    That’s how baking should be. Fun. Easy. Stress-free.

    So grab those spotty bananas off your counter. Give this recipe a try.

    I promise you won’t regret it.

    Happy baking!

    Easy Chocolate Chip Banana Bread (One Bowl)

    Easy Chocolate Chip Banana Bread (One Bowl)

    Turn overripe bananas into incredible chocolate chip banana bread using just one bowl. Moist, simple, and perfectly sweet with melted butter and mini chocolate chips in every bite.
    Prep Time 10 minutes
    Cook Time 1 hour
    Total Time 1 hour 10 minutes
    Servings: 10 slices
    Course: Breakfast, Dessert
    Cuisine: American
    Calories: 245

    Ingredients
      

    • 3 ripe bananas medium, the spottier the better
    • 1/3 cup butter melted and cooled slightly
    • 1/2 cup sugar
    • 1 egg large, room temperature if possible
    • 1 teaspoon vanilla extract
    • 1 teaspoon baking soda
    • 1/4 teaspoon salt
    • 1 1/2 cups all-purpose flour don’t pack it down
    • 1/2 cup mini chocolate chips save some for the top

    Method
     

    1. Preheat oven to 350°F (180°C). Grease a 9×5 inch loaf pan really well with butter or cooking spray. Optional: line the bottom with parchment paper for easier removal.
    2. Add 3 bananas to a large mixing bowl and mash with a fork until mostly smooth. A few lumps are fine.
    3. Pour in the melted butter while still slightly warm (not hot) and stir together until well combined.
    4. Add sugar and stir hard for about 30 seconds. Then crack in the egg and add vanilla extract. Mix until everything looks uniform.
    5. Sprinkle the baking soda and salt over the mixture. Add all the flour at once.
    6. Stir just until you don’t see dry flour anymore, about 20-30 seconds. Don’t overmix – some small lumps are okay. This keeps the bread tender.
    7. Set aside a small handful of chocolate chips for the top. Gently fold the remaining chocolate chips into the batter using folding motions.
    8. Pour batter into the prepared loaf pan and spread evenly. Sprinkle reserved chocolate chips on top.
    9. Bake on center rack for 50-60 minutes. Start checking at 50 minutes by inserting a toothpick in the center – it should come out with a few moist crumbs, not wet batter.
    10. Let the bread sit in the pan for 10 minutes. Run a knife around the edges, then flip onto a cooling rack.
    11. Wait another 30 minutes before slicing with a serrated knife using a gentle sawing motion.

    Notes

    Storage: Wrap completely cooled bread tightly in plastic wrap. Store at room temperature for up to 4 days or freeze wrapped in foil for up to 3 months.
    Variations: Add 1/2 cup chopped walnuts or pecans for crunch. Use 3/4 cup chocolate chips for extra chocolate. Replace half the flour with whole wheat flour for more fiber. Reduce sugar to 1/3 cup for less sweetness.
    Tips: Use very ripe bananas with brown or black peels for best flavor. Don’t overmix once flour is added to prevent tough bread. If browning too fast, cover with foil after 40 minutes. Every oven is different – start checking at 50 minutes.
    Egg Substitute: Use 1/4 cup unsweetened applesauce, extra mashed banana, or a flax egg (1 tbsp ground flaxseed + 3 tbsp water, let sit 5 minutes).
  • Easy Pumpkin Bread Recipe | Moist & Delicious

    Easy Pumpkin Bread Recipe | Moist & Delicious

    Picture this.

    You’re pulling a golden loaf of pumpkin bread from the oven on a crisp autumn morning. The smell of warm cinnamon and nutmeg hits you instantly. It fills every corner of your kitchen.

    And just like that… your home feels cozy and inviting.

    I’ve spent countless weekends perfecting this recipe. Honestly? I’m beyond excited to share my foolproof version with you today.

    Here’s what makes this pumpkin bread so special.

    It’s ridiculously simple.

    No fancy equipment. No hard-to-find ingredients. Everything comes together in one bowl. You’ll have the batter ready in about ten minutes flat.

    The result?

    A perfectly moist, tender loaf with just the right amount of sweetness and spice.

    I’ve baked this recipe more times than I can count. Each time, I’d tweak something. Adjust something else. Until finally… I achieved that ideal crumb structure.

    The texture? Wonderfully soft without being dense.

    And it stays fresh for days.

    My friends and family constantly request this recipe. Especially during fall when pumpkins are everywhere. One friend actually asked me to make three loaves for her daughter’s bake sale. That’s how good it is.

    Prep Time: 10 minutes | Cook Time: 60 minutes | Total Time: 1 hour 10 minutes
    Servings: 12 slices | Difficulty: Easy

    The beauty of this bread?

    Its versatility.

    • Enjoy a thick slice for breakfast with your morning coffee
    • Pack it in lunchboxes for an afternoon treat
    • Serve it as a simple dessert after dinner

    I often make two loaves at once. One to enjoy immediately. Another to freeze for later.

    pumpkin bread recipe

    Understanding Your Ingredients

    Let me walk you through what you’ll need.

    Each ingredient plays a specific role in creating the perfect loaf.

    Pumpkin Puree is the heart of this recipe.

    I always reach for canned pumpkin puree. Why? Because it delivers consistent results every single time.

    Here’s the catch though.

    Look for pure pumpkin on the label. Not pumpkin pie filling. That stuff contains added sugars and spices that’ll throw off the balance.

    The puree adds moisture and that distinct earthy-sweet pumpkin flavor we all love.

    All-Purpose Flour creates the structure.

    I’ve tested this recipe with various flour types. Regular all-purpose works beautifully. The protein content is just right for a tender crumb that isn’t too delicate or too sturdy.

    Vegetable Oil might seem unusual.

    But here’s the secret.

    It’s actually what makes this bread incredibly moist. Unlike butter (which solidifies when cooled), oil stays liquid at room temperature.

    This keeps your bread soft and tender. Even after sitting on the counter for a couple of days.

    Granulated Sugar does two things.

    It sweetens the loaf. And it helps create that lovely golden crust.

    I prefer white sugar here because it lets the pumpkin flavor shine through. Brown sugar would add competing caramel notes.

    Warm Spices transform everything.

    Ground cinnamon provides warmth. Freshly grated nutmeg adds a subtle complexity that makes people ask, “What’s your secret ingredient?”

    And honestly? That’s my favorite part.

    Leavening Agents work together here.

    Both baking soda and baking powder give your bread a beautiful rise. The combination creates a loaf that’s light and airy. Not heavy and compact.

    pumpkin bread recipe

    Complete Ingredients List

    IngredientQuantityNotes
    All-purpose flour1¾ cups (210g)Spooned and leveled
    Baking soda1 teaspoonFresh for best rise
    Baking powder½ teaspoonHelps with lift
    Salt½ teaspoonEnhances flavors
    Ground cinnamon2 teaspoonsFor warmth
    Grated nutmeg¼ teaspoonFreshly grated preferred
    Pumpkin puree1⅓ cups (300g)Pure pumpkin only
    Granulated sugar1¼ cups (250g)White sugar works best
    Vegetable oil⅔ cup (160ml)Canola also works
    Large eggs2Room temperature
    Vanilla extract1 teaspoonPure extract preferred

    Smart Ingredient Substitutions

    I love experimenting with variations.

    And this recipe? It’s wonderfully forgiving.

    Here are some swaps that work beautifully.

    For the oil:

    Melted coconut oil adds a subtle tropical note. Light olive oil works perfectly without overwhelming the pumpkin flavor. Avocado oil is another excellent neutral option.

    For the sugar:

    Swap up to half the white sugar with light brown sugar. You’ll get deeper, molasses-like undertones. Plus, the extra moisture from brown sugar makes the bread even more tender.

    For dietary needs:

    Your favorite gluten-free flour blend works wonderfully here. Just use a one-to-one substitute. Don’t adjust any other ingredients.

    For the spices:

    Got pumpkin pie spice in your pantry? Use two teaspoons instead of measuring individual spices. It simplifies things without sacrificing flavor.

    pumpkin bread recipe

    Step-by-Step Baking Instructions

    Getting perfect pumpkin bread is all about technique and timing.

    Let me guide you through the process. These are tips I’ve learned through trial and error.

    Step 1: Prepare Your Workspace

    Start by preheating your oven to 350°F.

    This gives it plenty of time to reach the right temperature while you mix your batter.

    Grab a 9×5-inch loaf pan. Coat it thoroughly with baking spray.

    Don’t skip this step.

    Proper greasing ensures your beautiful loaf slides out effortlessly after baking.

    Step 2: Combine the Dry Ingredients

    Take a large mixing bowl. Add your flour, baking soda, baking powder, salt, cinnamon, and nutmeg.

    Use a whisk to blend everything together for about 30 seconds.

    This distributes the leavening agents and spices evenly throughout the flour.

    You’ll notice something cool here.

    The mixture takes on a warm, speckled appearance from the cinnamon.

    Step 3: Mix the Wet Ingredients

    In a separate medium bowl, combine the pumpkin puree, sugar, vegetable oil, eggs, and vanilla extract.

    Here’s a crucial tip I learned the hard way.

    Start whisking gently at first.

    If you whisk too vigorously right away, the oil can splash out of the bowl. (Trust me on this. I’ve cleaned up that mess more than once.)

    Once everything starts coming together, whisk more energetically. Keep going until the mixture becomes smooth and uniform.

    The batter should look glossy and well-emulsified.

    You’ll see the sugar beginning to dissolve. And the mixture will have a beautiful orange hue from the pumpkin.

    Step 4: Bring It All Together

    Create a well in the center of your dry ingredients.

    Pour the wet mixture directly into this well.

    Using a silicone spatula or wooden spoon, gently fold the ingredients together. Start from the center. Work your way outward in smooth, deliberate strokes.

    Now here’s the important part.

    Stop mixing as soon as you no longer see streaks of flour.

    A few small lumps? Perfectly fine. They’ll disappear during baking.

    Overmixing develops gluten strands. Which leads to tough, chewy bread instead of the tender texture we’re after.

    Step 5: Transfer and Bake

    Pour your batter into the prepared loaf pan.

    Use your spatula to smooth the top surface gently.

    The batter will be quite thick. Almost like a very dense cake batter. This thickness is exactly what we want.

    Place the pan in your preheated oven. Set a timer for 60 minutes.

    After about 30 minutes of baking, check on your loaf.

    If the top is already deeply golden? Loosely tent it with aluminum foil. This prevents the surface from burning while the inside continues cooking.

    pumpkin bread recipe

    Step 6: Test for Doneness

    At the one-hour mark, perform the toothpick test.

    Insert a wooden toothpick or thin knife into the center of the loaf. It should emerge with just a few moist crumbs clinging to it.

    If you see wet batter? Give it another five minutes. Test again.

    Another method is the touch test.

    Gently press the top of the bread with your fingertip. The surface should spring back immediately. Not leave an indent.

    This springiness indicates the bread has set properly.

    Step 7: Cool Properly

    Remove the pan from the oven. Place it on a wire cooling rack.

    Let the bread rest in the pan for exactly 15 minutes.

    This resting period allows the structure to firm up. Makes it easier to remove from the pan without breaking.

    After 15 minutes, run a butter knife around the edges of the pan. Loosen any stuck bits.

    Carefully invert the pan to release the loaf onto the cooling rack.

    Turn it right-side up. Let it cool completely before slicing.

    Essential Baking Tips I’ve Learned

    Measure Flour Correctly

    Scooping flour directly from the bag packs it down. You end up with too much flour.

    Instead?

    Fluff the flour with a spoon. Then gently spoon it into your measuring cup. Level it off with a straight edge.

    This one tip made a huge difference in my baking.

    Room Temperature Matters

    Cold eggs straight from the refrigerator don’t incorporate as smoothly into the batter.

    Let them sit on the counter for 30 minutes before baking. Or place them in warm water for five minutes.

    Fresh Nutmeg Makes a Difference

    Pre-ground nutmeg loses its potency quickly.

    If you have whole nutmeg? Grate it fresh using a microplane grater.

    The flavor difference is remarkable. Like night and day.

    Don’t Rush the Cooling

    I know it’s tempting to slice into warm bread.

    But patience pays off here.

    Warm bread crumbles easily. It doesn’t showcase that perfect texture. Wait until it reaches room temperature for clean, beautiful slices.

    Creative Variations to Try

    Once you’ve mastered the basic recipe, these variations add exciting new dimensions.

    For added crunch:

    Fold in half a cup of chopped toasted pecans or walnuts. Do this just before pouring the batter into the pan. The nuts add wonderful texture contrast.

    For chocolate lovers:

    Stir in chocolate chips.

    Dark chocolate provides a sophisticated bitterness that balances the sweetness. Milk chocolate creates a more dessert-like treat.

    For extra moisture:

    Dried cranberries or chopped dates scattered throughout the batter. They add chewy pockets of concentrated sweetness.

    For a finishing touch:

    Mix powdered sugar with a splash of milk and cinnamon. Creates a simple glaze. Drizzle it over the cooled loaf for an elegant presentation.

    How to Serve This Delicious Bread

    Pumpkin bread shines in so many different serving situations.

    For breakfast?

    I love toasting thick slices until the edges get slightly crispy. The warmth intensifies the spices. Creates an irresistible aroma.

    Spread a generous pat of butter on top. Watch it melt into all those little air pockets.

    For an indulgent afternoon snack, try spreading cream cheese on a slice.

    The tangy richness complements the sweet pumpkin perfectly.

    Want to take it up a notch?

    Maple-flavored cream cheese. It takes this combination to another level entirely.

    When serving guests, present thin slices arranged on a platter. Alongside hot tea or coffee.

    The bread holds its shape beautifully when cut thin. Makes it perfect for elegant entertaining.

    If you enjoy warm desserts, microwave individual slices for about 15 seconds.

    This gentle reheating makes the bread taste freshly baked. Without drying it out.

    pumpkin bread recipe

    Storage Guidelines

    Proper storage keeps your pumpkin bread tasting fresh for days.

    Once the loaf has cooled completely to room temperature, wrap it tightly. Use plastic wrap or aluminum foil.

    It stays fresh on your kitchen counter for up to three days.

    For longer storage?

    Refrigeration extends the life to five days. Keep the bread wrapped to prevent it from absorbing other flavors. Or drying out from the cold air.

    Freezing works wonderfully for this recipe.

    Slice the entire loaf before freezing. Then wrap each slice individually in plastic wrap. Bundle the wrapped slices together in a freezer-safe zip-top bag.

    This method lets you thaw individual portions as needed. Without defrosting the entire loaf.

    Frozen pumpkin bread stays delicious for up to three months.

    To thaw? Simply leave slices at room temperature for an hour. Or microwave them for 20-30 seconds straight from frozen.

    Frequently Asked Questions

    Can I make muffins instead of a loaf?

    Absolutely.

    This batter works perfectly for muffins.

    Line a muffin tin with paper liners. Fill each cup about two-thirds full. Reduce the baking time to 20-22 minutes. Test with a toothpick to ensure they’re done.

    You’ll get approximately 12 standard-size muffins from this recipe.

    Why is my bread too dense?

    Dense bread usually results from overmixing the batter.

    When you stir too much, you develop gluten strands. These create a tough, heavy texture.

    Mix only until the flour disappears into the wet ingredients.

    Another common cause?

    Using too much flour. Always measure carefully using the spoon-and-level method.

    Can I use fresh pumpkin instead of canned?

    Yes. But with an important adjustment.

    Fresh pumpkin puree contains more water than canned versions.

    After pureeing your cooked pumpkin, spread it on paper towels. Let it sit for ten minutes to absorb excess moisture.

    Otherwise? Your bread may turn out soggy. Or take much longer to bake through.

    How do I know when the bread is perfectly done?

    Use two tests together for confidence.

    First, insert a toothpick into the center. It should come out with a few moist crumbs. But no wet batter.

    Second, gently press the top of the loaf with your finger. The surface should feel firm. Spring back immediately.

    What if the top browns too quickly?

    If your loaf’s surface is getting too dark before the inside finishes cooking, loosely cover it with aluminum foil.

    This shields the top from direct heat. Allows the center to continue baking.

    Usually, this happens around the 30-minute mark. Check your bread at that point.

    I hope you enjoy making this pumpkin bread as much as I do.

    The simple process and incredible results make it my go-to recipe whenever autumn arrives.

    Happy baking!

    Easy Pumpkin Bread

    Easy Pumpkin Bread

    A perfectly moist and tender pumpkin bread with warm cinnamon and nutmeg. Simple one-bowl recipe that comes together in 10 minutes with consistent, foolproof results every time.
    Prep Time 10 minutes
    Cook Time 1 hour
    Total Time 1 hour 10 minutes
    Servings: 12 slices
    Course: Breakfast, Dessert
    Cuisine: American

    Ingredients
      

    • cups all-purpose flour spooned and leveled (210g)
    • 1 teaspoon baking soda fresh for best rise
    • ½ teaspoon baking powder helps with lift
    • ½ teaspoon salt enhances flavors
    • 2 teaspoons ground cinnamon for warmth
    • ¼ teaspoon grated nutmeg freshly grated preferred
    • 1⅓ cups pumpkin puree pure pumpkin only (300g)
    • cups granulated sugar white sugar works best (250g)
    • cup vegetable oil canola also works (160ml)
    • 2 large eggs room temperature
    • 1 teaspoon vanilla extract pure extract preferred

    Method
     

    1. Preheat your oven to 350°F. Coat a 9×5-inch loaf pan thoroughly with baking spray.
    2. In a large mixing bowl, whisk together the flour, baking soda, baking powder, salt, cinnamon, and nutmeg for about 30 seconds until evenly distributed.
    3. In a separate medium bowl, combine the pumpkin puree, sugar, vegetable oil, eggs, and vanilla extract. Whisk gently at first, then more vigorously until the mixture becomes smooth, glossy, and well-emulsified.
    4. Create a well in the center of the dry ingredients. Pour the wet mixture into the well.
    5. Using a silicone spatula or wooden spoon, gently fold the ingredients together, starting from the center and working outward. Mix only until no streaks of flour remain. A few small lumps are fine—do not overmix.
    6. Pour the batter into the prepared loaf pan and smooth the top gently with your spatula.
    7. Bake for 60 minutes. After 30 minutes, check if the top is deeply golden and loosely tent with aluminum foil if needed to prevent burning.
    8. Test for doneness by inserting a toothpick into the center—it should come out with just a few moist crumbs. The top should spring back when gently pressed.
    9. Remove from oven and let the bread rest in the pan on a wire cooling rack for exactly 15 minutes.
    10. Run a butter knife around the edges, invert the pan to release the loaf, and turn right-side up. Let cool completely before slicing.

    Notes

    Storage: Wrap tightly in plastic wrap or foil. Keeps at room temperature for 3 days, refrigerated for 5 days, or frozen (sliced) for up to 3 months.
    Variations: Add ½ cup chopped toasted pecans or walnuts, chocolate chips, dried cranberries, or drizzle with cinnamon glaze.
    Muffin Option: Makes 12 muffins. Bake at 350°F for 20-22 minutes.
    Tips: Use pure pumpkin puree (not pie filling), measure flour using spoon-and-level method, bring eggs to room temperature, and don’t rush cooling for clean slices.
  • Gluten Free Ricotta Almond Cake Recipe (Easy!)

    Gluten Free Ricotta Almond Cake Recipe (Easy!)

    I’ll be honest with you.

    I’ve been playing around with almond flour desserts for years now. And this cake? It’s become one of my absolute favorites.

    The texture is completely different from what you’d expect. Moist. Tender. With this perfect hint of lemon that just makes everything pop.

    So here’s how this recipe came to be.

    I had half a container of ricotta sitting in my fridge. Already used some for lasagna. Didn’t want to waste the rest. That’s when I started looking into traditional Italian ricotta cakes and thought… why not make a gluten-free version?

    The result?

    A dessert that looks fancy but is actually pretty simple to make.

    gluten free ricotta almond cake

    Here’s what I love about this cake. You can literally serve it anytime:

    • Breakfast with your morning coffee
    • Brunch with fresh fruit on the side
    • Afternoon treat with tea
    • After-dinner dessert with berries

    The sweetness is subtle. Not overwhelming. Just right for any time of day.

    Now, I know what you’re thinking.

    “Separated eggs? Folded egg whites? That sounds complicated.”

    Trust me, it’s not. I’m going to walk you through every single step. And once you get the hang of it, you’ll realize it’s actually pretty forgiving.

    The ingredient list is super straightforward. Nothing fancy. No hard-to-find items. Everything’s at your regular grocery store.

    One thing though…

    Room temperature ingredients are KEY here. They blend smoother. Create a better texture. Makes a huge difference in the final result.

    Here’s what makes this cake special.

    It’s naturally gluten-free. The almond flour isn’t just a substitute. It’s the actual ingredient that’s supposed to be there. So the texture is exactly what it should be. No compromises.

    The time breakdown?

    Active prep takes about 20 minutes. Then the oven does all the work while your kitchen smells absolutely amazing. The hardest part is waiting for it to cool.

    Prep Time: 20 minutes | Cook Time: 50 minutes | Cooling Time: 60 minutes | Total Time: 2 hours 10 minutes
    Servings: 8 slices | Difficulty: Moderate

    I’ve made this cake more times than I can count. Each time I learned something new. How the egg whites should look. When to stop folding. How to tell when it’s perfectly done.

    All those lessons? Packed into the instructions below.

    Whether you’re avoiding gluten or just want to try something different, this cake delivers. Even my friends who eat regular desserts all the time ask for seconds. The combination of creamy ricotta and fine almond flour just works.

    What You’ll Need

    Let me break down everything for you.

    IngredientQuantityNotes
    Unsalted butter½ cup (1 stick)Room temperature, plus extra for greasing
    Organic cane sugar1 cupWhite granulated sugar works equally well
    Large eggs4Room temperature, will be separated
    Whole milk ricotta1 cup (8 oz.)Store-bought is perfectly fine
    Lemon zest1 tablespoonFrom about 2 fresh lemons
    Fresh lemon juice2 tablespoonsFreshly squeezed preferred
    Vanilla extract2 teaspoonsPure extract recommended
    Almond extract1 teaspoonOptional but adds authentic Italian flavor
    Almond flour2 cups (8.4 oz.)Blanched almond flour, not almond meal
    Sea salt¼ teaspoonFine grain works best
    Sliced almonds⅓ cupFor topping
    Confectioner’s sugar2-3 tablespoonsOptional, for dusting before serving
    gluten free ricotta almond cake

    How to Make This Cake (Step by Step)

    Okay, let’s do this.

    Step 1: Get Everything Ready

    First things first.

    Preheat your oven to 325°F. Cut a circle of parchment paper to fit your 9-inch cake pan. Butter everything—the paper, the sides. This is what keeps your cake from sticking later.

    Step 2: Cream the Butter and Sugar

    Grab a large mixing bowl. Toss in your butter and sugar.

    Now here’s the important part.

    Beat them together with an electric mixer on medium-high speed for about 5 minutes. You want it pale and fluffy. This step adds air, which makes your cake lighter.

    Add the egg yolks one at a time. Beat after each one. The mixture should get smooth and thick.

    Step 3: Mix in the Wet Stuff

    Time to add:

    • Ricotta cheese
    • Lemon zest
    • Lemon juice
    • Vanilla extract
    • Almond extract (if you’re using it)

    Beat everything together until combined.

    Here’s the thing.

    The mixture might look weird. Slightly separated. Maybe a bit grainy. Don’t panic. This is completely normal. It’ll all come together.

    gluten free ricotta almond cake

    Step 4: Add the Dry Ingredients

    Sprinkle your almond flour and salt over the ricotta mixture.

    Grab a spatula. Fold gently. Keep going until you don’t see any dry patches.

    The batter will be thick. Look a bit grainy. That’s exactly what you want.

    Step 5: Whip Those Egg Whites

    This step is crucial.

    Wash your mixer beaters really well. Dry them completely. Even a tiny bit of fat will mess this up.

    Beat the egg whites on medium speed for about 3 minutes. You’re looking for soft peaks. The whites should hold their shape but the tips curl over a bit.

    Step 6: The Folding Technique

    Here’s where people usually get nervous.

    Take about one-third of your whipped whites. Stir them into the almond batter. This lightens everything up.

    Now for the rest…

    Fold gently. Use a sweeping motion from bottom to top. Stop when you don’t see white streaks anymore.

    Don’t overmix.

    Seriously. Overmixing deflates the whites and makes your cake dense.

    Step 7: Into the Pan

    Pour your batter into the prepared pan. Smooth the top a little.

    Scatter those sliced almonds all over. Press them down just slightly. Not too hard. You want them to stick during baking.

    gluten free ricotta almond cake

    Bake for 50 minutes.

    What you’re looking for:

    • Golden brown edges
    • Slightly jiggly center (that’s okay!)

    Put the pan on a cooling rack. Let it sit for a full hour. This cooling time is important. It lets everything set up properly.

    Step 8: Get It Out and Serve

    Run a thin knife around the edge. If you used a springform pan, just release the sides.

    Regular pan? Put a plate on top. Flip. Remove the parchment. Flip again onto your serving plate.

    Dust with confectioner’s sugar right before serving. Makes it look fancy.

    Want to Switch Things Up?

    Here are some options that work great.

    Sugar Swaps

    Regular white sugar? Works perfectly. Use the same amount.

    Want to make it keto-friendly? Use Swerve or another low-carb sweetener. Same 1:1 ratio.

    Ricotta Quality Matters

    Get whole milk ricotta if you can. The richness is worth it.

    If there’s an Italian market near you, grab fresh ricotta there. The difference is noticeable.

    About That Almond Extract

    It adds authentic Italian flavor. But if you’re not a fan, skip it. The cake will still taste amazing.

    Try Different Citrus

    Swap out the lemon for orange. Same amounts. Different vibe. Sweeter and mellower.

    Ways to Enjoy This Cake

    Let me give you some ideas.

    For Breakfast

    Cut a thick slice. Pour some coffee. Start your day right.

    The sweetness is moderate. Won’t make you feel like you’re eating dessert for breakfast (even though technically you are).

    At Brunch

    Cut it into smaller squares. Makes it easier for guests to grab while they’re mingling.

    It always looks impressive on the table.

    Afternoon Pick-Me-Up

    Just a simple wedge with tea or coffee. The lemon flavor is refreshing. Not heavy at all.

    As a Proper Dessert

    This is where you can get creative:

    • Add fresh berries (the tartness is perfect)
    • Dollop of whipped cream (keeps it light)
    • Berry compote (makes it look restaurant-quality)
    gluten free ricotta almond cake

    Fun Variations I’ve Tried

    Raspberry Version

    Fold in ½ to 1 cup of fresh raspberries right before you pour the batter into the pan.

    Gives you these little bursts of tartness throughout. So good.

    Make It Into Bars

    Use a 9×9-inch square baking dish instead. Cut into bars.

    Perfect for casual gatherings where you want easy grab-and-go portions.

    Orange Instead of Lemon

    Replace everything lemon with orange. Zest and juice.

    You get a sweeter, mellower flavor. Some people prefer it this way.

    How to Store Leftovers

    Here’s what you need to know.

    Keep It Cold

    Ricotta is dairy. So the cake goes in the fridge. Use an airtight container.

    It’ll stay fresh for up to 4 days.

    Bonus tip:

    The texture actually gets better on day two. The flavors meld together more.

    Don’t Freeze It

    I know it’s tempting. But don’t.

    The ricotta’s texture changes when frozen and thawed. Not in a good way. The consistency gets weird.

    Serve at Room Temperature

    Yes, you store it in the fridge. But it tastes best at room temperature.

    Take it out about 30 minutes before serving. Makes a big difference.

    Questions People Always Ask Me

    Can I make this dairy-free?

    Short answer? Not really.

    Ricotta is what makes this cake special. The texture. The moisture. The flavor.

    Dairy-free ricotta exists. But I haven’t tested it here. The results would probably be pretty different.

    My egg whites deflated. What happened?

    You overmixed.

    When you fold in the egg whites, be gentle. Use a lifting motion. Not stirring.

    Stop as soon as you don’t see white streaks. A few small bits of egg white are fine. They’ll bake in.

    The mixture looks curdled. Did I mess up?

    Nope! You’re good.

    After you add the ricotta, things might look separated. Maybe grainy. This is totally normal.

    Once you fold in the almond flour, it all smooths out. The final cake will be perfectly creamy.

    Can I use almond meal instead?

    You can, but it’ll be different.

    Almond meal has the skins in it. Coarser texture. Your cake will be darker and a bit denser.

    Blanched almond flour gives you the best, most delicate results.

    How do I know when it’s done baking?

    Look for these signs:

    • Golden-brown edges
    • Lightly golden top
    • Center might still jiggle a tiny bit (that’s okay!)

    Stick a toothpick in the center. It should come out with just a few moist crumbs.

    Don’t overbake.

    That’s how you end up with a dry cake.

    Why do ingredients need to be room temperature?

    Cold stuff doesn’t blend well.

    Cold eggs won’t whip properly. Cold butter won’t cream with sugar the way it should.

    Set everything out about 30 minutes before you start. Makes the whole process easier.

    Final Thoughts

    This cake brings together Italian tradition with modern gluten-free baking.

    The technique might feel new at first. That’s okay. Each time you make it, you’ll feel more confident.

    Before you know it, you’ll be making this from memory. Adjusting things to your taste.

    The beauty of this recipe?

    It’s simple. Quality ingredients. Careful technique. A little patience.

    No fancy equipment. No complicated steps.

    Just straightforward baking that gives you impressive results every single time.

    Give it a try. I think you’re going to love it.

    Gluten Free Ricotta Almond Cake

    Gluten Free Ricotta Almond Cake

    A moist, tender Italian-inspired cake featuring creamy ricotta and almond flour with a perfect hint of lemon. Naturally gluten-free with a delicate texture that’s perfect for breakfast, brunch, or dessert.
    Prep Time 20 minutes
    Cook Time 50 minutes
    Cooling Time 1 hour
    Total Time 2 hours 10 minutes
    Servings: 8 slices
    Course: Dessert
    Cuisine: Italian
    Calories: 385

    Ingredients
      

    • 1/2 cup unsalted butter room temperature, plus extra for greasing
    • 1 cup organic cane sugar white granulated sugar works equally well
    • 4 large eggs room temperature, will be separated
    • 1 cup whole milk ricotta 8 oz., store-bought is perfectly fine
    • 1 tablespoon lemon zest from about 2 fresh lemons
    • 2 tablespoons fresh lemon juice freshly squeezed preferred
    • 2 teaspoons vanilla extract pure extract recommended
    • 1 teaspoon almond extract optional but adds authentic Italian flavor
    • 2 cups almond flour blanched almond flour, not almond meal (8.4 oz.)
    • 1/4 teaspoon sea salt fine grain works best
    • 1/3 cup sliced almonds for topping
    • 2-3 tablespoons confectioner’s sugar optional, for dusting before serving

    Method
     

    1. Preheat your oven to 325°F. Cut a circle of parchment paper to fit your 9-inch cake pan. Butter the parchment paper and the sides of the pan.
    2. In a large mixing bowl, beat the butter and sugar together with an electric mixer on medium-high speed for about 5 minutes until pale and fluffy. Add the egg yolks one at a time, beating after each addition until smooth and thick.
    3. Add the ricotta cheese, lemon zest, lemon juice, vanilla extract, and almond extract (if using). Beat everything together until combined. The mixture may look slightly separated or grainy – this is normal.
    4. Sprinkle the almond flour and salt over the ricotta mixture. Fold gently with a spatula until no dry patches remain. The batter will be thick and slightly grainy.
    5. In a clean, dry bowl with clean beaters, beat the egg whites on medium speed for about 3 minutes until soft peaks form. The whites should hold their shape but the tips should curl over slightly.
    6. Stir about one-third of the whipped egg whites into the almond batter to lighten it. Then gently fold in the remaining egg whites using a sweeping motion from bottom to top. Stop when no white streaks remain. Do not overmix.
    7. Pour the batter into the prepared pan and smooth the top. Scatter the sliced almonds over the surface and press down slightly.
    8. Bake for 50 minutes until the edges are golden brown and the center is slightly jiggly. A toothpick inserted in the center should come out with just a few moist crumbs.
    9. Place the pan on a cooling rack and let cool for a full hour to allow everything to set properly.
    10. Run a thin knife around the edge. If using a springform pan, release the sides. For a regular pan, place a plate on top, flip, remove parchment, and flip again onto serving plate. Dust with confectioner’s sugar before serving.

    Notes

    Storage: Store in an airtight container in the refrigerator for up to 4 days. The texture actually improves on day two. Serve at room temperature – take out 30 minutes before serving.
    Variations: For a raspberry version, fold in 1/2 to 1 cup fresh raspberries before pouring into pan. For orange flavor, replace lemon zest and juice with orange. For bars, use a 9×9-inch square pan.
    Important Tips: Room temperature ingredients are key for proper blending. Don’t overmix the egg whites when folding – stop as soon as white streaks disappear. Use blanched almond flour, not almond meal, for the best delicate texture.