
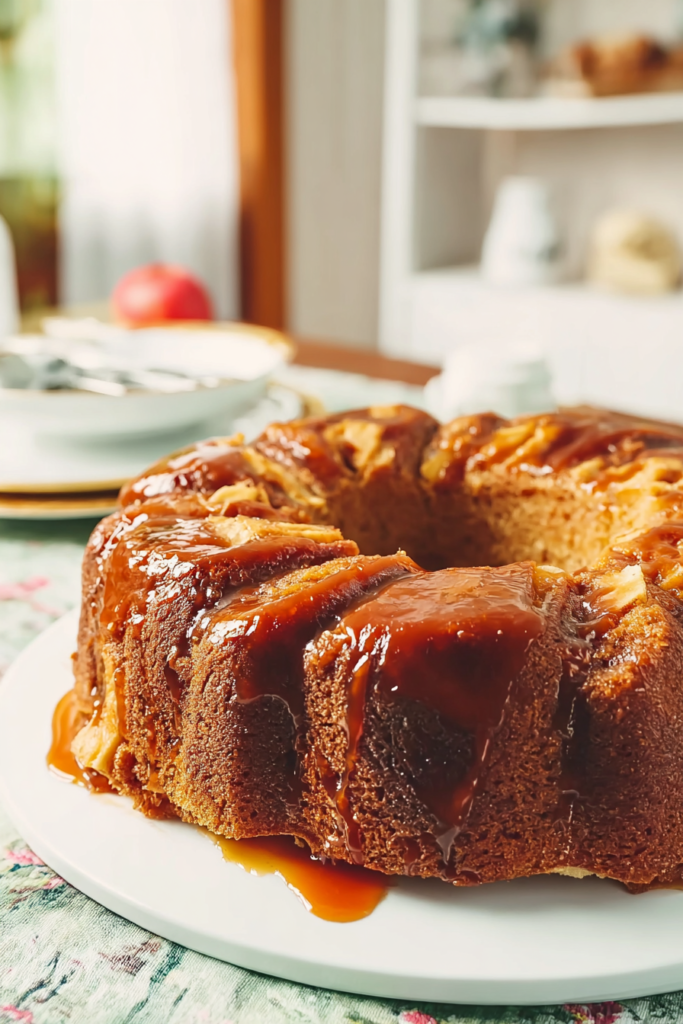
It’s a cool fall afternoon. Your oven is on. And the smell of apples and cinnamon fills every corner of your house.
That’s exactly what happens when I make this apple cake with caramel glaze. And honestly? It’s become the dessert I turn to when I want my home to feel warm and cozy.
Here’s what makes it different from other apple cakes out there.
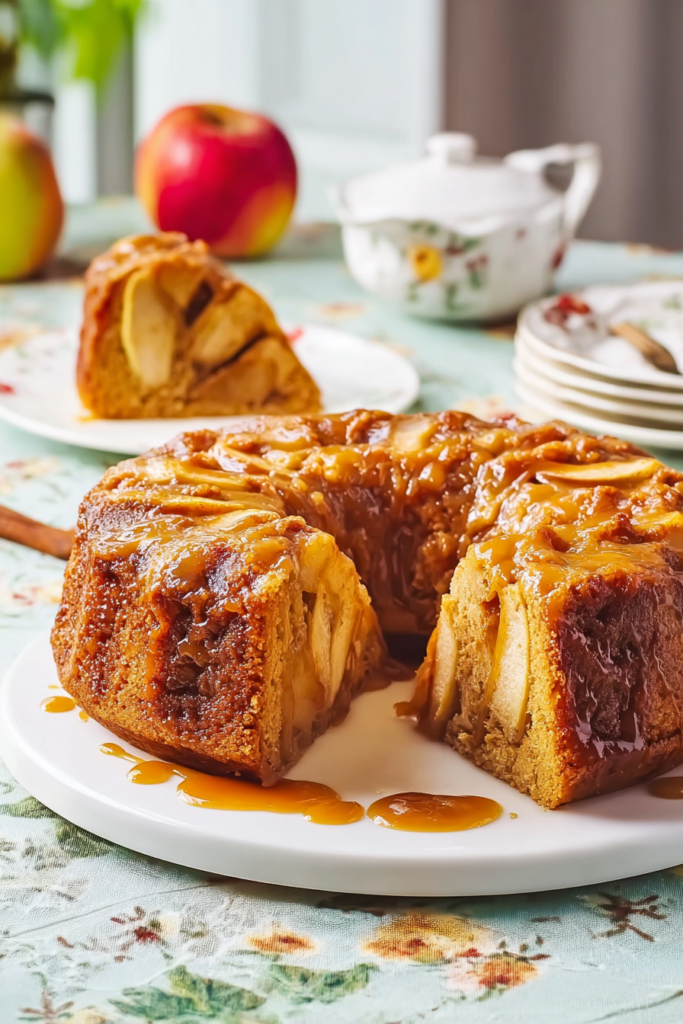
Most recipes give you a regular cake with a few sad apple pieces here and there. Not this one. This cake is absolutely loaded with apples. I’m talking three whole pounds of them.
The texture? Almost like a pudding. Super moist. The apples practically melt in your mouth.
How I Found This Recipe
I stumbled on this recipe a few years back.
Was hunting for the perfect fall dessert. You know, something that screams autumn but doesn’t require a culinary degree to pull off.
When I first read it, I literally did a double-take. Three pounds of apples? For one cake? Had to be a typo, right?
Wrong.
I made it anyway. And the moment I took my first bite, everything clicked. The “cake” part is really just there to hold all those gorgeous apple chunks together. It’s more like an apple dessert that happens to have cake batter in it.
Mind. Blown.
Why This Recipe Works Every Time
The best part?
You don’t need fancy equipment. No stand mixer required (though you can use one if you want). Just a big bowl, some measuring cups, and a 9×13-inch pan.
The most time you’ll spend is peeling and chopping apples. But even that’s kind of therapeutic. Put on some music, pour yourself a cup of coffee, and get to work.
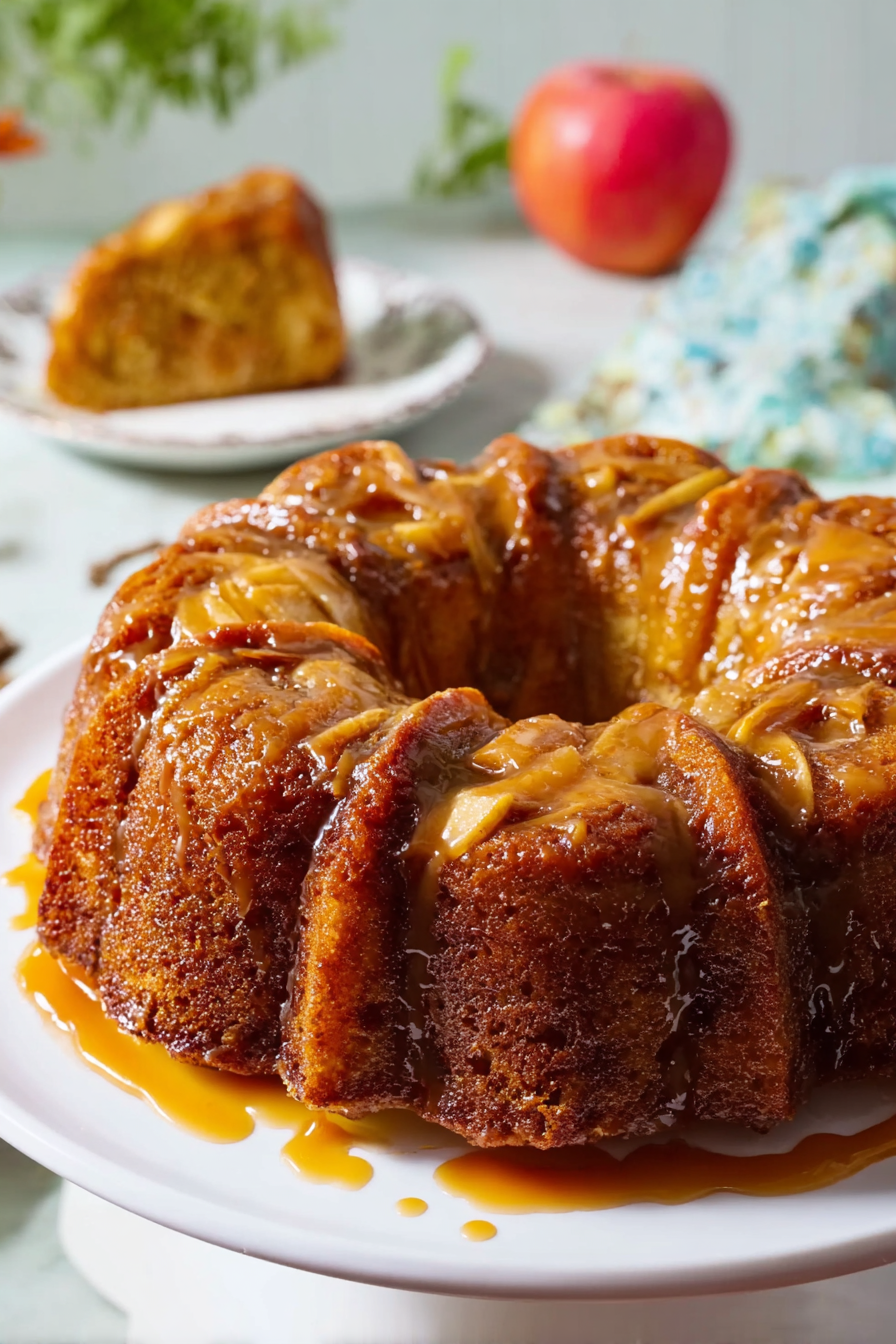
Now let’s talk about the caramel glaze.
This isn’t some wimpy drizzle. This is a rich, buttery, brown-sugar-and-cream situation that soaks into every single crevice of the cake. It keeps the cake moist for days. (If it lasts that long in your house, which… good luck with that.)
I’ve brought this cake to:
- Family dinners
- Holiday parties
- Potlucks
- Random Tuesday nights when I needed comfort food
Every single time, people ask for the recipe. And every single time, they’re shocked when I tell them how easy it is.
The combo of tart Granny Smith apples, warm spices, crunchy pecans, and that sweet caramel?
Chef’s kiss.
My Favorite Thing About This Cake
It’s basically foolproof.
Even if you overbake it a little (been there), all those apples keep it from drying out. Actually, here’s a little secret: it tastes even better the next day. The flavors get cozy with each other overnight.
So I usually bake it the night before I need it. Then I warm it up just a bit and pour the glaze on right before serving. Makes me look like I have my life together, which is always a win.
Whether you bake all the time or you’re just starting out, this cake is going to become your new favorite. It’s got everything you want in a fall dessert: warm flavors, amazing smells, and that “wow, you made this?” factor.
Let me show you how to make it.
What You’ll Need (And How to Make It)
The Ingredient Breakdown
| Ingredient | Quantity | Why It Matters |
|---|---|---|
| Light brown sugar | 1 cup, packed | Keeps the cake moist, adds that caramel-y depth |
| Granulated sugar | 1 cup | Sweetness and structure |
| Vegetable oil | 1½ cups | This is your moisture MVP |
| Large eggs | 3 | Room temp is better if you remember |
| All-purpose flour | 3 cups | Spoon it in, don’t pack it |
| Baking soda | 1 teaspoon | Makes it rise just right |
| Ground cinnamon | 2 teaspoons | Fresh stuff is worth it |
| Ground nutmeg | ½ teaspoon | Grate it fresh if you can |
| Salt | ½ teaspoon | Balances out all that sweetness |
| Vanilla extract | 2¼ teaspoons | Go for the real stuff, not imitation |
| Granny Smith apples | 3 pounds | That’s about 6-7 medium apples |
| Pecans | 1¼ cups | Chopped, but not too fine |
| For the Glaze: | ||
| Unsalted butter | 4 tablespoons | Half a stick |
| Granulated sugar | ¼ cup | Building that caramel |
| Light brown sugar | ¼ cup | More caramel flavor |
| Heavy cream | ½ cup | Makes it silky smooth |
| Salt | 1 pinch | Trust me on this |

Let’s Get Baking
First Things First
Crank your oven to 325°F.
Yeah, I know that seems low. But trust the process. This lower temp means the edges won’t burn while the center is still baking.
Butter your 9×13-inch pan. Get in those corners. I also hit it with a light dusting of flour. Better safe than sorry when it comes to stuck cake.
Making the Batter
Grab your biggest bowl.
Dump in both sugars and the oil. Beat it with your mixer for about two minutes. It’ll get lighter and fluffier as you go.
Now add your eggs. One at a time. Beat well after each one. This is where you’re building the structure of your cake, so don’t rush it.
In another bowl, whisk your flour, baking soda, cinnamon, nutmeg, and salt together. This makes sure all your spices and leavening get distributed evenly.
Here’s the thing about adding the flour.
Do it in three batches. Mix on low. Stop as soon as you don’t see dry flour anymore. Overmixing = tough cake. And nobody wants that.
Stir in the vanilla.
Now comes the fun part.
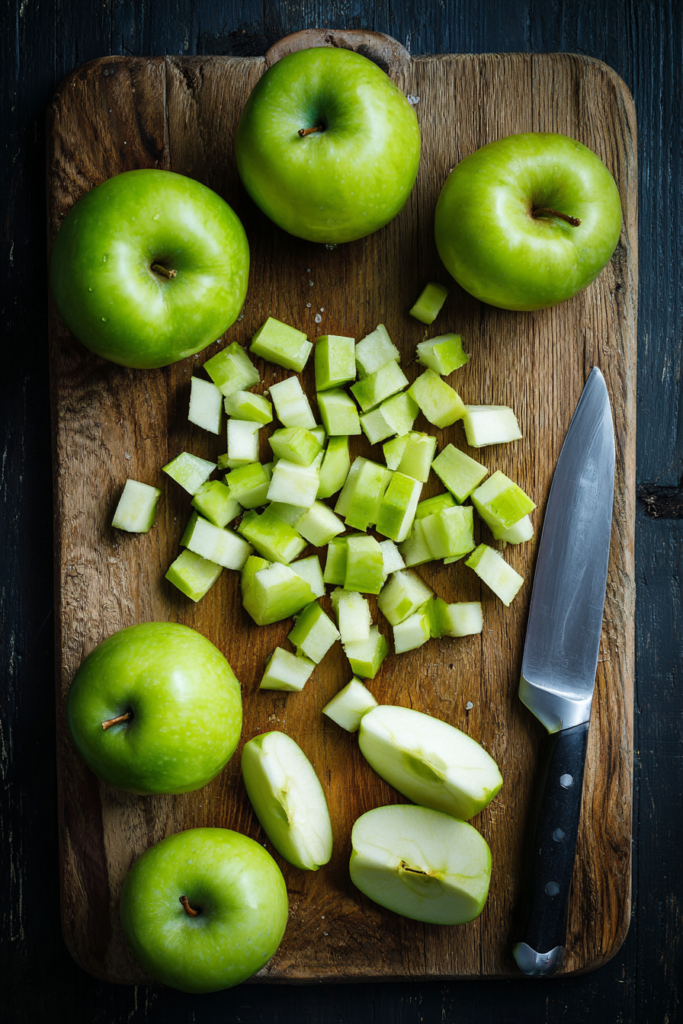
The Apple Situation
Time to peel, core, and chop those apples.
Cut them into half-inch pieces. Not bigger (they won’t cook through). Not smaller (they’ll turn to mush). Half-inch is the sweet spot.
Three pounds sounds like a lot. Because it is a lot. You’ll have a mountain of apples on your cutting board. It’s totally normal.
Dump all the apples and pecans into your batter.
Now here’s where you might panic a little.
The batter is THICK. Like, really thick. You’ll think there’s no way there’s enough batter to hold all these apples together.
But there is.
Just keep folding. Use a good sturdy spoon or spatula. Be patient. Eventually everything will come together and every apple piece will have some batter clinging to it.
Into the Oven
Scrape everything into your pan. Spread it out as best you can. The pan’s going to be pretty full.
Pop it in the oven. Set a timer for 60 minutes.
At that point, stick a toothpick in the center. If it comes out clean (or with just a couple moist crumbs), you’re done. If not, give it another 10-15 minutes.
Total bake time is usually 60-75 minutes.
Pull it out. Let it hang out in the pan while you make the glaze. The cake needs to still be warm for what comes next.
Making That Gorgeous Glaze
Get a medium saucepan going on medium-low heat.
Melt your butter. Add both sugars and that pinch of salt. Stir it around until everything’s combined. It’ll look grainy and weird at first. That’s fine.
Let it cook for about two minutes. Keep stirring now and then.
Pour in the cream. Turn the heat up just a touch. Bring it to a gentle boil, stirring the whole time.
Once it’s boiling, let it go for exactly two minutes. Keep stirring. You’ll see it thicken up and turn this beautiful golden color.
Off the heat immediately.
The Grand Finale
Grab a wooden skewer or toothpick. Poke holes ALL over the top of your warm cake. This gives the glaze somewhere to sink into.
Pour that warm glaze right over the top. Don’t hold back. Let it pool in the holes. Let it run down the sides.
Give it at least 30 minutes to cool before you cut into it.
You can serve it warm. Or at room temp. Both are amazing. I like to add a scoop of vanilla ice cream on the side, but that’s just me.
My Best Tips (Plus Answers to Your Questions)
Things I’ve Learned Making This Cake
The apple variety matters.
Granny Smiths are my go-to. They’re tart, which balances out all the sugar. Plus they hold their shape during the long bake time.
That said, I’ve used Pink Lady apples before. Even Honeycrisp. They make the cake sweeter, which some people love. Just depends on your taste.
Don’t freak out about the thick batter.
I know I already mentioned this, but it bears repeating. When you add those apples, the batter is going to seem impossibly thick. You might be tempted to add more oil or some milk.
Don’t.
That thickness is what makes this cake work. Just keep folding. It’ll come together.
Timing is everything with the glaze.
Both the cake and the glaze need to be warm when you put them together. That’s when the magic happens. The glaze soaks in instead of just sitting on top.
If your glaze cools down too much and gets thick? Just warm it back up gently before pouring.
This cake gets better with age.
Not kidding. Day two is better than day one. The flavors meld together. The moisture distributes evenly. It’s like the cake needs a night to think about what it wants to be.
Keep it covered on your counter for up to three days. Or stick it in the fridge for up to a week.
Your Questions Answered
Can I use a different pan?
Sure can.
A tube pan works great. So does a bundt pan. The baking time stays about the same, but start checking at the 60-minute mark. Look for the cake pulling away slightly from the edges.
What if I don’t have heavy cream?
Whole milk will work in a pinch. The glaze just won’t be quite as rich and thick. Half-and-half is the perfect middle ground if you’ve got it.
Can I make this ahead?
Absolutely.
Bake the cake up to two days before you need it. Keep it covered at room temp. Then make the glaze fresh and pour it on right before serving.
This actually makes your life way easier if you’re entertaining.
Help! My apples always sink to the bottom.
Here’s a trick: toss your diced apples with a tablespoon of flour before adding them to the batter.
But honestly? The super thick batter usually keeps them suspended just fine on its own.
What about other nuts?
Walnuts work great. They’ve got a slightly earthier flavor than pecans.
Or skip the nuts completely if allergies are an issue. The cake is still delicious without them, just missing that nice crunch.
Look, this apple cake with caramel glaze is comfort food at its absolute best.
It’s the kind of dessert that makes your house smell amazing. That makes people smile when they take a bite. That disappears faster than you think it will.
Try it this weekend. I’m betting it becomes your new fall tradition.
Apple Cake with Caramel Glaze
Ingredients
Method
- Preheat your oven to 325°F (165°C).
- Butter a 9×13-inch baking pan and lightly dust with flour, making sure to get into the corners.
- In a large bowl, beat together both sugars and vegetable oil for about 2 minutes until lighter and fluffier.
- Add eggs one at a time, beating well after each addition.
- In a separate bowl, whisk together flour, baking soda, cinnamon, nutmeg, and salt.
- Add the flour mixture to the wet ingredients in three batches, mixing on low speed just until no dry flour is visible. Do not overmix.
- Stir in the vanilla extract.
- Fold in the chopped apples and pecans. The batter will be very thick – this is normal. Keep folding until every apple piece is coated with batter.
- Scrape the batter into the prepared pan and spread evenly.
- Bake for 60-75 minutes, or until a toothpick inserted in the center comes out clean or with just a few moist crumbs.
- Remove from oven and let the cake rest in the pan while you make the glaze. The cake should still be warm.
- In a medium saucepan over medium-low heat, melt the butter.
- Add both sugars and salt, stirring until combined. Cook for about 2 minutes, stirring occasionally.
- Pour in the heavy cream and increase heat slightly. Bring to a gentle boil, stirring constantly.
- Once boiling, continue cooking for exactly 2 minutes while stirring. The glaze will thicken and turn golden. Remove from heat immediately.
- Using a wooden skewer or toothpick, poke holes all over the top of the warm cake.
- Pour the warm caramel glaze over the cake, letting it soak into the holes and run down the sides.
- Let the cake cool for at least 30 minutes before cutting. Serve warm or at room temperature. Optional: serve with vanilla ice cream.
Leave a Reply